
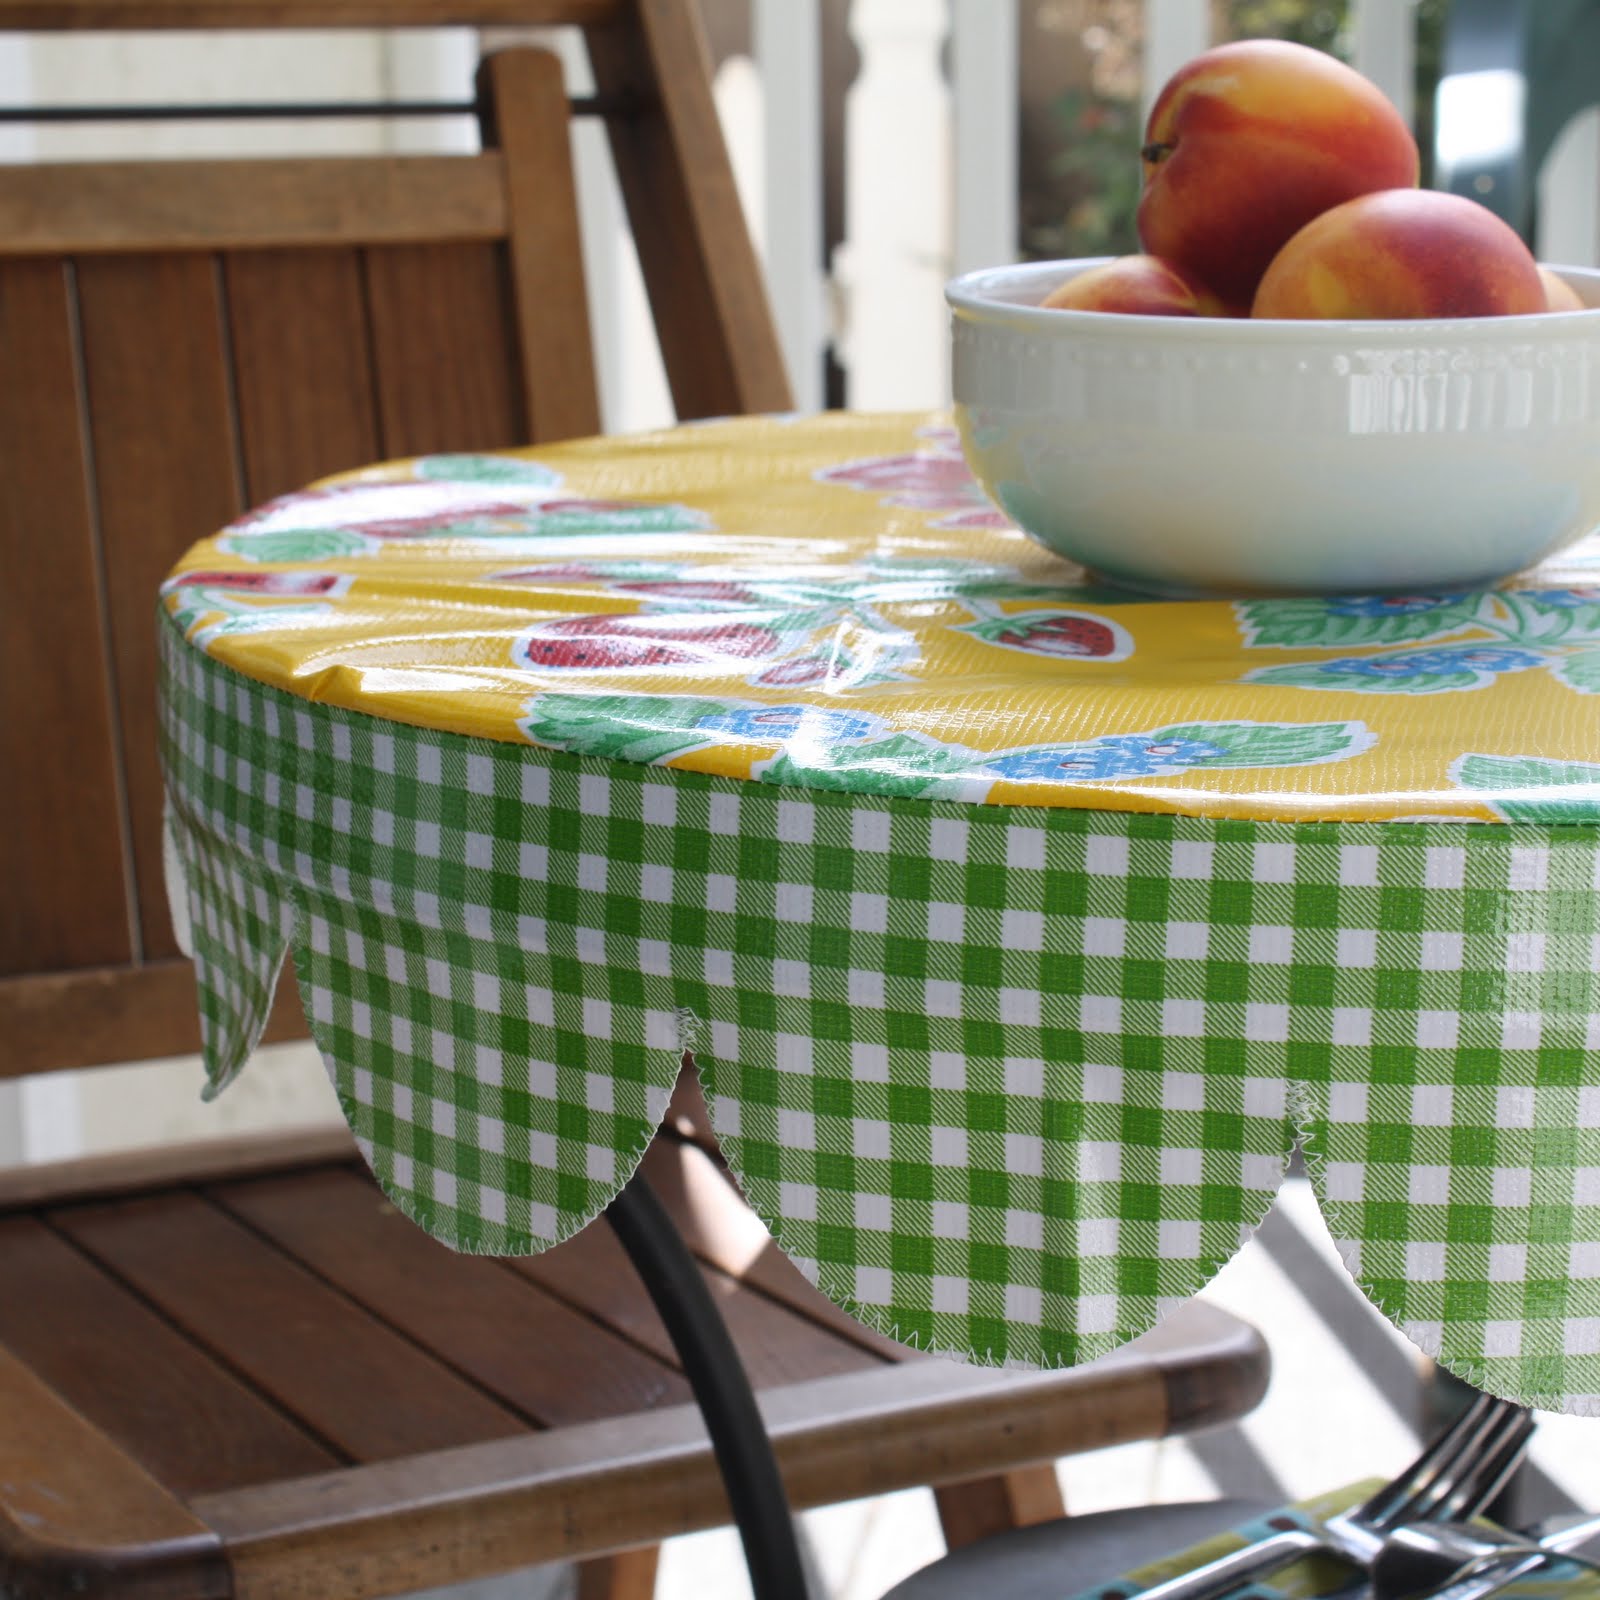
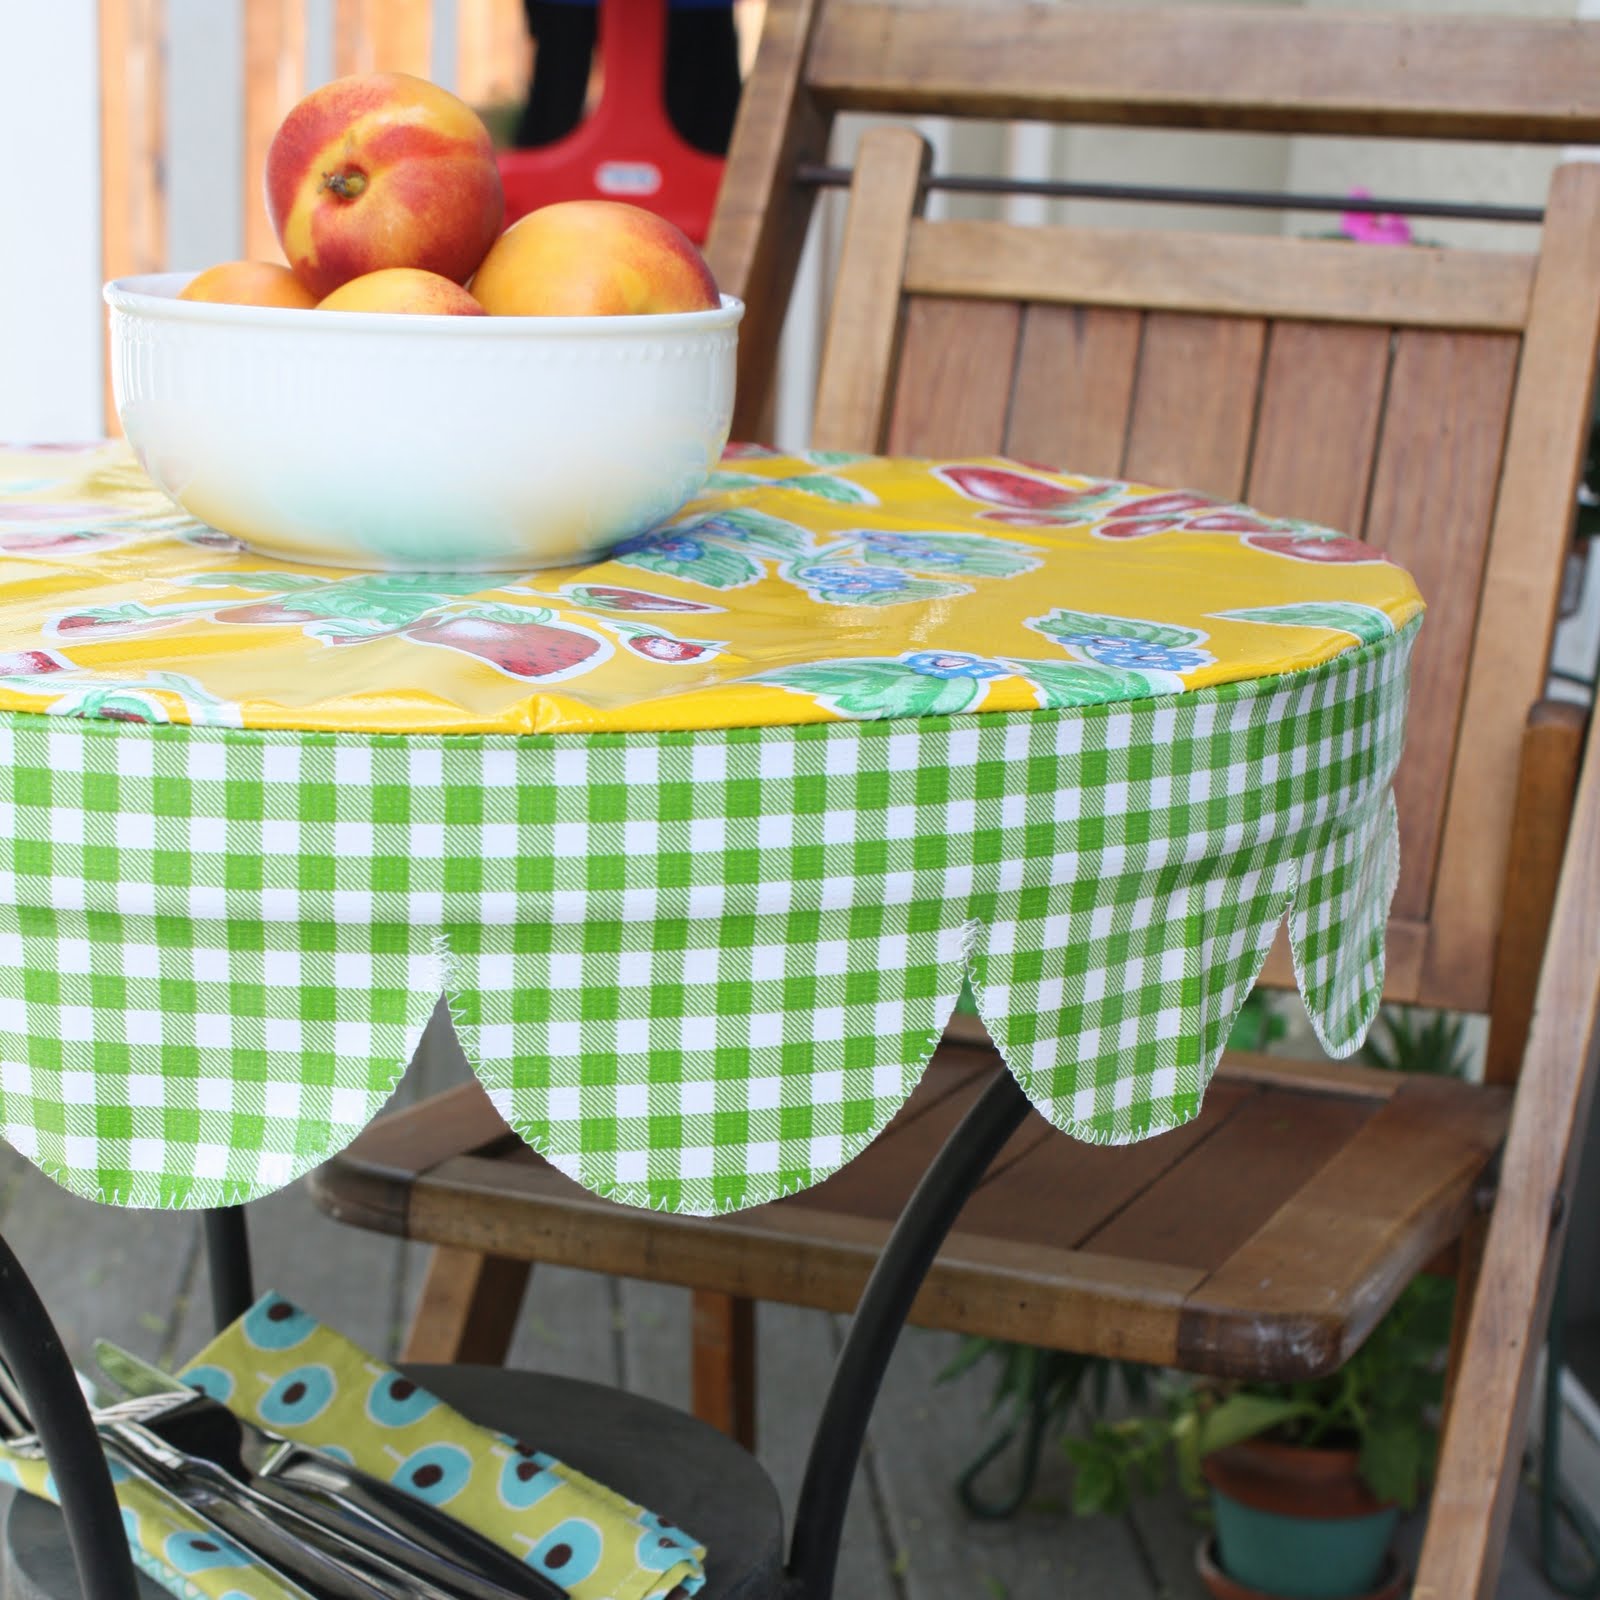
Al fresco dining is on my mind these days. Here in Northern California, the weather is phenomenal almost all the time, but the draw to go outside to eat is particularly strong now, with evenings warm and light enough to be out at dinnertime. And it’s strange for me, coming from upstate NY, but there are almost no insects here! So, as a bonus, eating outside is not a battle with mosquitoes and deer flies! Wahoo! To brighten up our dining space, I love the look of Mexican oilcloth–it’s colorful with some cute designs, but it’s also water-proof and fairly inexpensive. I’ve seen lovely tutorials for square or rectangular tables, but we have round ones, so I’ve put together some instructions for making a custom, fitted tablecloth (with a cutie scalloped border) for your round table.
Materials:
Mexican oilcloth (amount will vary, depending on the size of your table)
Ruler (I like this one)
Kitchen twine
Pencil
Calculator
Scissors, rotary cutter, self-healing mat
Standard sewing stuff–machine, straight pins, thread, etc.
Measure your table:
Take the diameter measurement of your table (make sure you are taking it at the very widest point). Add 1/2″ to this measurement to account for the 1/4″ seam allowance for both sides. Note: if your table diameter + seam allowance is greater than the width of your fabric, you will have to make two half-circles and sew them together (don’t forget the seam allowance!).
If your table has an apron (or edge) that you want to cover, measure the minimum needed to cover it. We will be adding more to that measurement to take into account the length of the scallops, but we’ll do that later.
Cutting fabric:
Fold your fabric in half, then fold again (to make it into quarters) ensuring the edges match up perfectly.
 . . |
|
| Folded in half (fold at the bottom) |
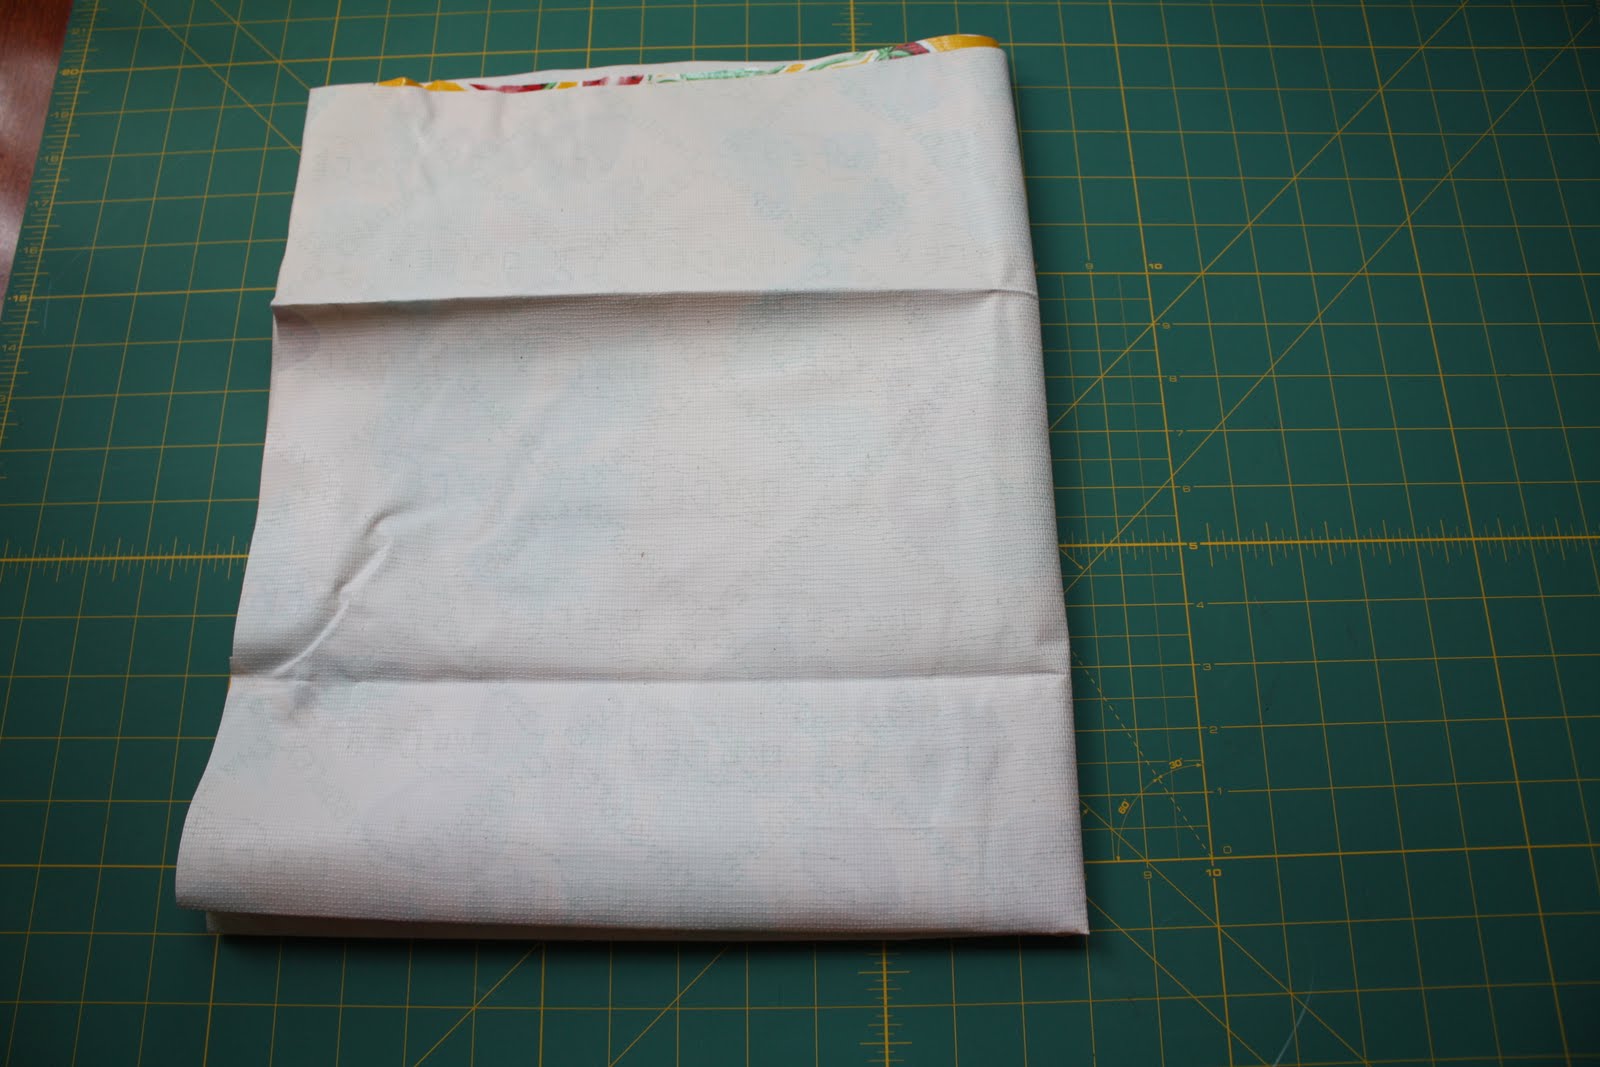 |
|
| Folded in half again (fold at right side) |
Using your diameter (+ seam allowance measurement), divide by 2. That’s the radius (remember high school geometry? It’s back!) Take your twine, and make a little loop in it, measure out the length to be equal to that of the radius and put your pencil point in the loop. Holding the other end securely at the corner of your folds, trace a quarter of a circle on the oilcloth. Double-check that you hit your radius length on both sides of the fabric. Maybe check it again 🙂
 |
|
| Trace the arc of your circle using the string and pencil |
Cut along the line through all thicknesses of fabric, being careful to keep the folds together and edges lined up. It’s a bit thick to pin, but it if you can, it will make it easier.
 |
| There it is, a perfect circle! |
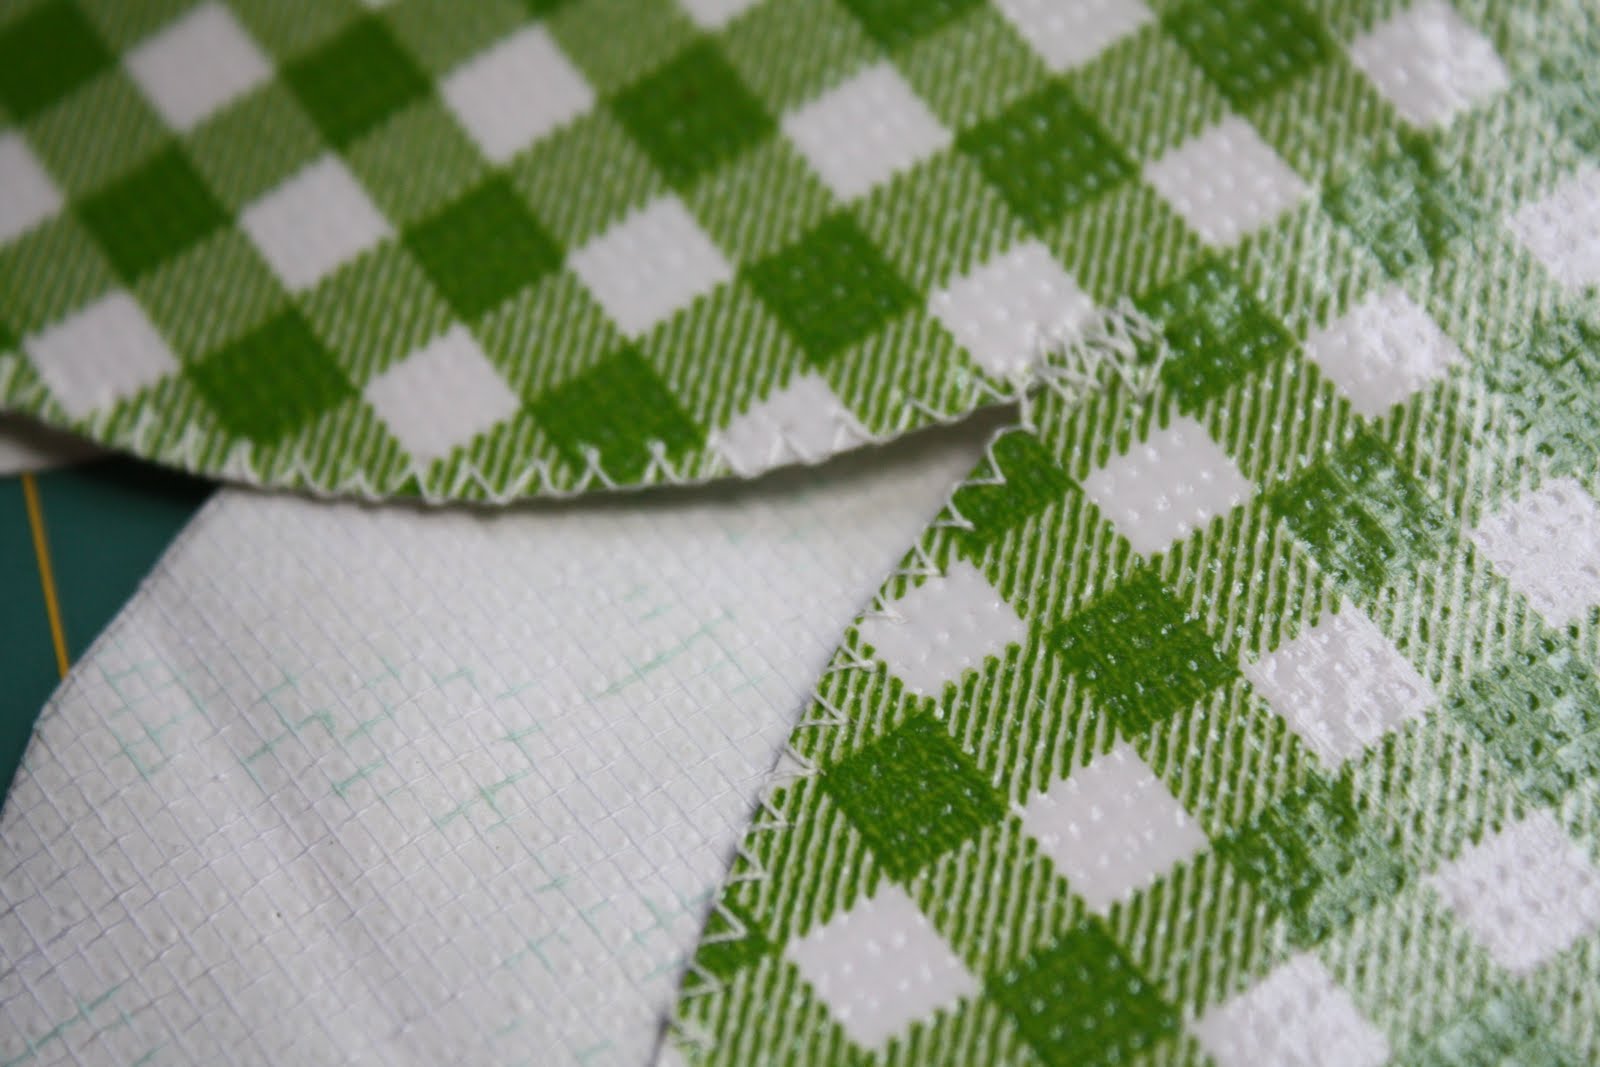
Next, you need to calculate the length of the strip to go around your circle. Length around a circle (circumference) is equal to circle diameter x pi (3.14). Use the real diameter, not including the seam allowance. If you are skeptical of the value you get with the calculation (I was!) use your tape measure to prove it to yourself. Next determine how much to add in seam allowance. Chances are, you won’t be able to get the full length of your strip from one length of fabric. For this table, I used two shorter strips to make the full length. Therefore, it will take 2 seams to make the circle. For EACH seam you need, add 1/2″ seam allowance to the circumference measurement.
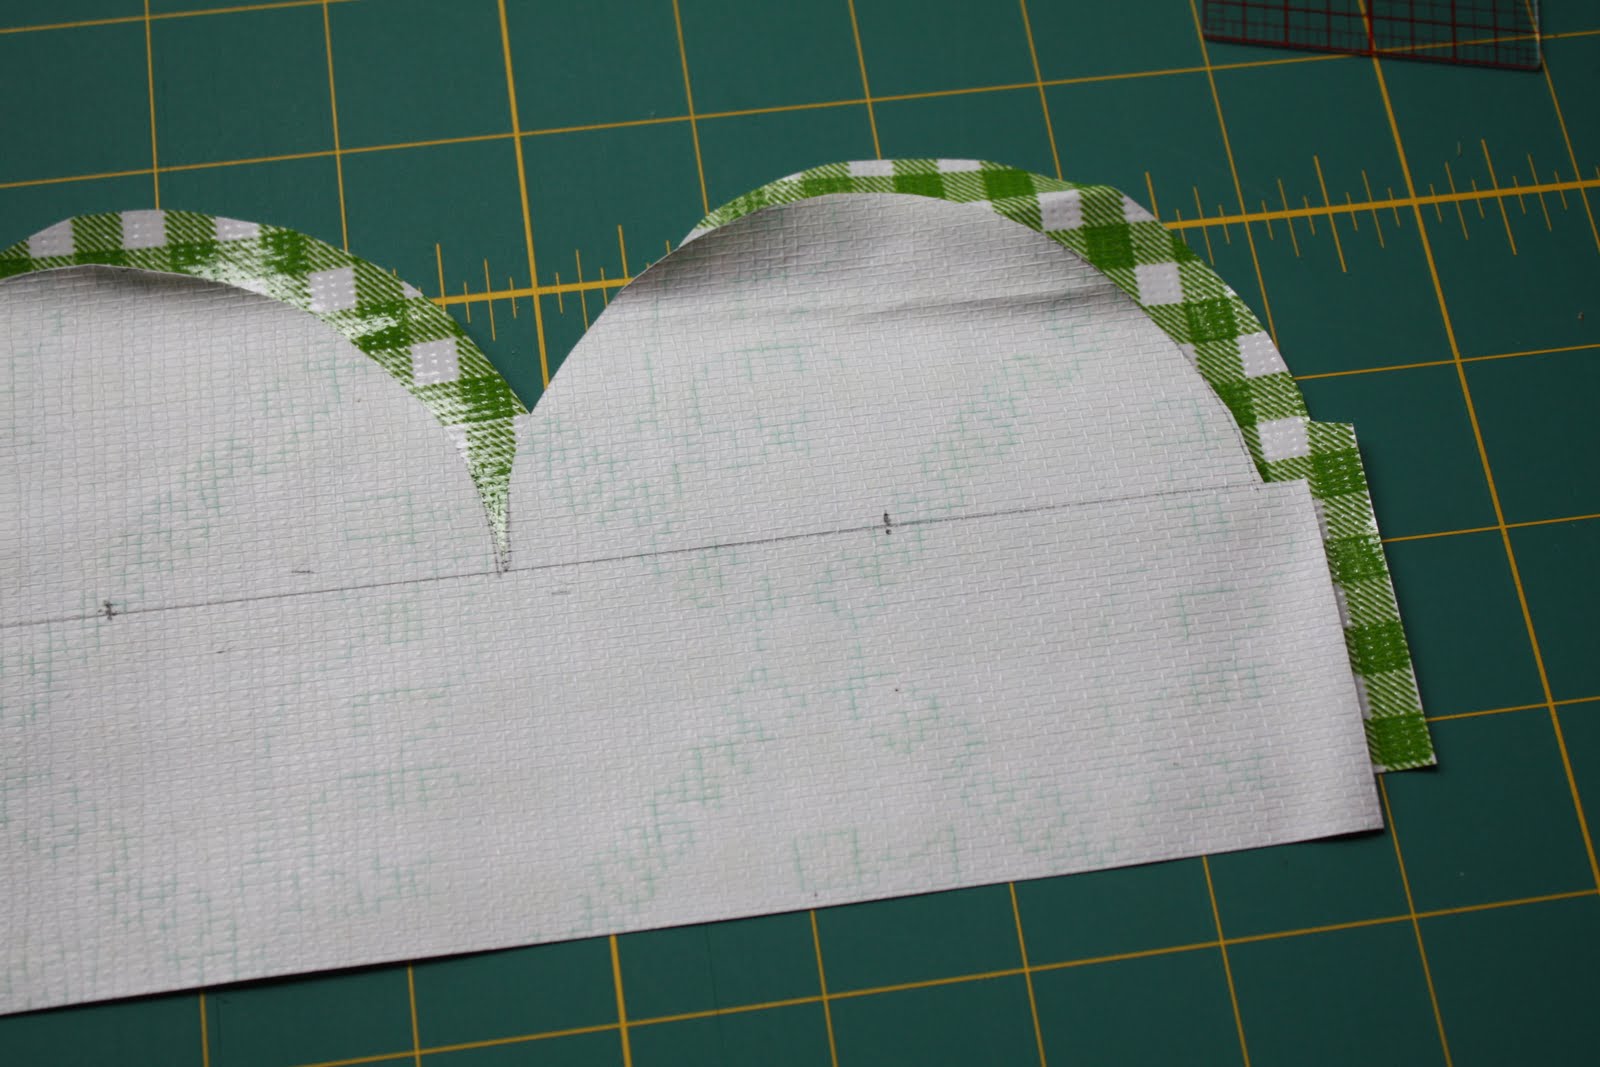
Scallops, next. Mine were 4″ wide. Incredibly, this measurement created equally spaced scallops around my table, but if yours does not, divide the circumference (do not include seam allowance) by the desired width of scallops. Evenly spaced is great, but keeping a whole number makes life easier down the road.
With length taken care of, you next need the width (drop) of the strip. You measured the minimum length for the drop of the tablecloth, but you will be making cute scallops. I made scallops that are 2 inches long (4 inches wide), so add 2″ to the width measurement. Then, add 1/4″ for seam allowance. My strips were 4″ in width (1.75″ minimum cloth drop + 2″ for scallops + 1/4″ seam allowance).
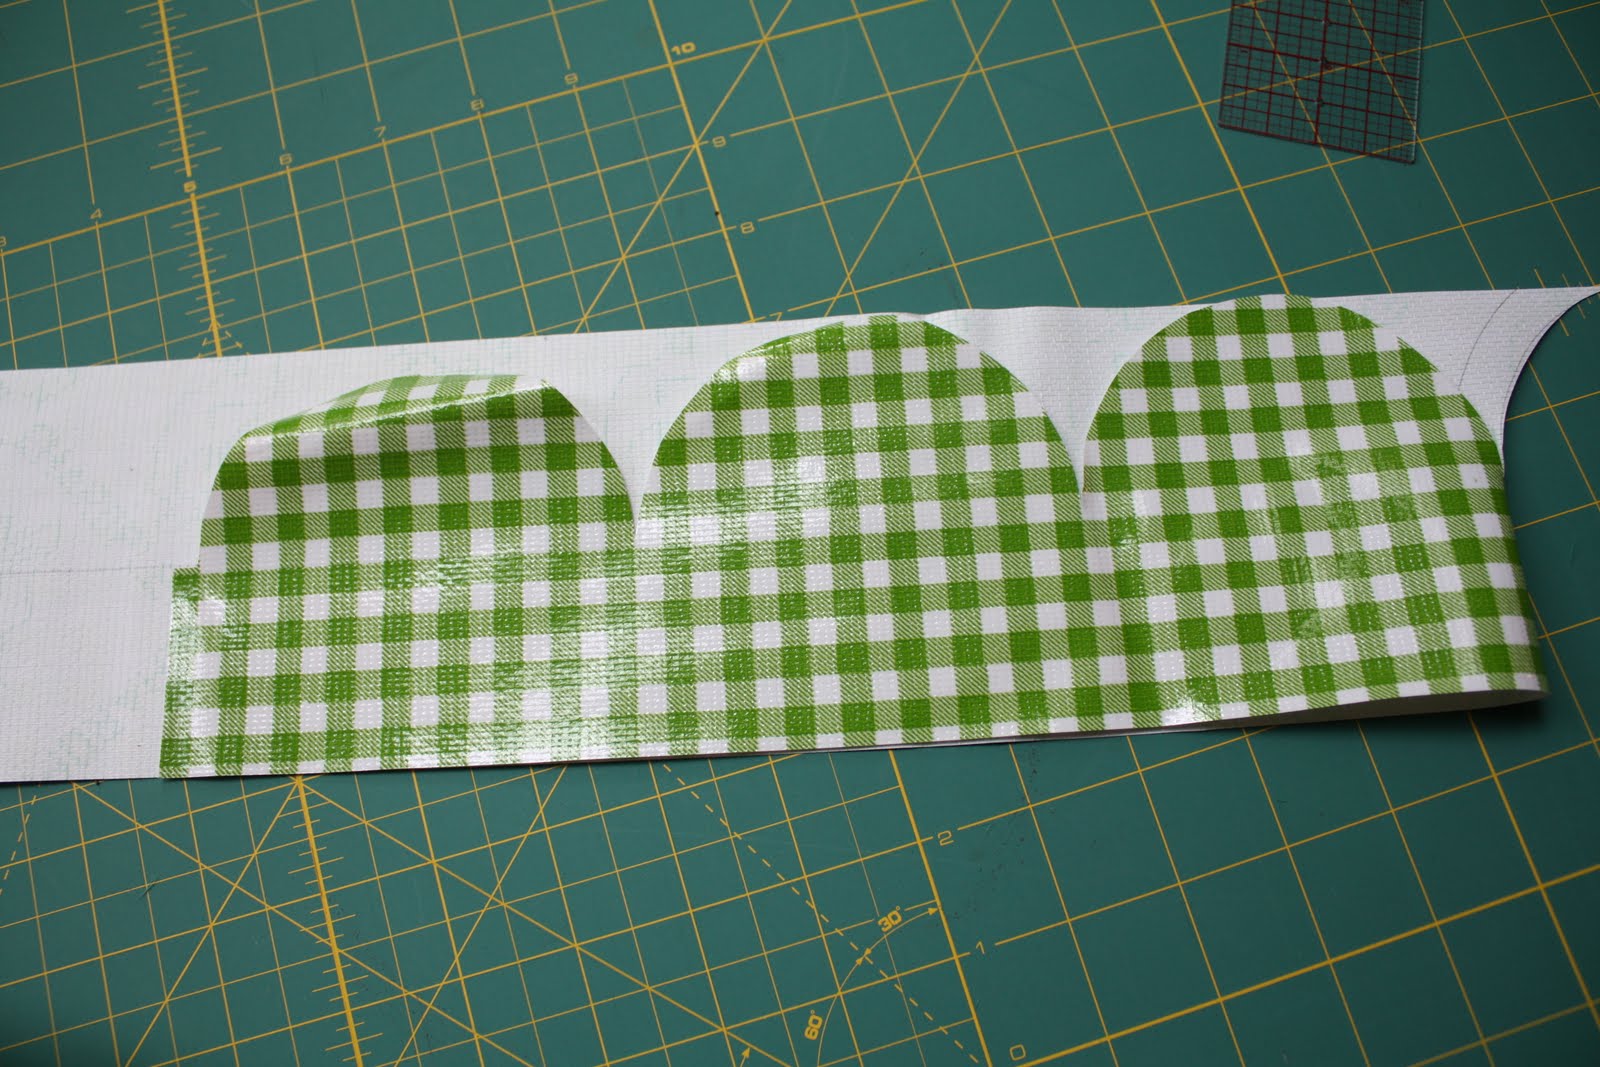
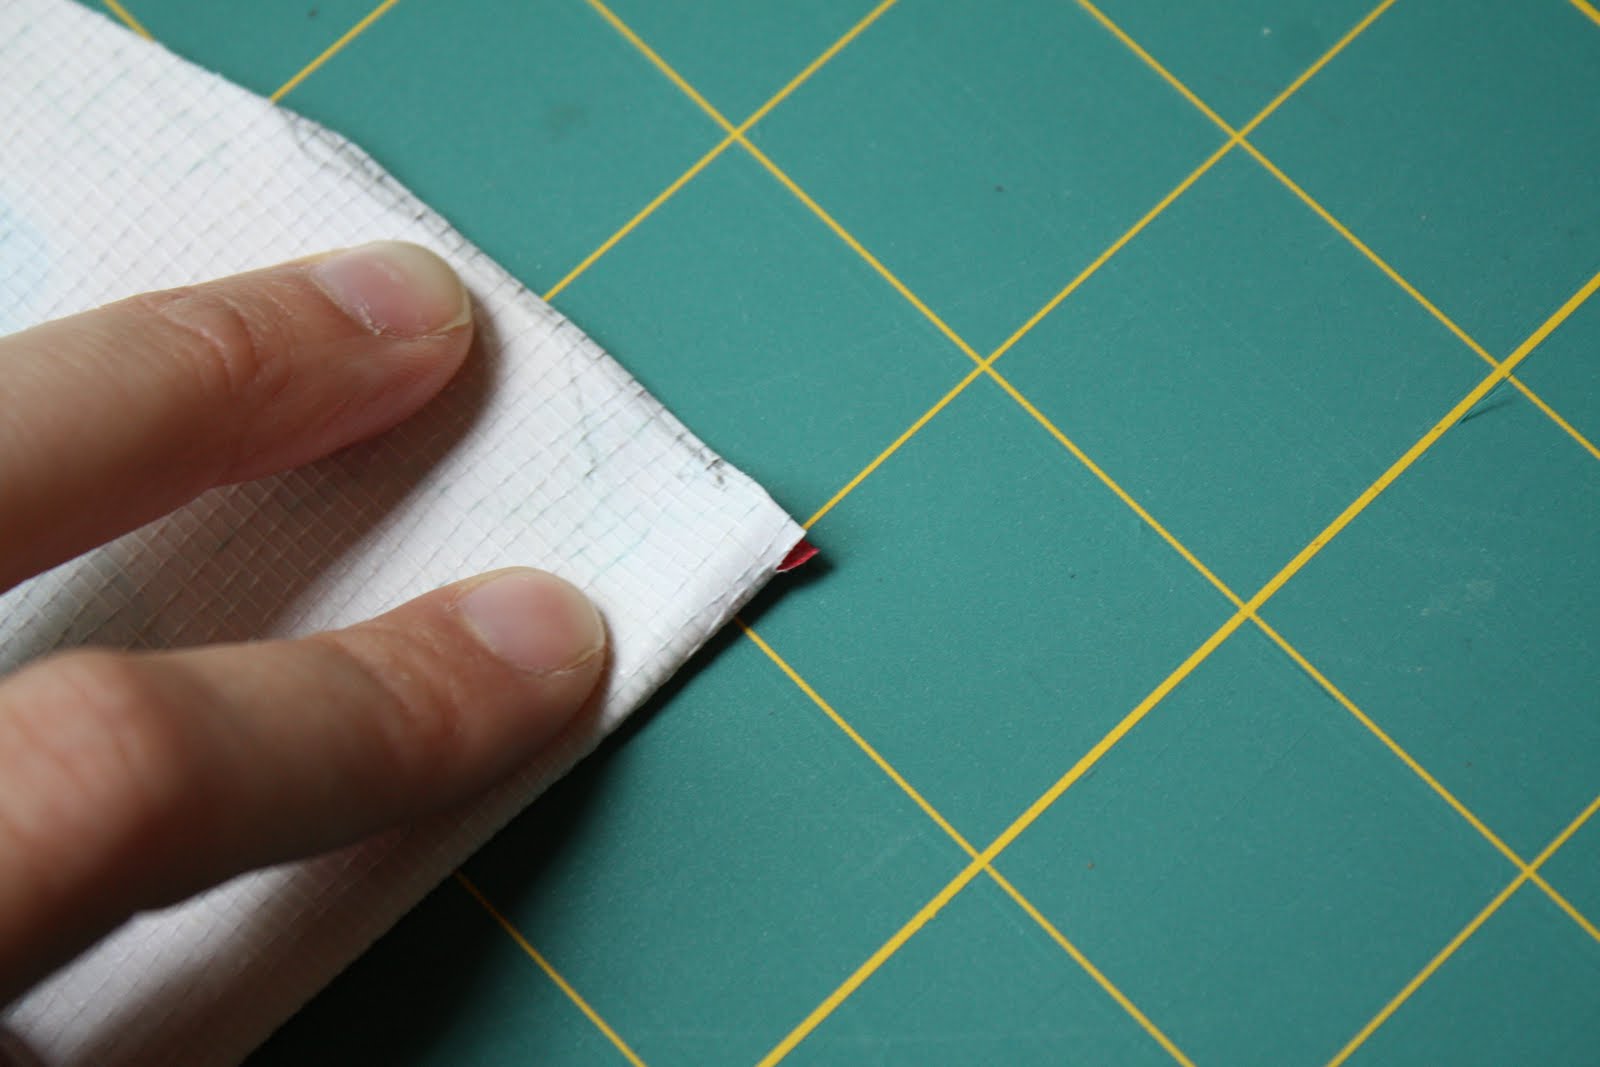
Cut your strips using a rotary cutter and self-healing mat. On the wrong side, make a line 2″ from the edge down the length of the strip.
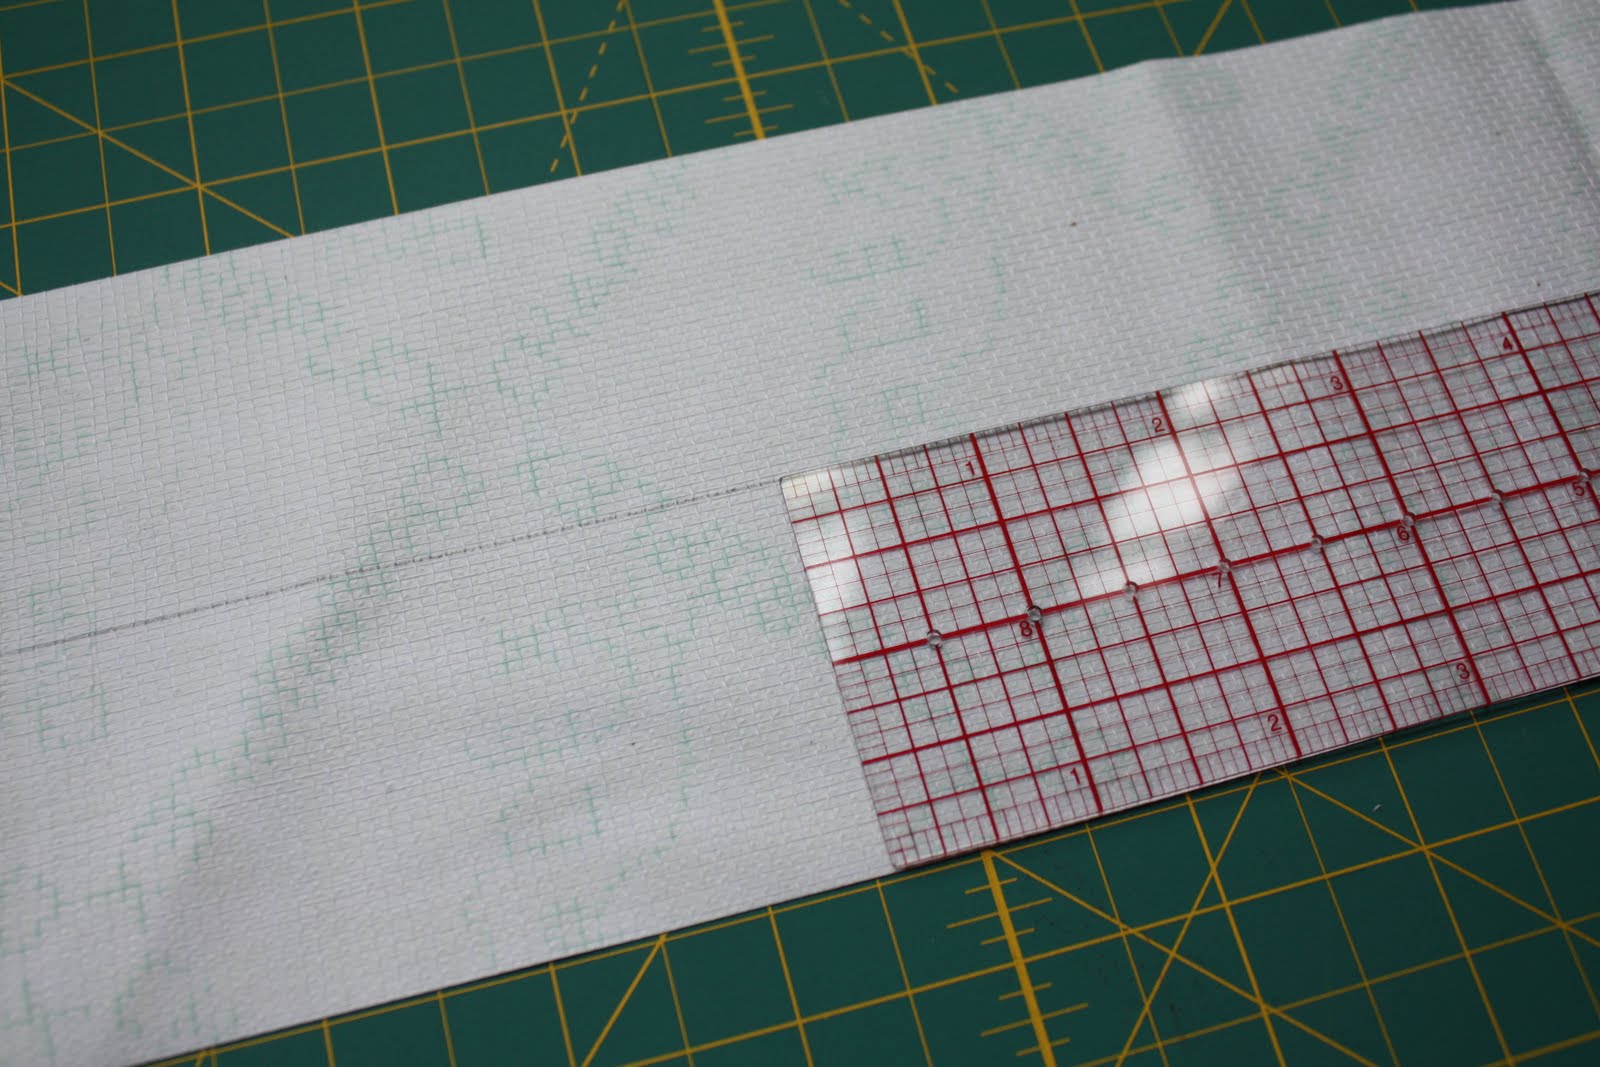
My flexible ruler (shown above) has tiny holes every 1/2″, so holding a pencil point in one (pivot point) and a pencil point in another 2″ away and tracing the arc creates perfect semi-circles of the desired width. Yay! You can also use the string method (above) or a dish with a diameter of 4″. Start in 1/4″ (for seam allowance) from the edge, then measure 2″ and mark with a dot. Make your arc. Continue on…and on…

 |
| Notice the 1/4″ seam allowance on the left, before the start of the scallop |
 |
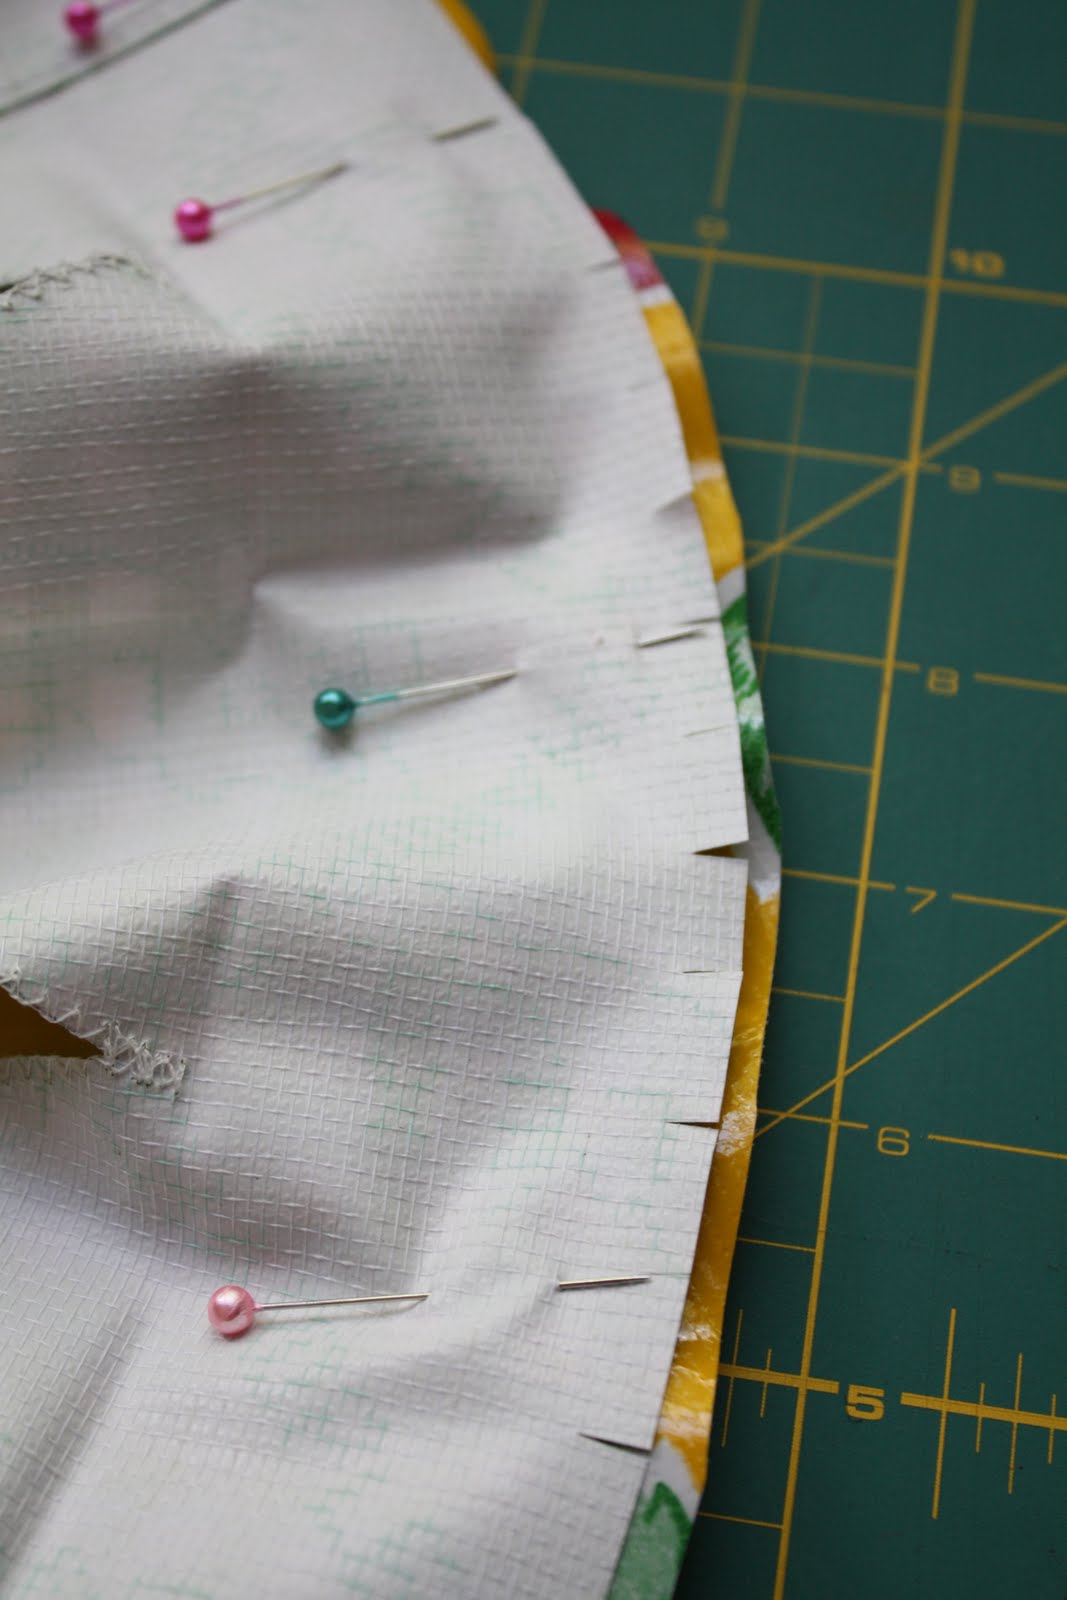
| Clip at the fold to mark the quarters of your circle |


This is super cute! I found your tutorial on sewmamasew. I think I need to make one!
LikeLike
Thanks, KristyMN! Let me know if you have any questions about the tutorial!
LikeLike
WONDERFULL
LikeLike
I love it ;))
LikeLike
Adorable. I found this on Pinterest and love it. Do you think it would work using cheap vinyl tablecloths?
LikeLike
Hi Jenn–Thanks! As long as you are able to sew the vinyl, it should work. I would suggest getting a teflon presser foot, and you might want to run some tissue paper under the vinyl so that it doesn't stick to your machine.
LikeLike
so so cute! what a great way to protect your table in style. love it. I'd like to pin this but am a newbie at pinterest and don't know how!!!
LikeLike
This comment has been removed by the author.
LikeLike
Thank you SO much for the great tutorial! I made one of these during the holidays and could NOT have done it without your blog! Thanks again!!! http://livinguffda.com/2013/02/04/oilcloth-table-cover/
LikeLike
OUTSTANDING DESIGN FOR A TABLE CLOTH AND GREAT TUTORIAL. I WILL MAKE ONE. : ) THANK YOU FOR SHARING. Rindy
LikeLike
🙂
LikeLike
OilclothByTheYard.com has the largest supply of oilcloth available. So many choices!
LikeLike