

If you’re coming from Britex Fabrics, welcome!
At our house, we’ve been exclusively using cloth napkins for a while now. I typically use quilting cotton for our “regular” napkins, so when I received the cotton and linen yardage from Britex, I almost felt guilty for using such incredible, beautiful fabric essentially for wiping dirty hands and mouths. But as I worked with the linen in particular, I came to the realization that I wasn’t making a throw-away, disposable item; well-made table linens, from high-quality fabrics are the type of item one might inherit. That thought made me especially happy since I chose the linen fabric to coordinate with a set of German breakfast dishes handed down to me from my grandmother. How fitting!
Napkins come in all shapes and sizes, for all occasions. For more “casual” napkins, I sew a narrow hem and little miter corners. For formal, special occasion linen napkins, I use a wider hem and the traditional sewn miter corner. This tutorial shows you how to make both!
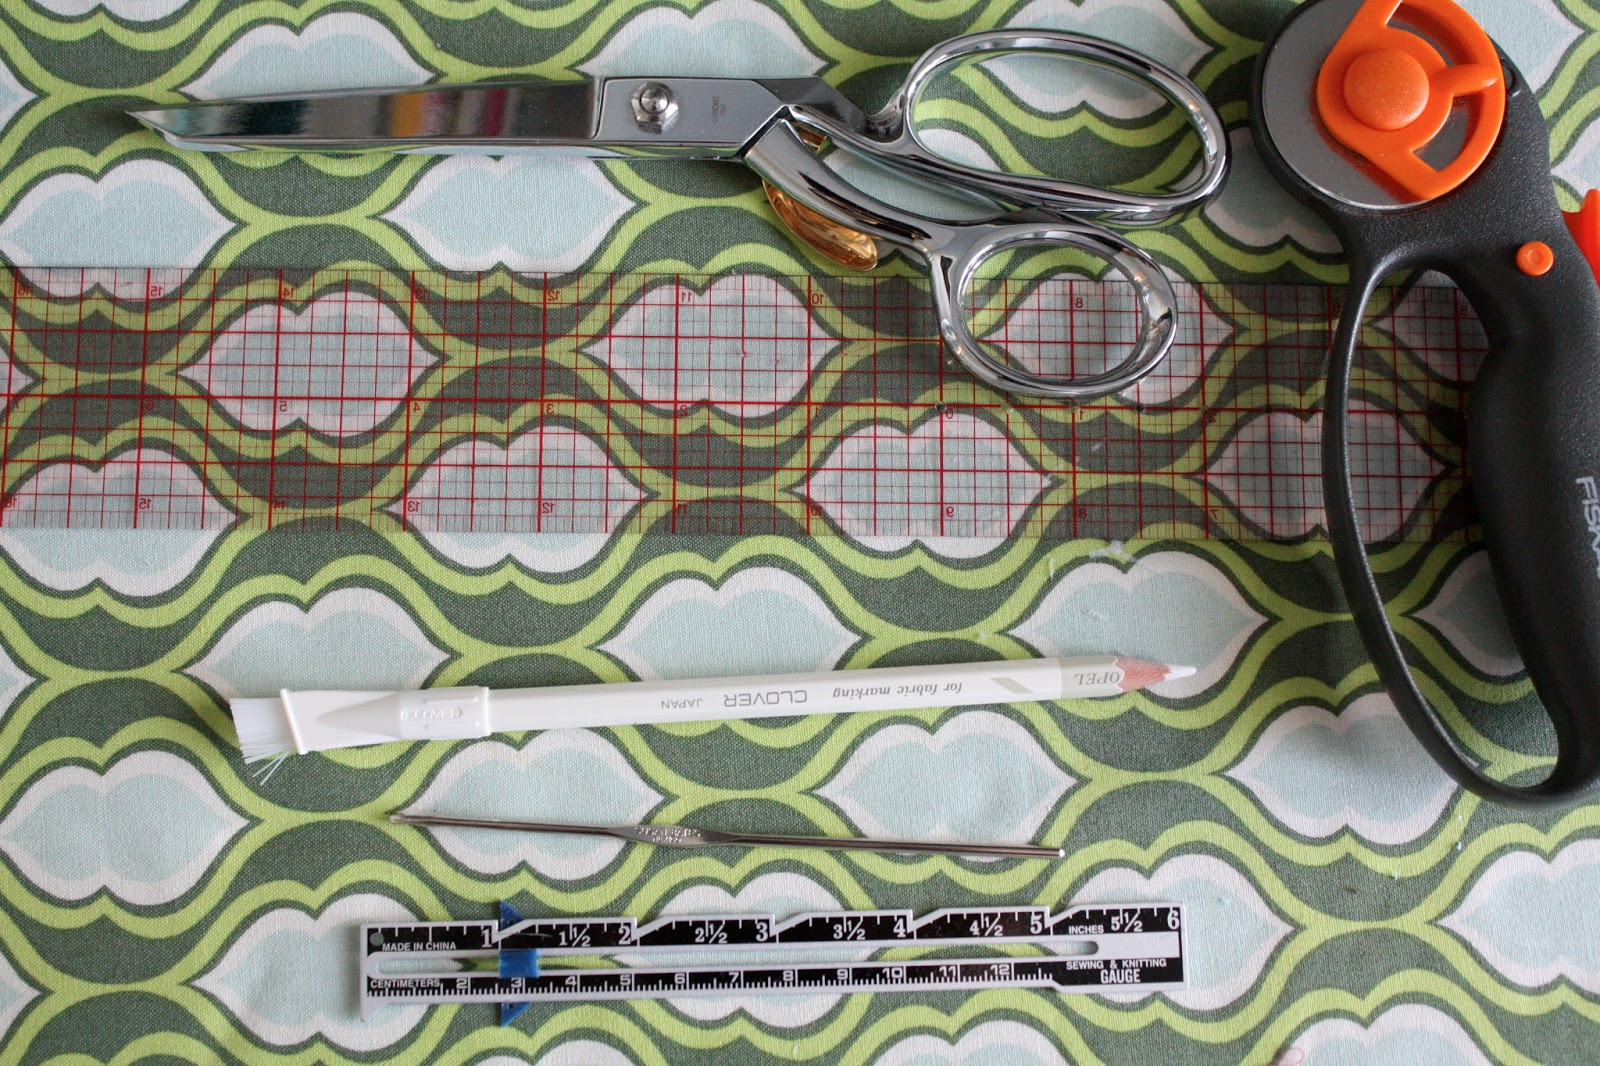
For either type of napkin, you will need some supplies:
- rotary cutter, straight edge, and self-healing mat
- scissors
- clear quilter’s ruler
- fabric marking pencil
- seam gauge
- tiny crochet hook or point turner
- spray starch
|
|
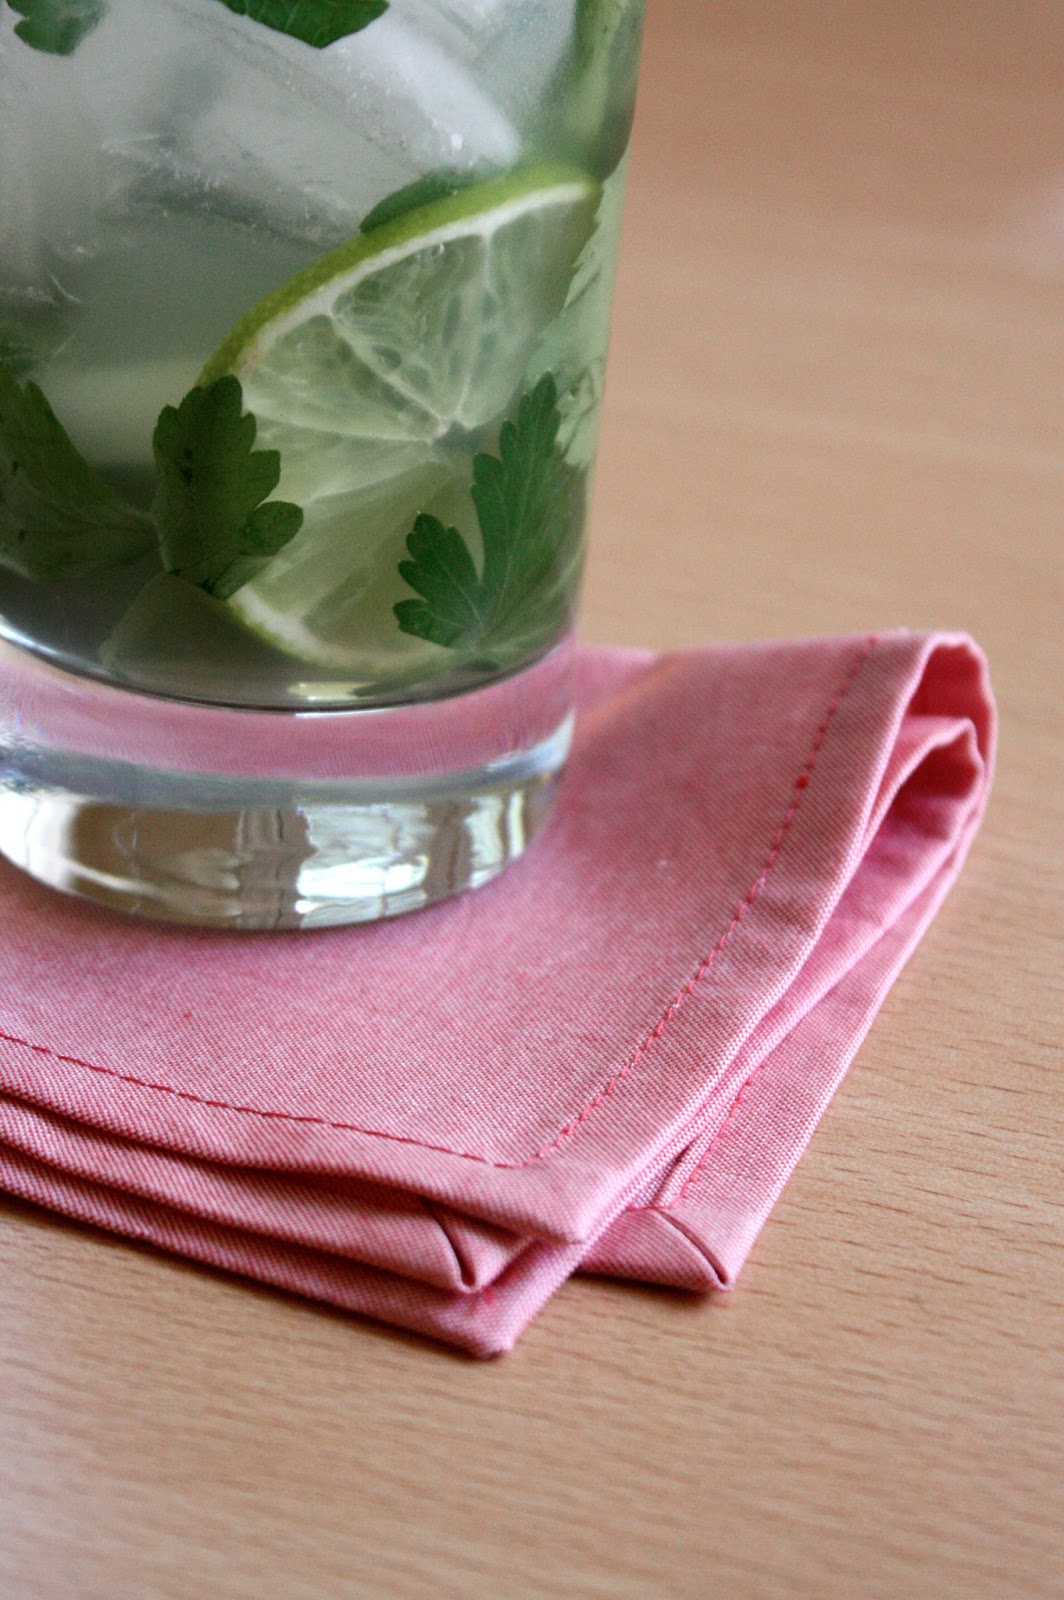
Casual miter-corner napkins
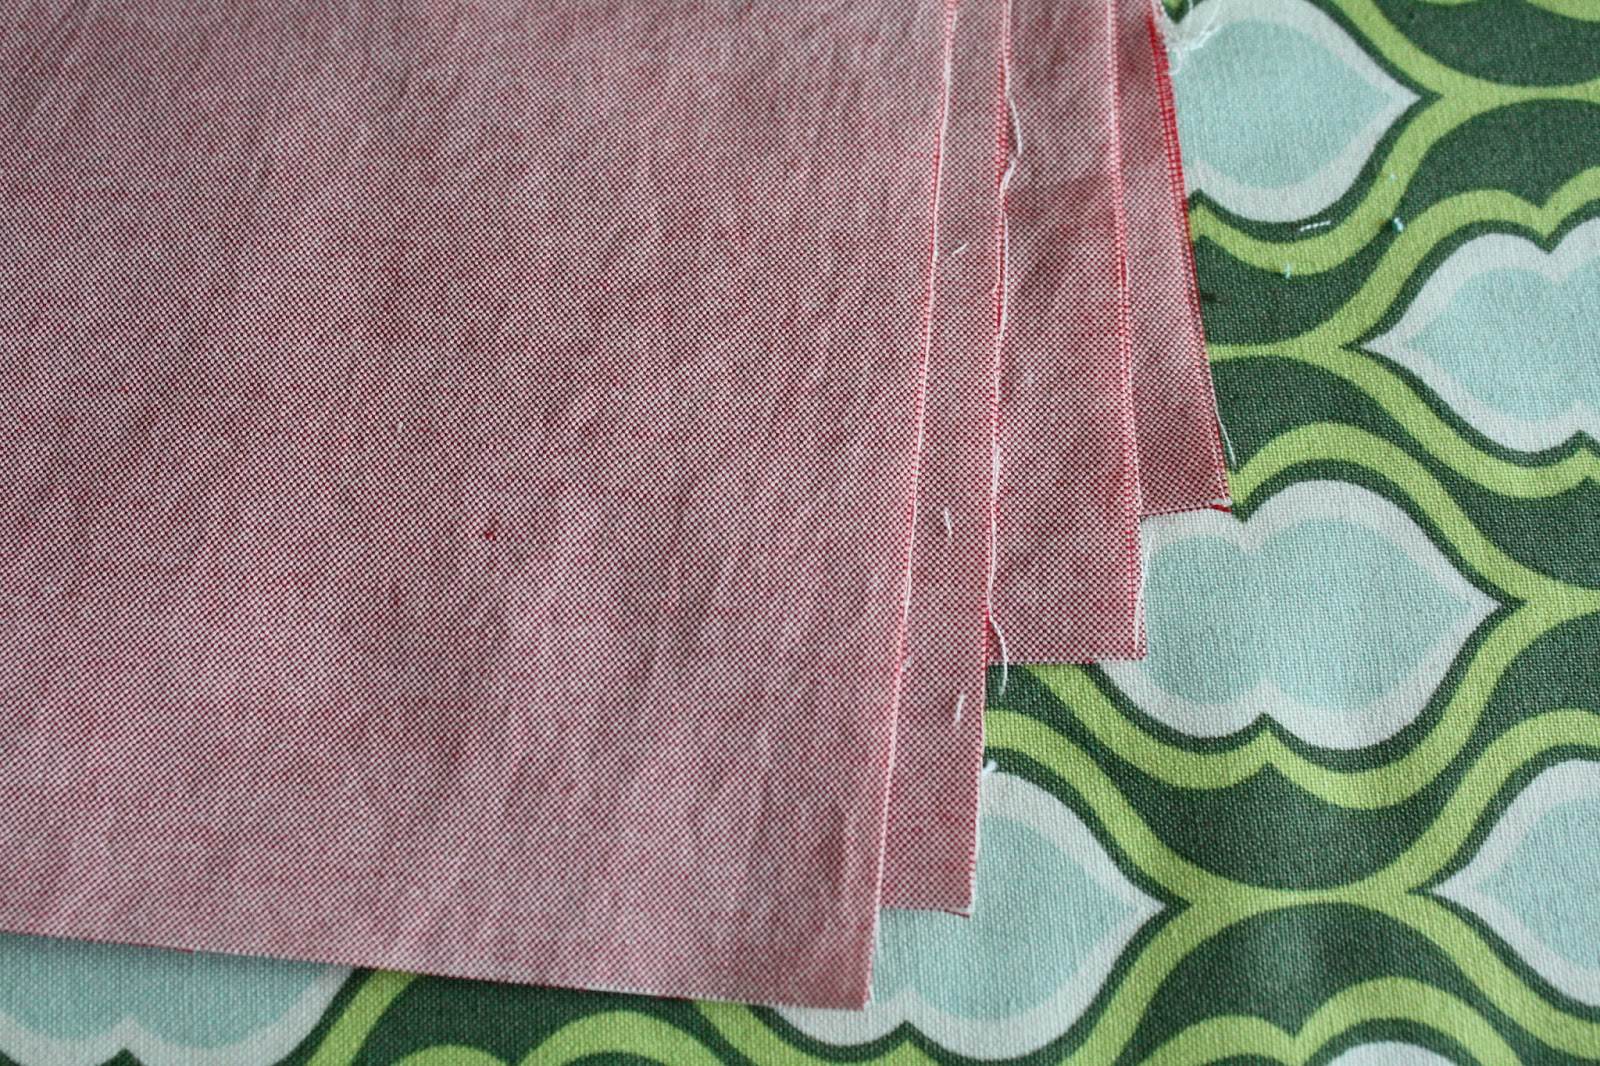
First up, the casual napkin. I usually make these out of medium-weight cottons, that can be happily machine washed and dried. For these napkins, I used cherry red oxford shirting from Britex. The size of the napkins you want obviously determines how much fabric to buy, but to maximize the fabric usage, I typically make my dinner napkins around 17″ square. This way, I can get 4 napkins out of a single yard of fabric. Fat quarter bundles work great for this size. For today’s tutorial, I made cocktail-size napkins at 9″ square, and could cut 8 napkins out of 3/4 yard (58″ width).
For the casual napkin, if you want it X inch square, you must cut your fabric X+1 inch square to allow for 1/2″ hem allowances on all sides. Iron the fabric carefully and cut the fabric precisely square.
Using steam, press 1/4″ around all four sizes of your fabric square. I often eyeball this, but use the seam gauge to be more accurate. If your fabric does not press well, try using spray starch.

Next, fold over and press 1/4″ again around all sides.
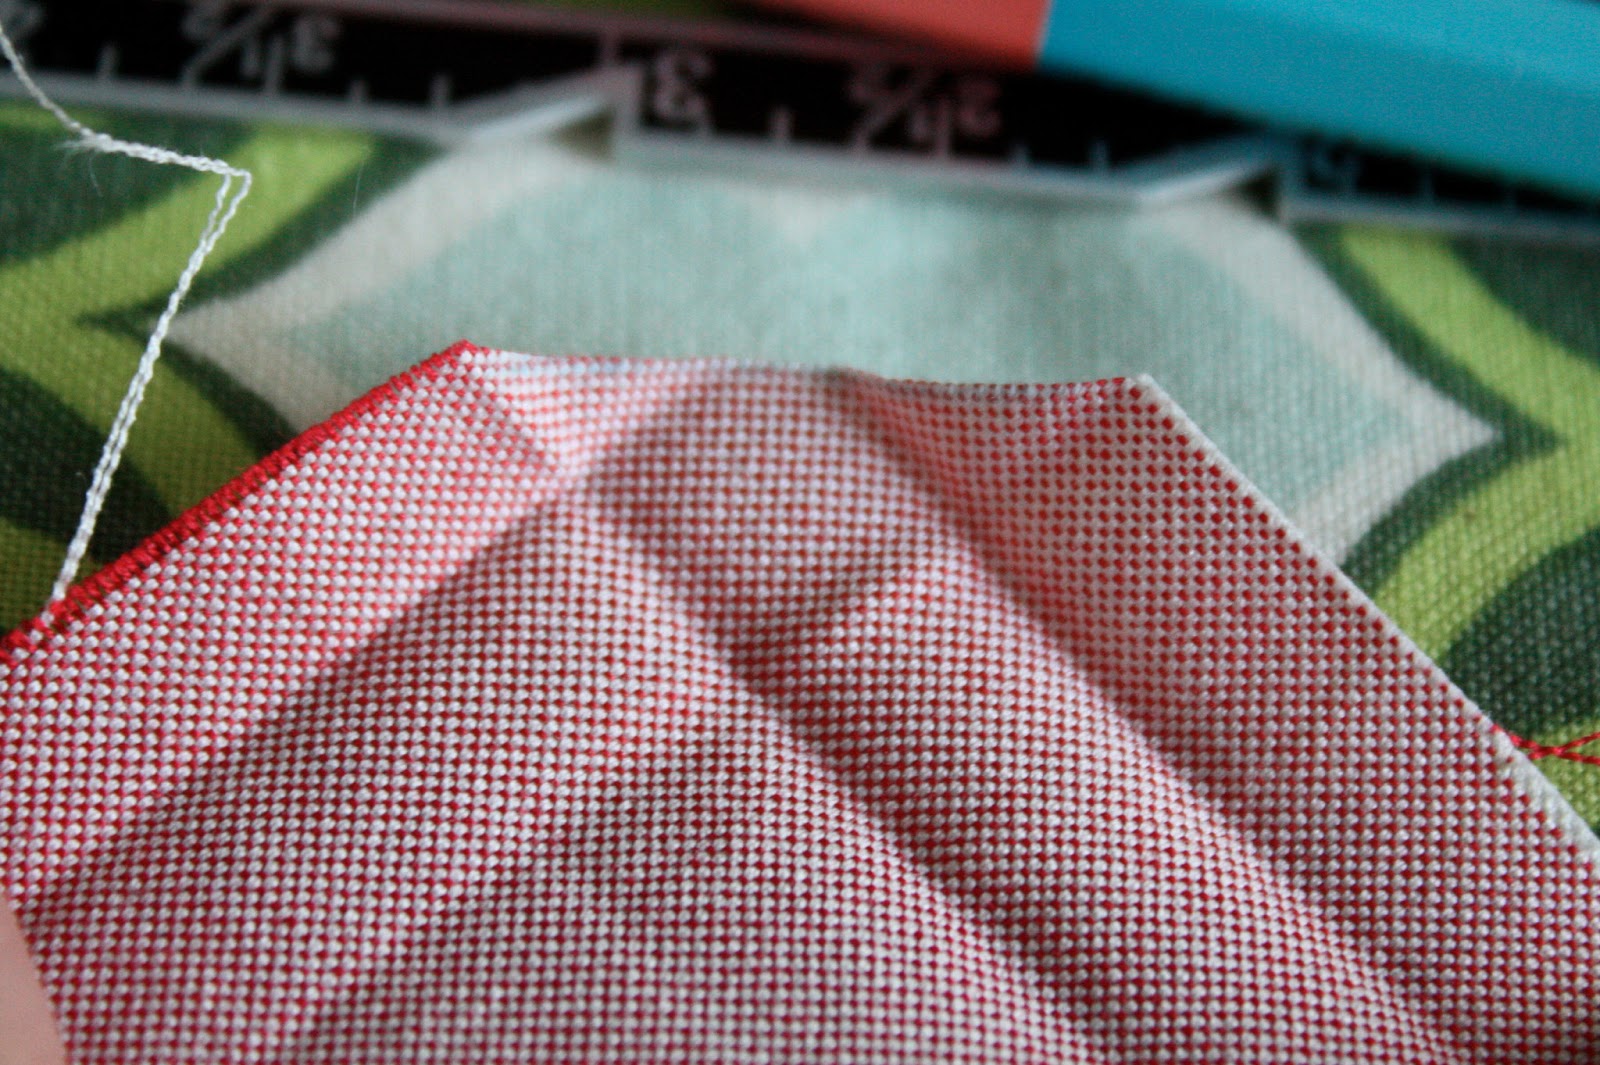
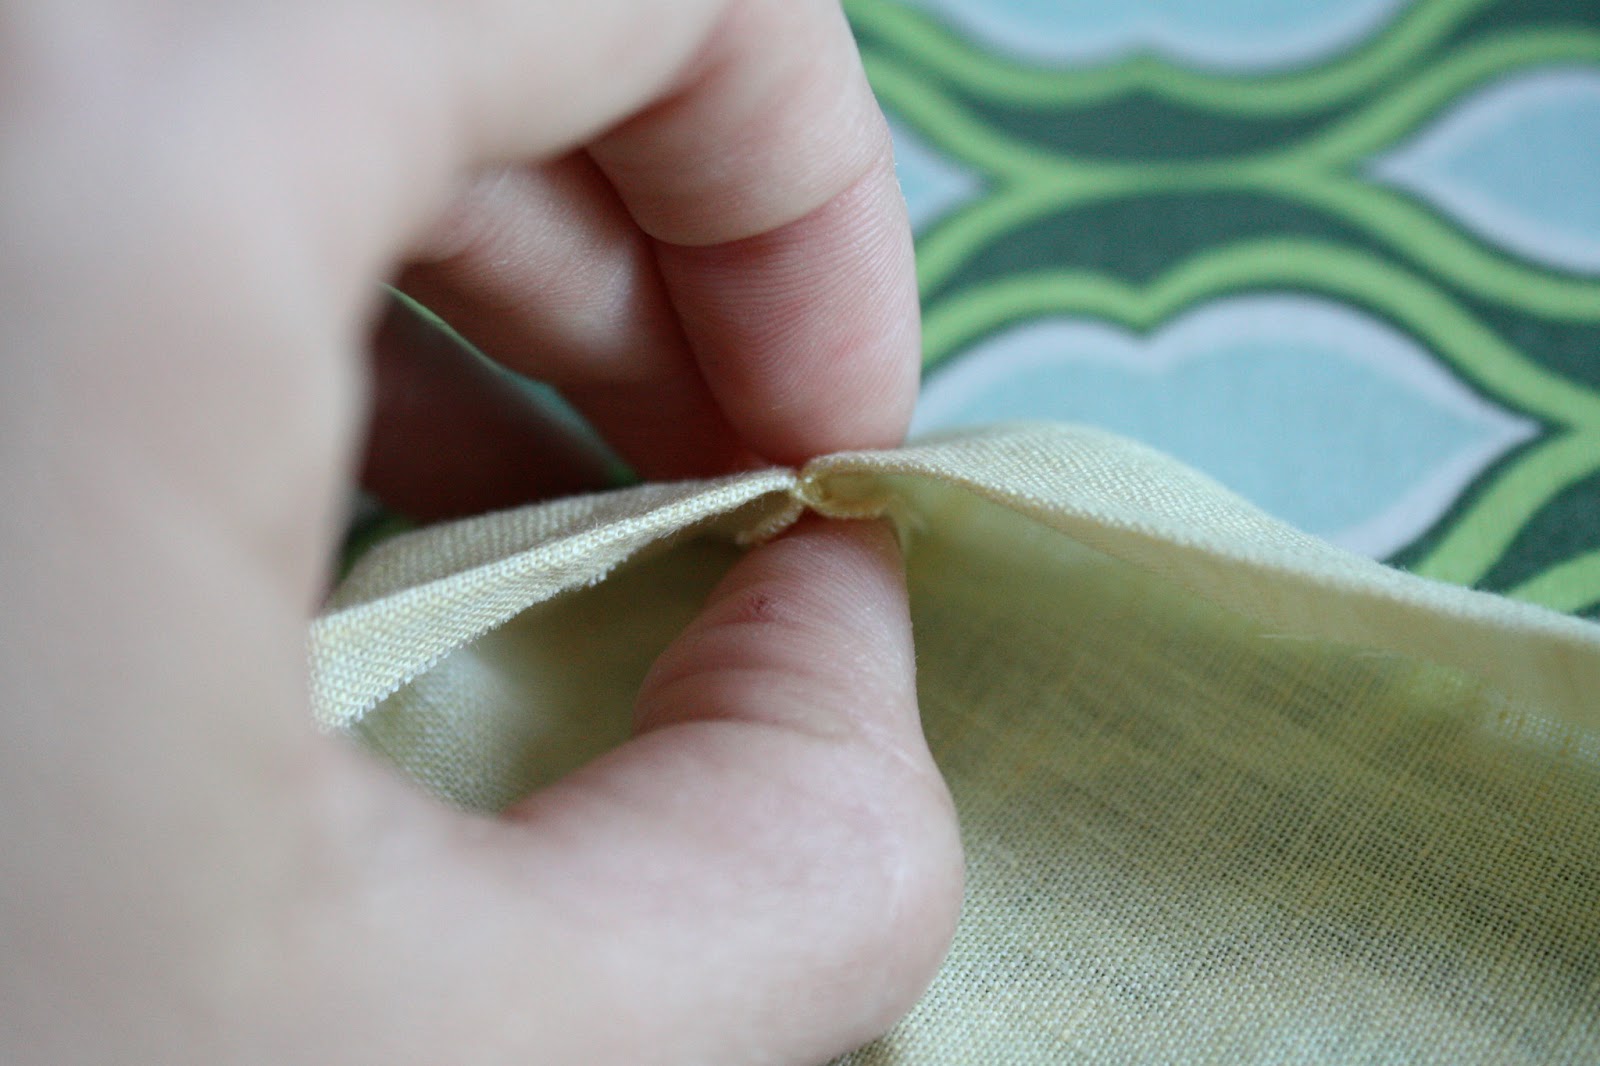
I need a manicure. Then, open out the corner. You should have some nicely pressed crease lines to guide the next few steps. (I’m using the seam gauge just to hold down the corner; it’s not measuring anything!)
To reduce the bulk and get rid of the unwanted point, cut from corner to corner as created by the second crease lines, as shown. You may want to mark the line (in blue, below), but I usually don’t bother!

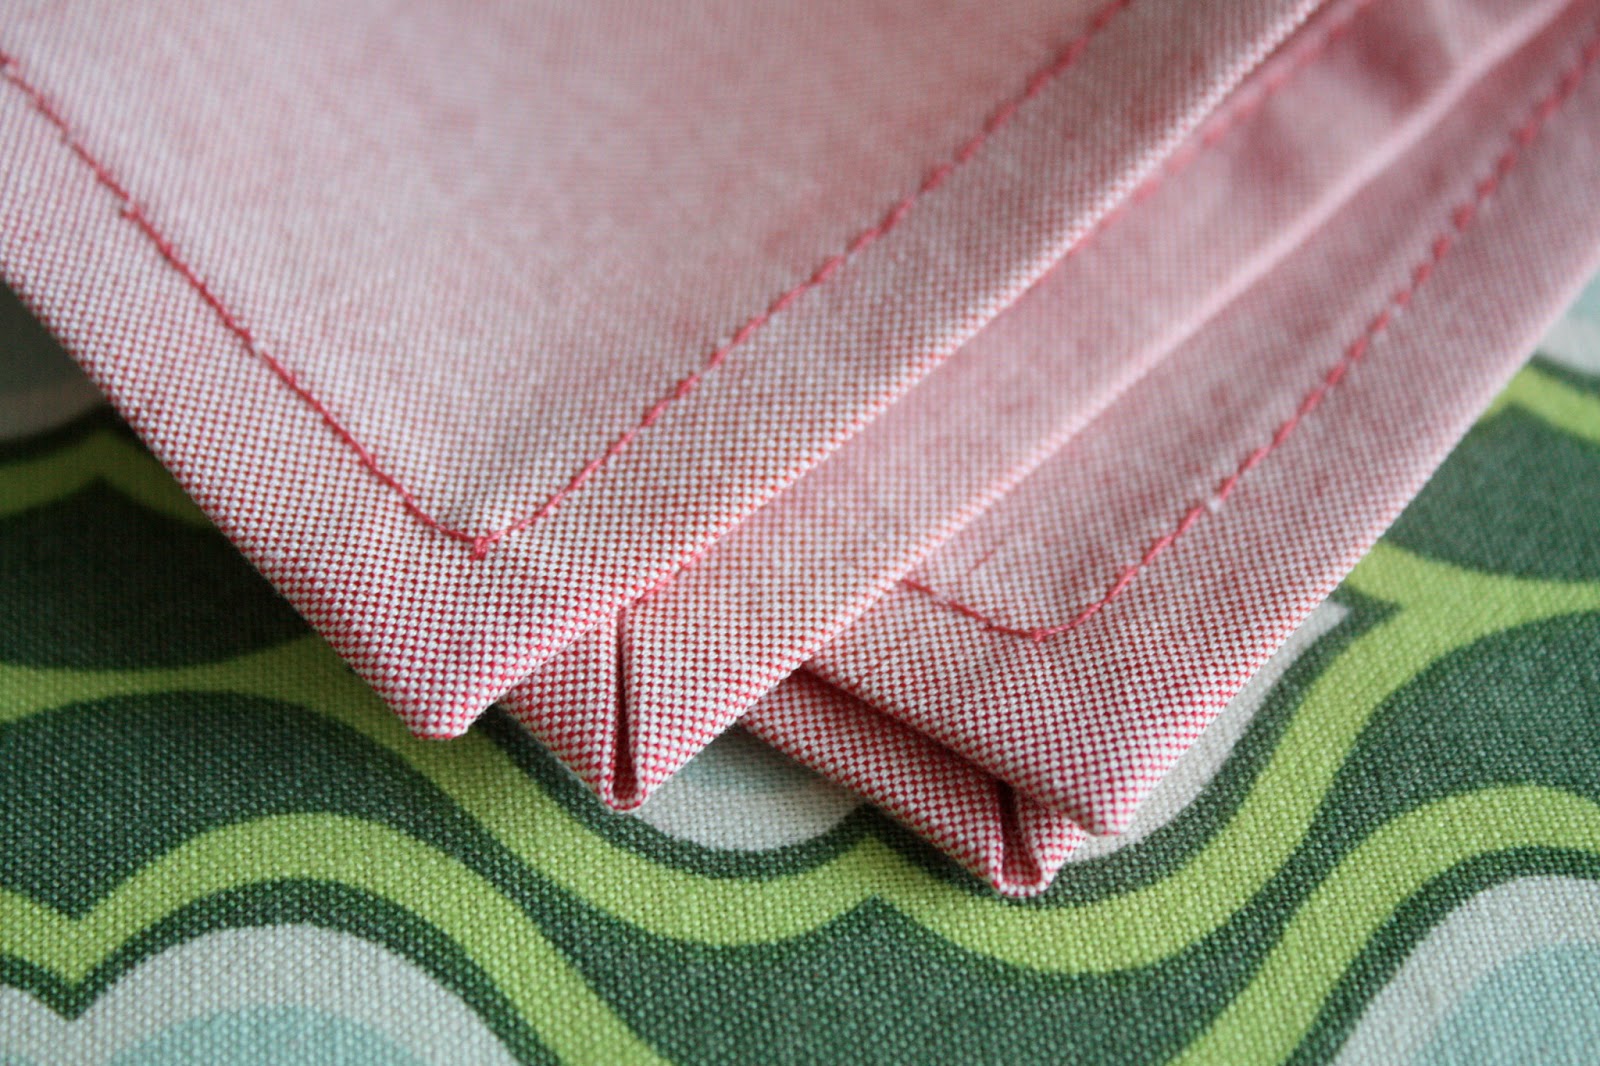
Next, fold the fabric at the first pressed crease line on both sides.
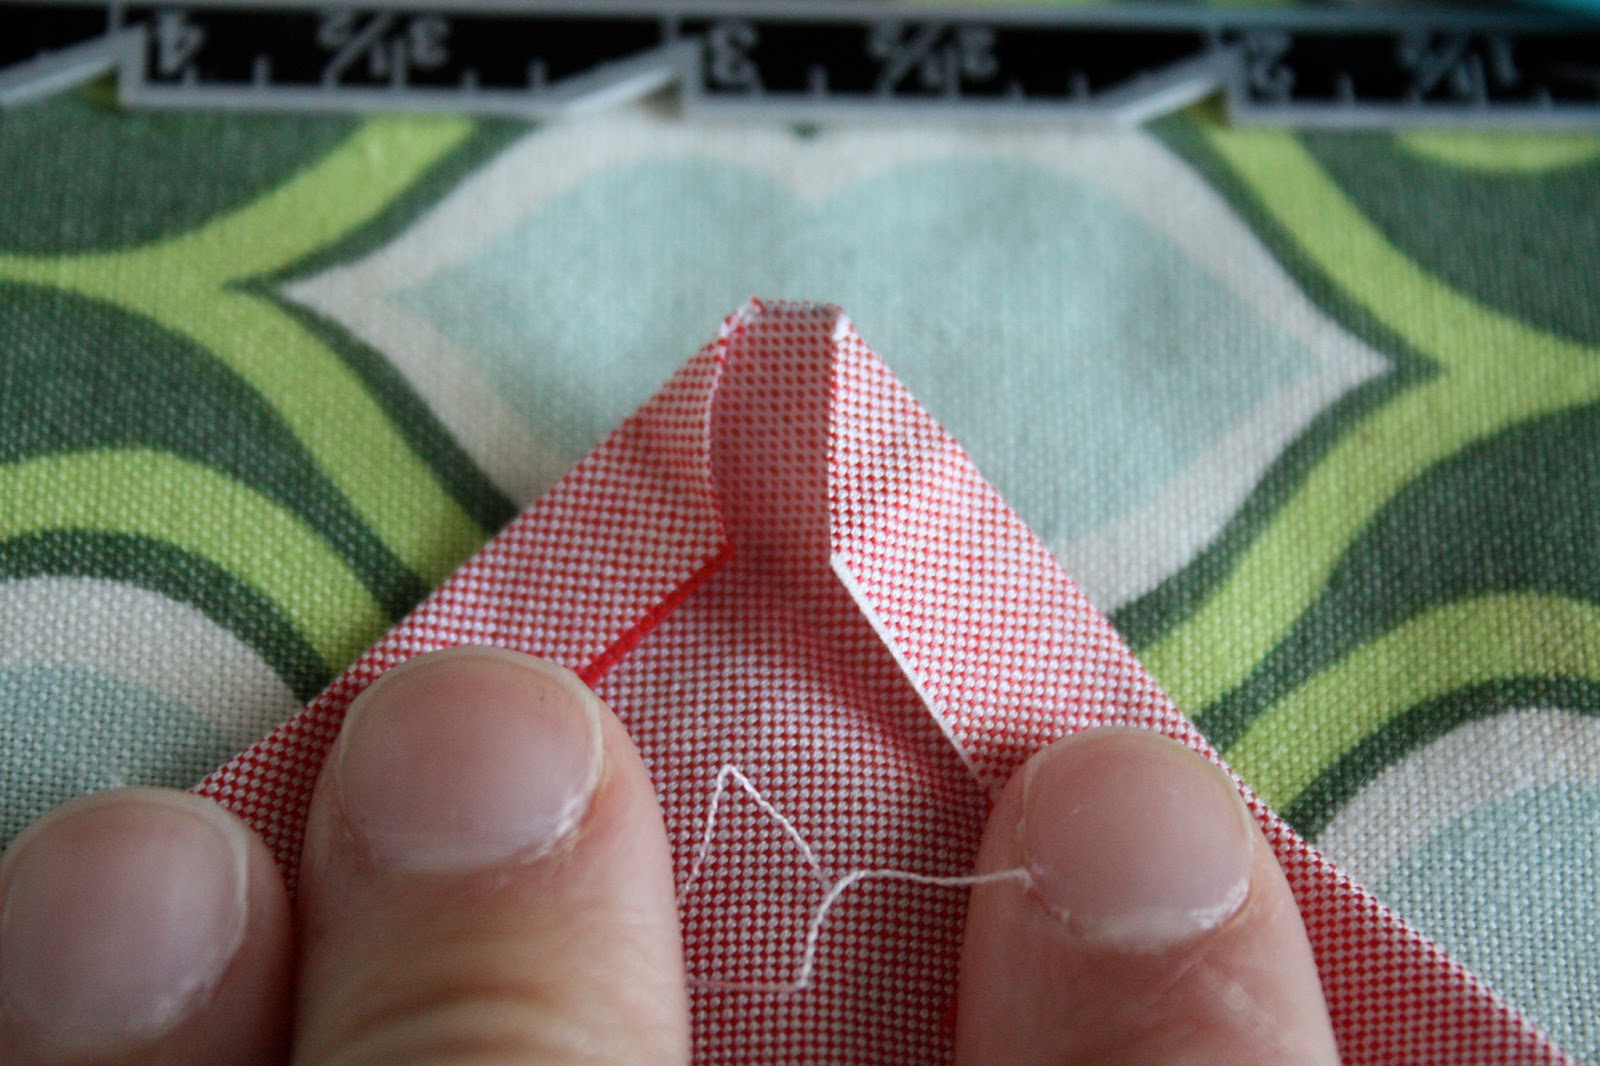
Then, fold the tip of the triangle down to the intersection of the second pressed crease line.
The creases on the folded-down tip should line up to the second crease lines. Then, fold each side along the second crease line to create the miter. In the image, below, only the right side has been folded.

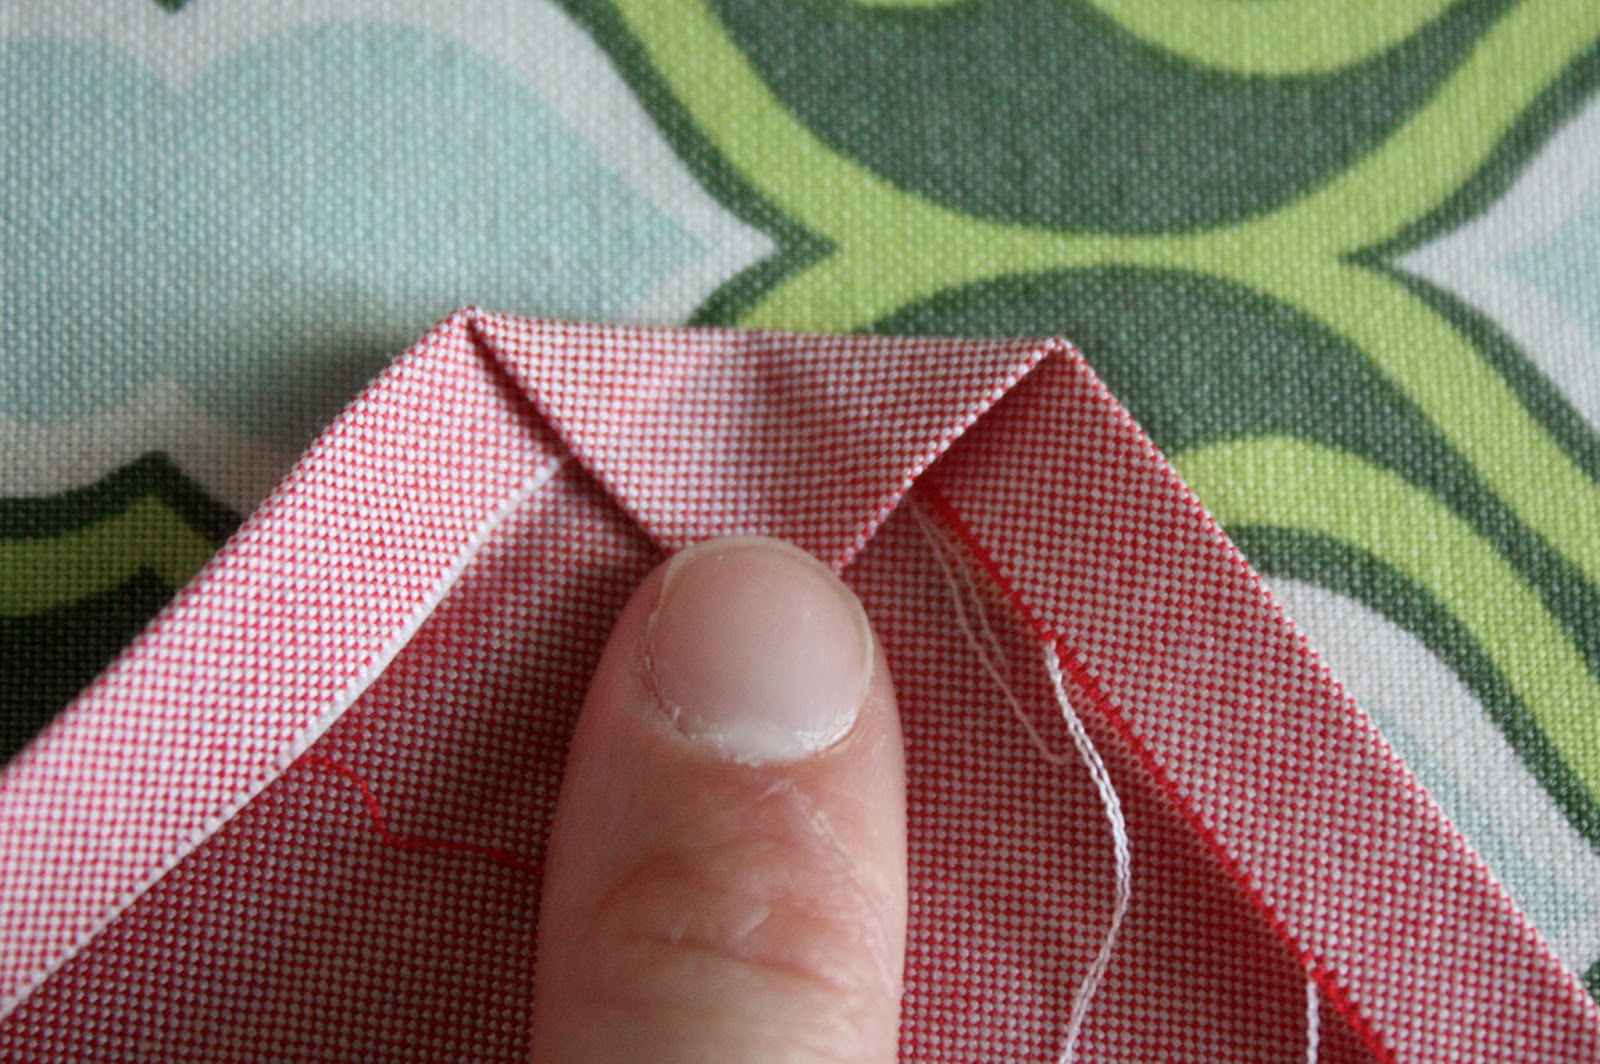
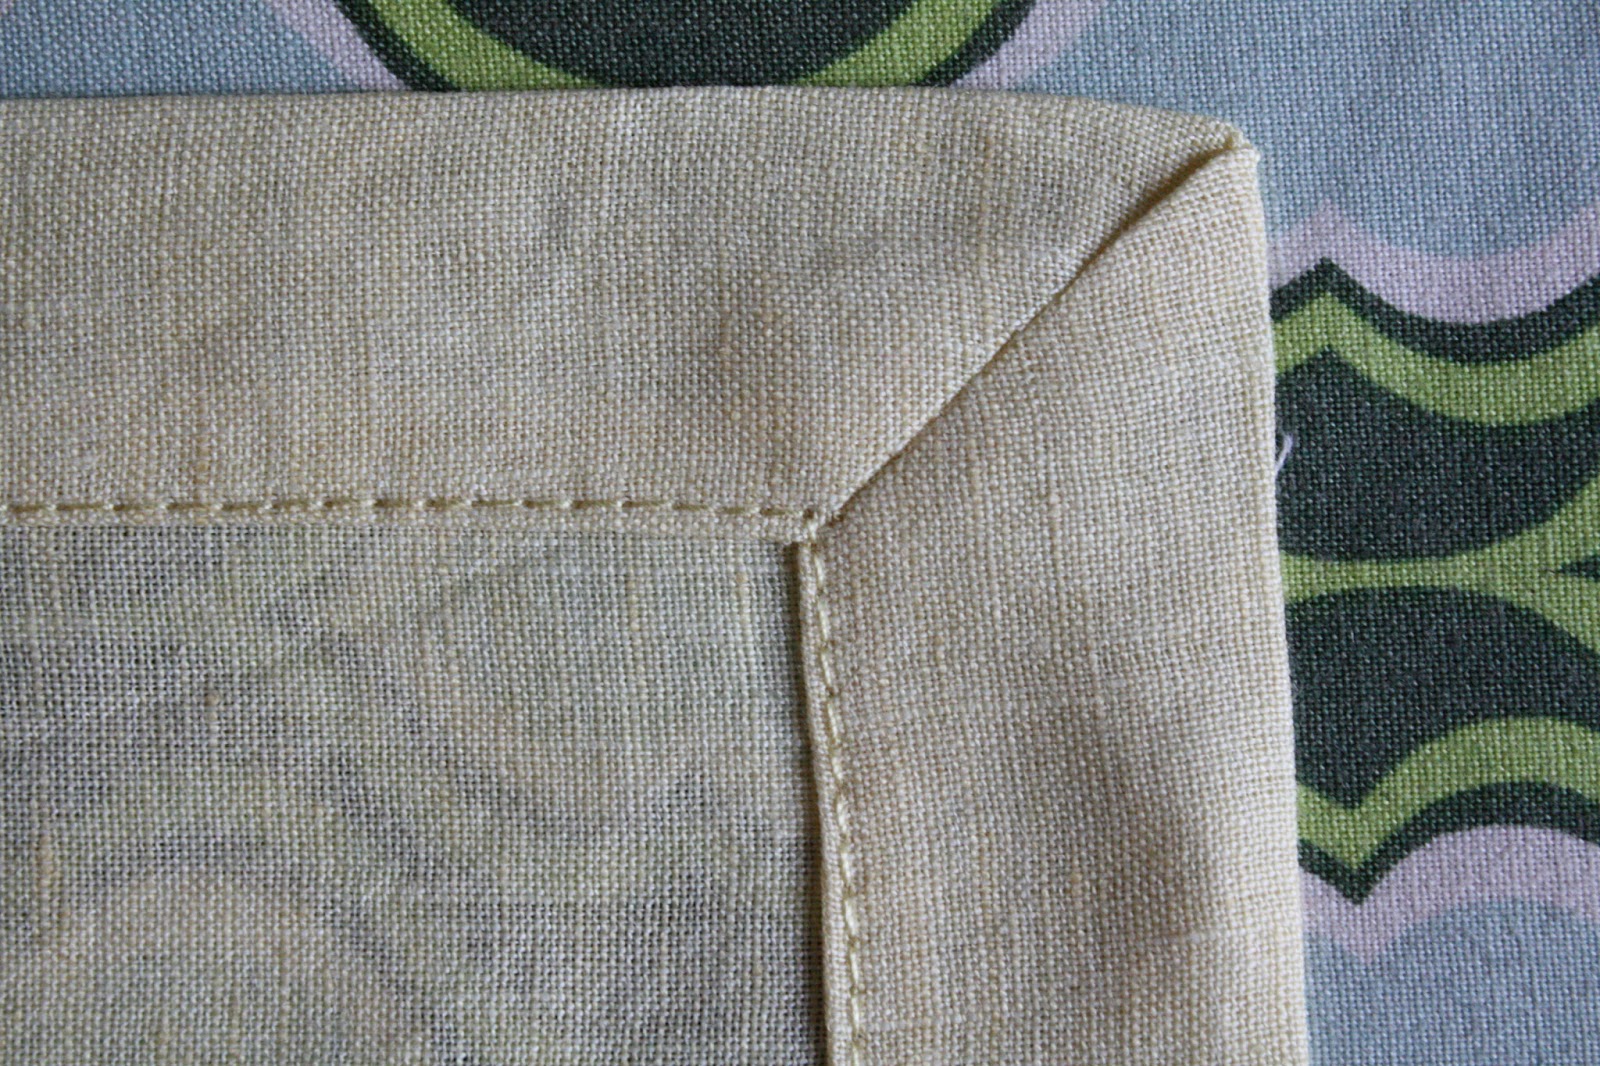
Press carefully, and pin if needed. Then, repeat on the other three corners! Press again, using starch if needed.
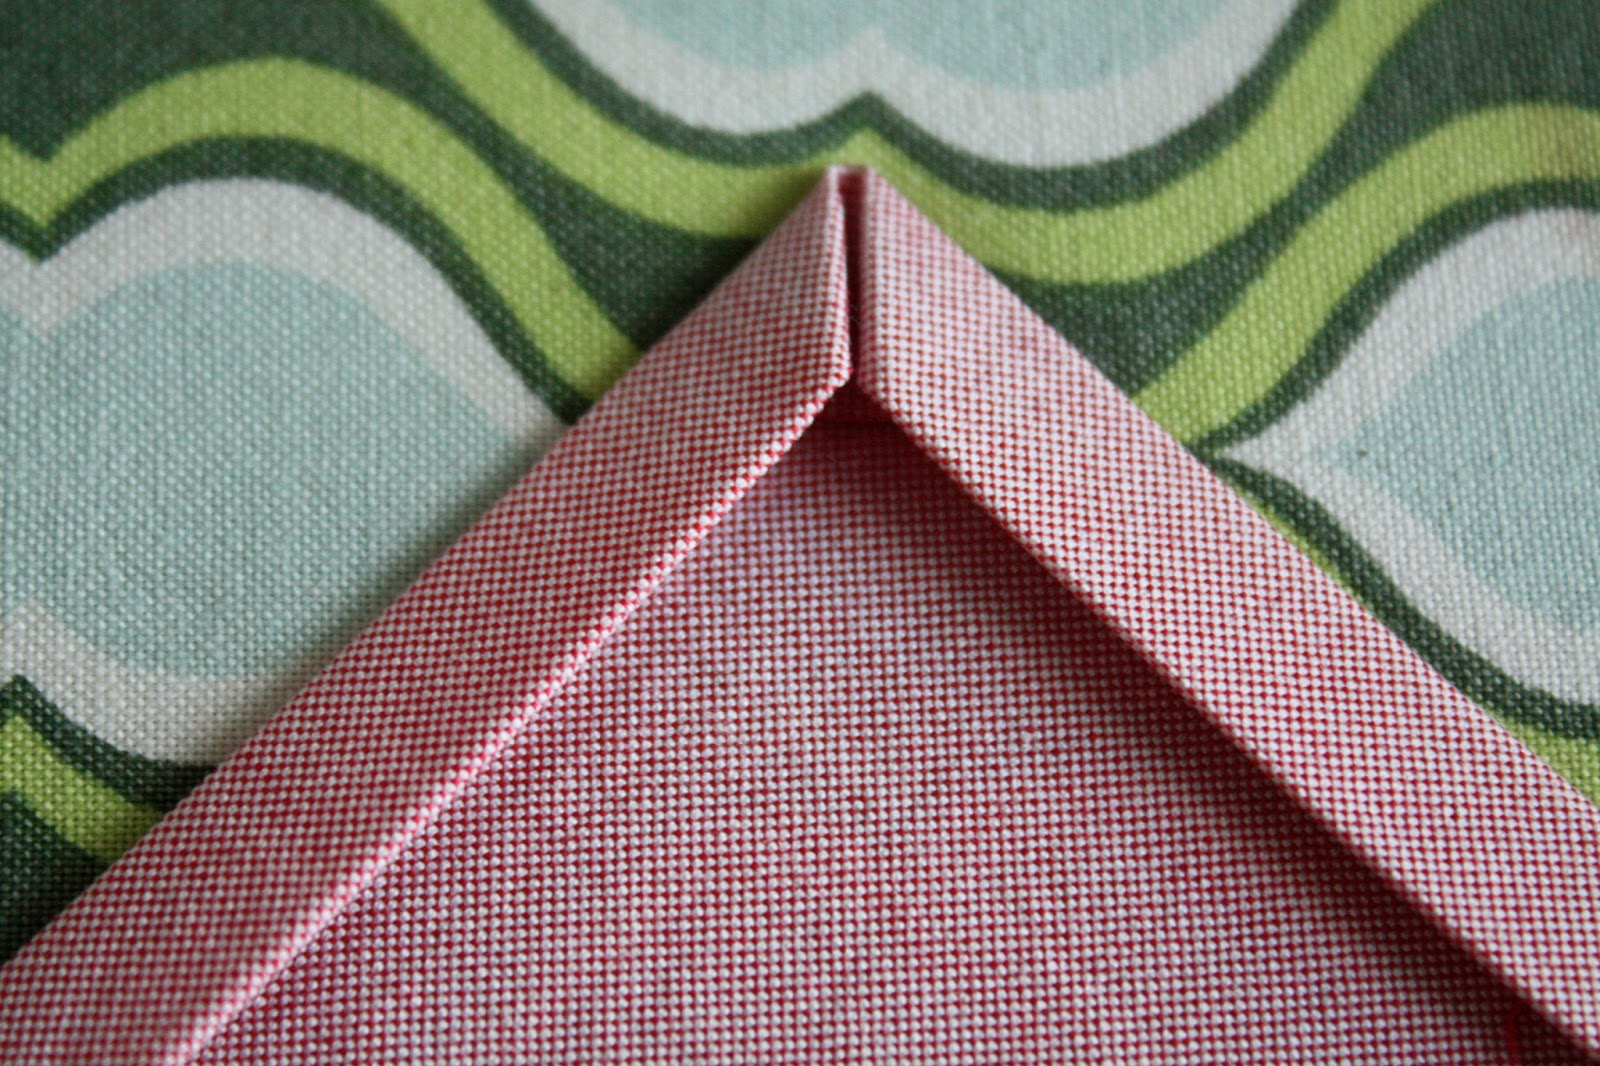
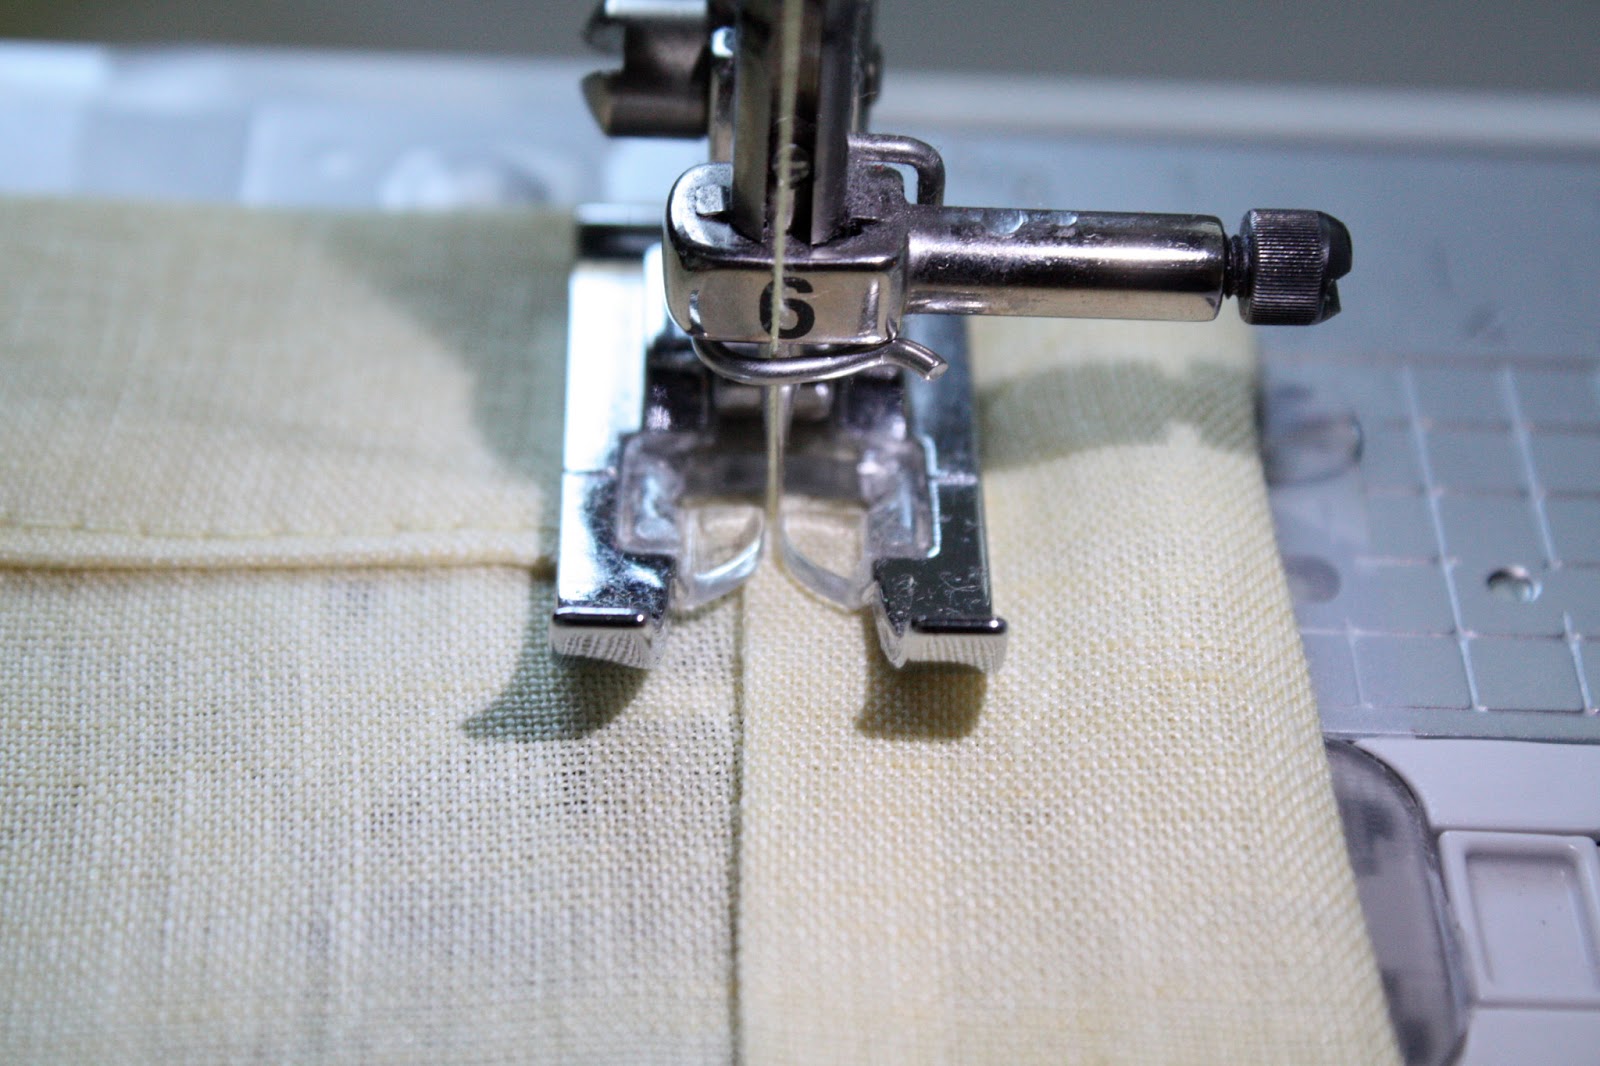
Stitch around the very edge of your hemmed sides. Be creative with your thread color and stitch selection! At the corners, pivot in the ditch created by the miter.

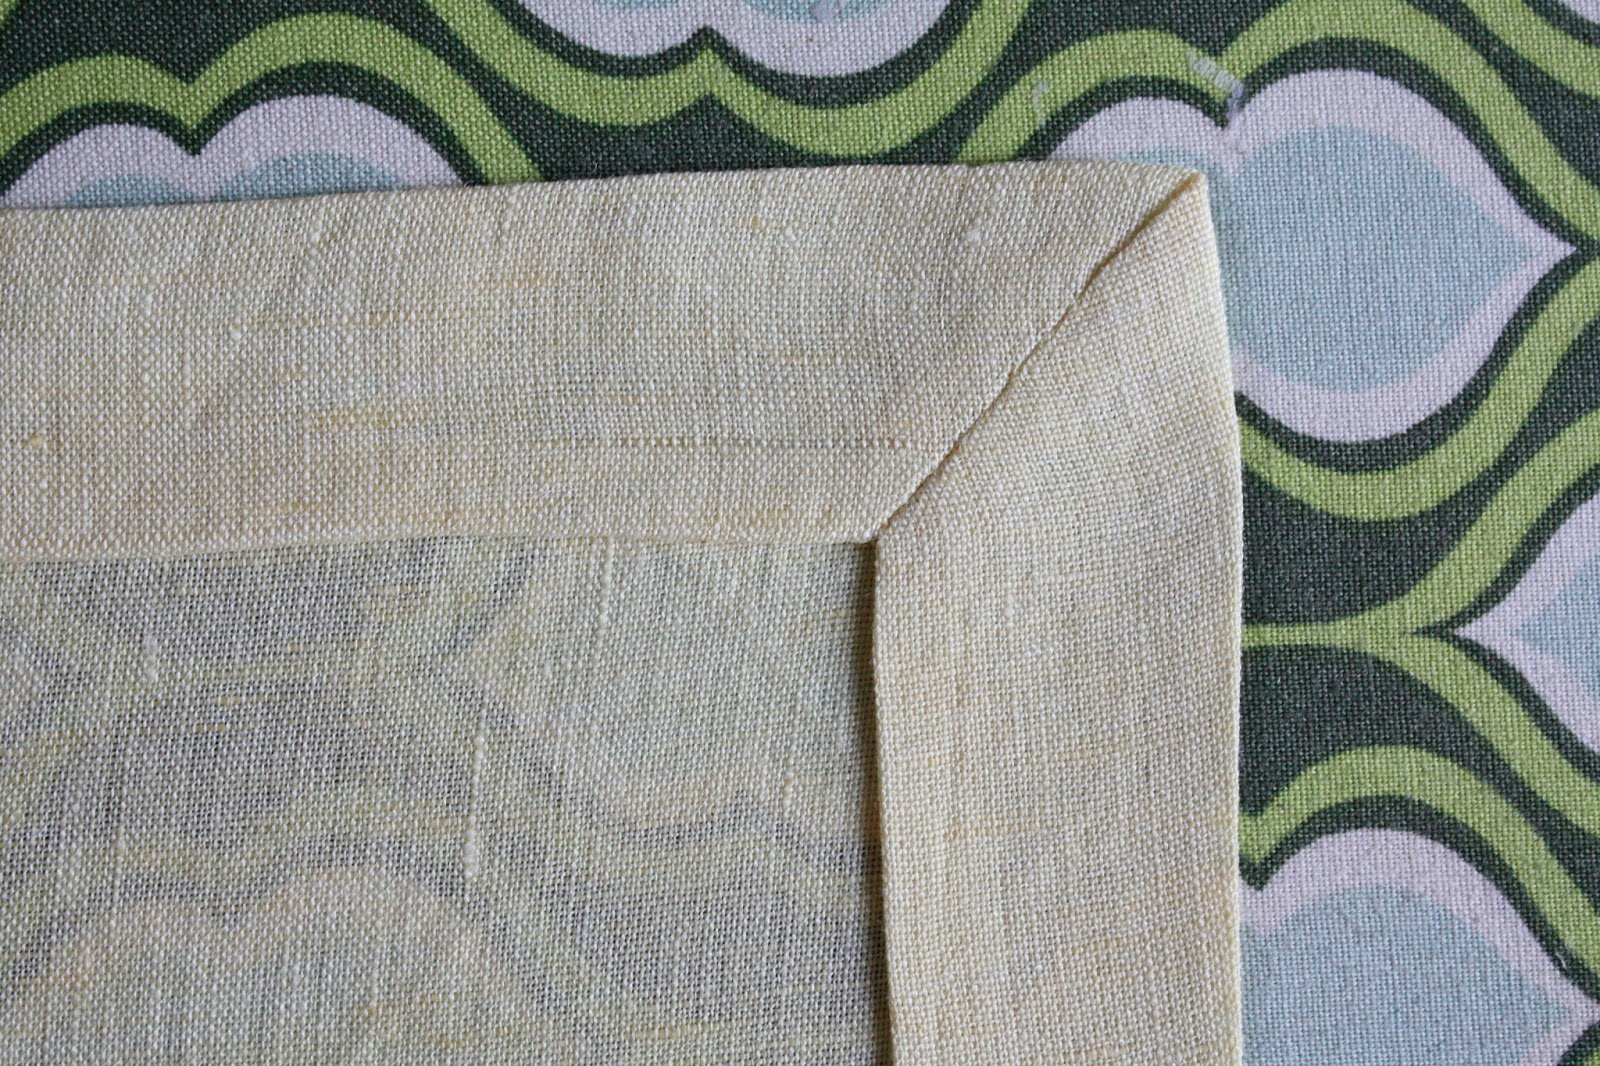
After stitching, press again.
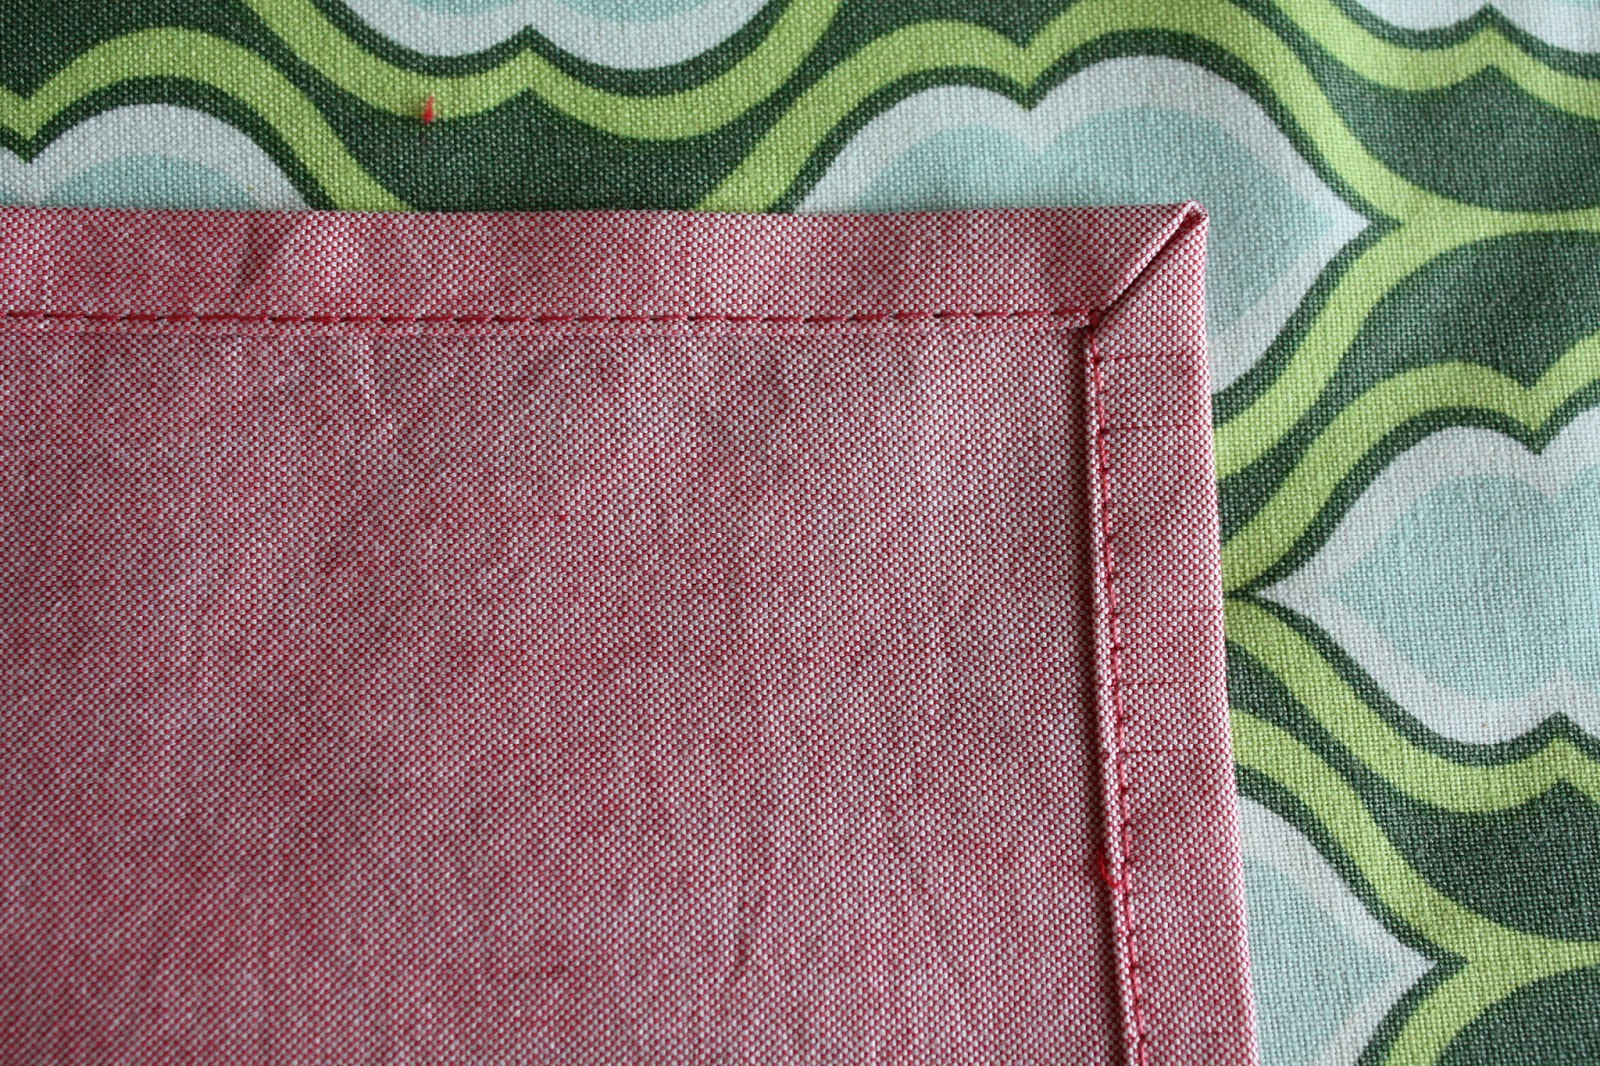

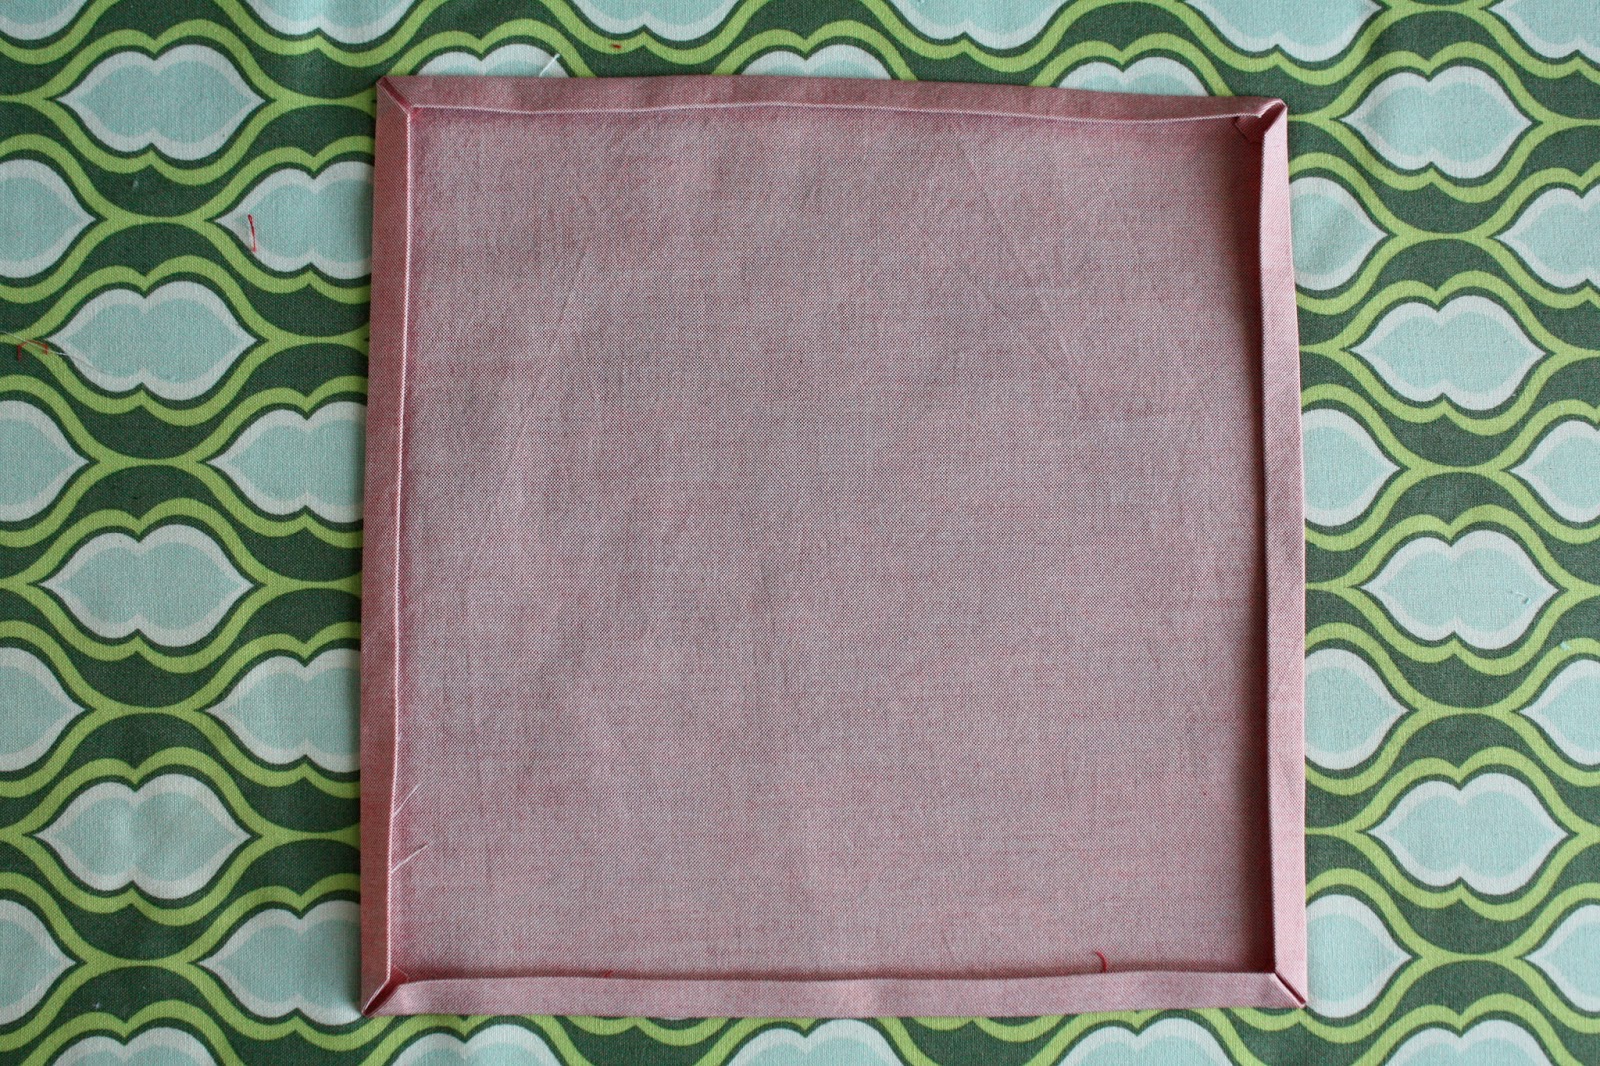
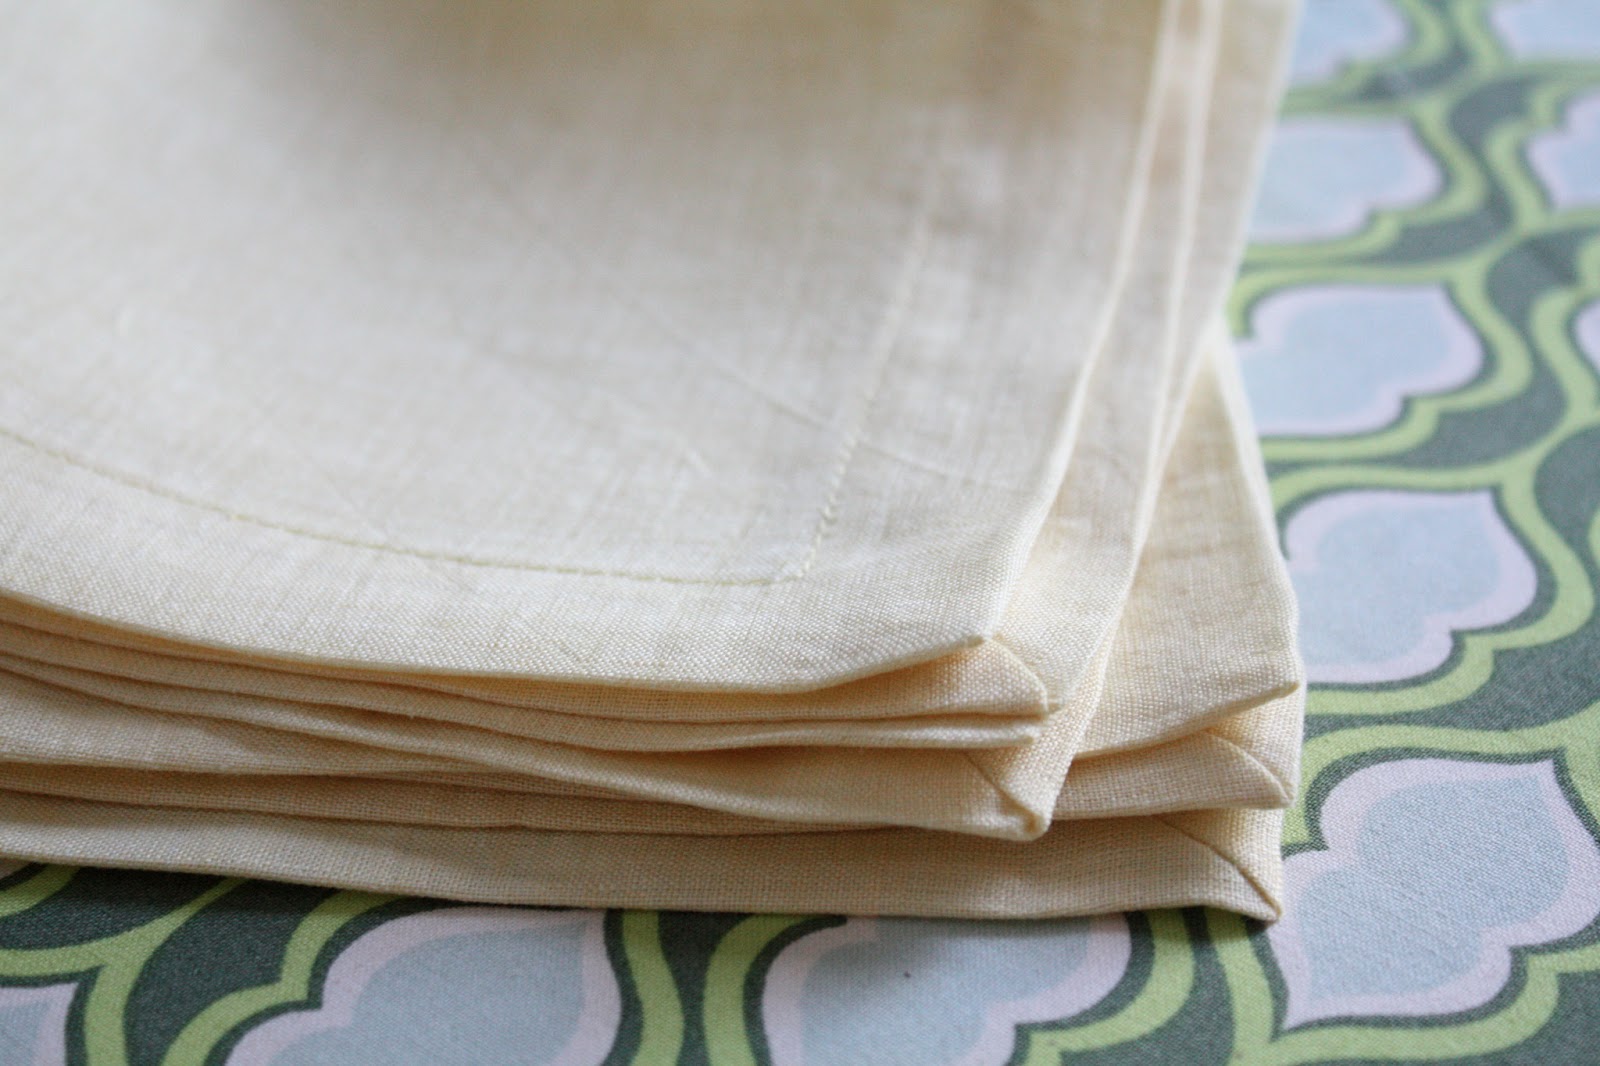
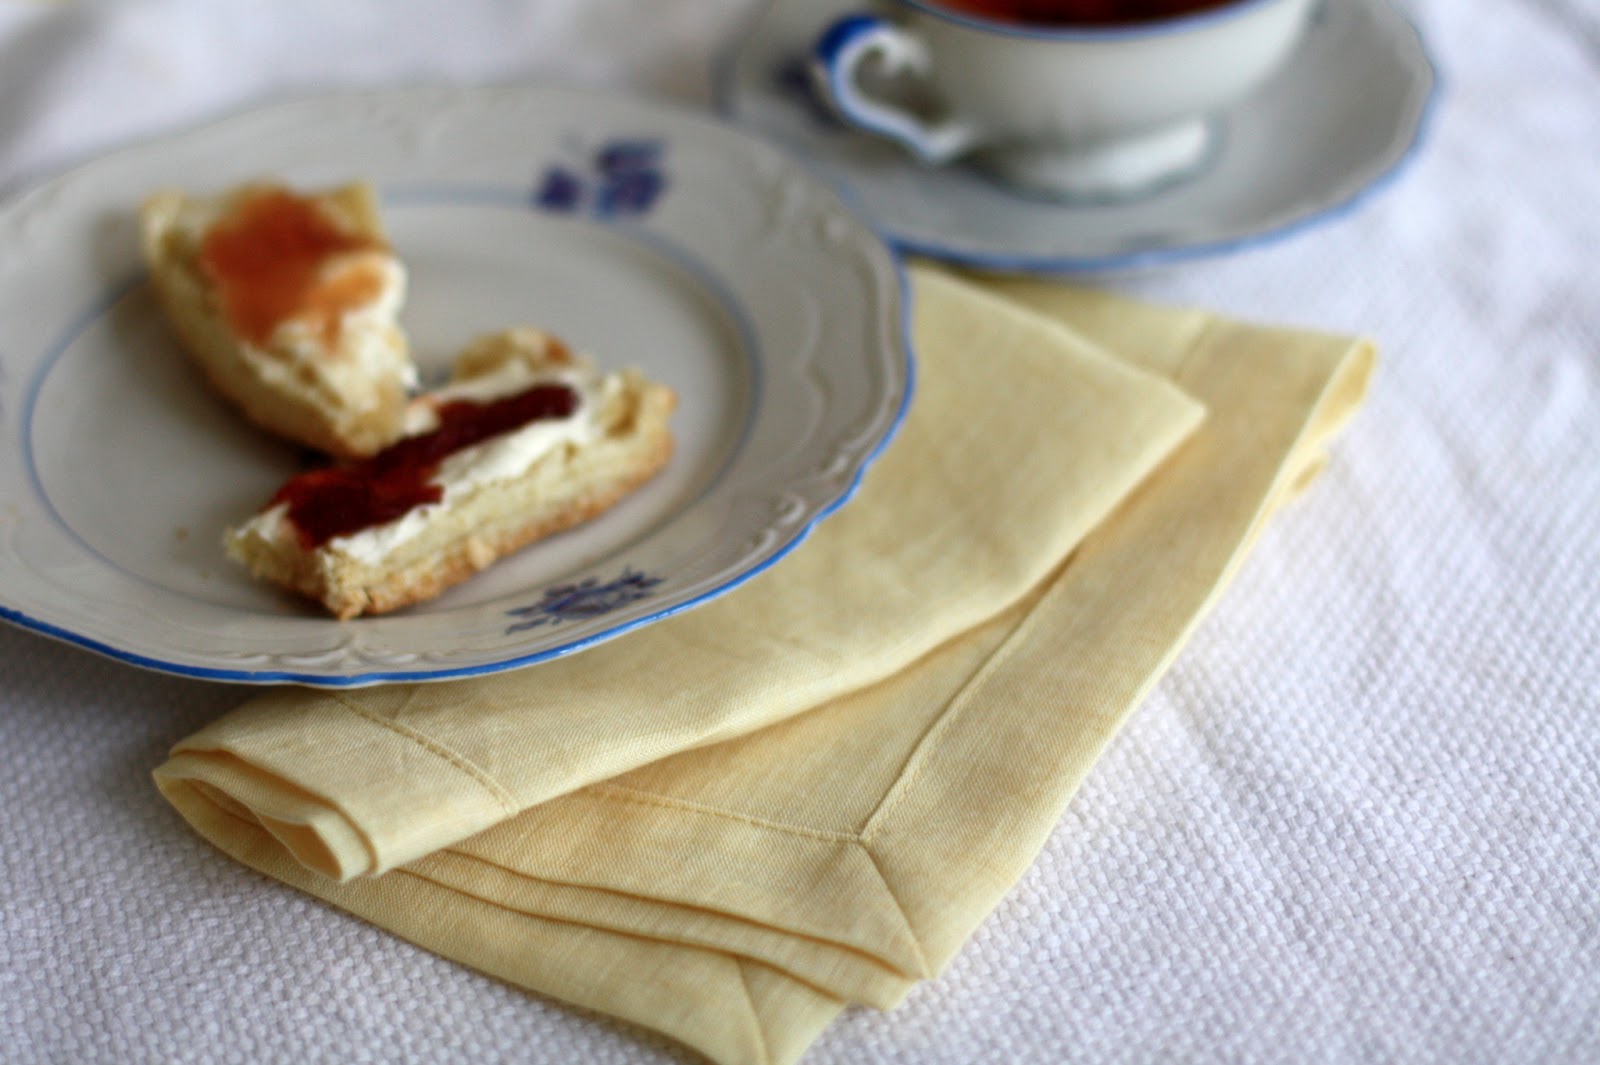
Voila! Beautiful and functional napkins, with a cute miter corner.
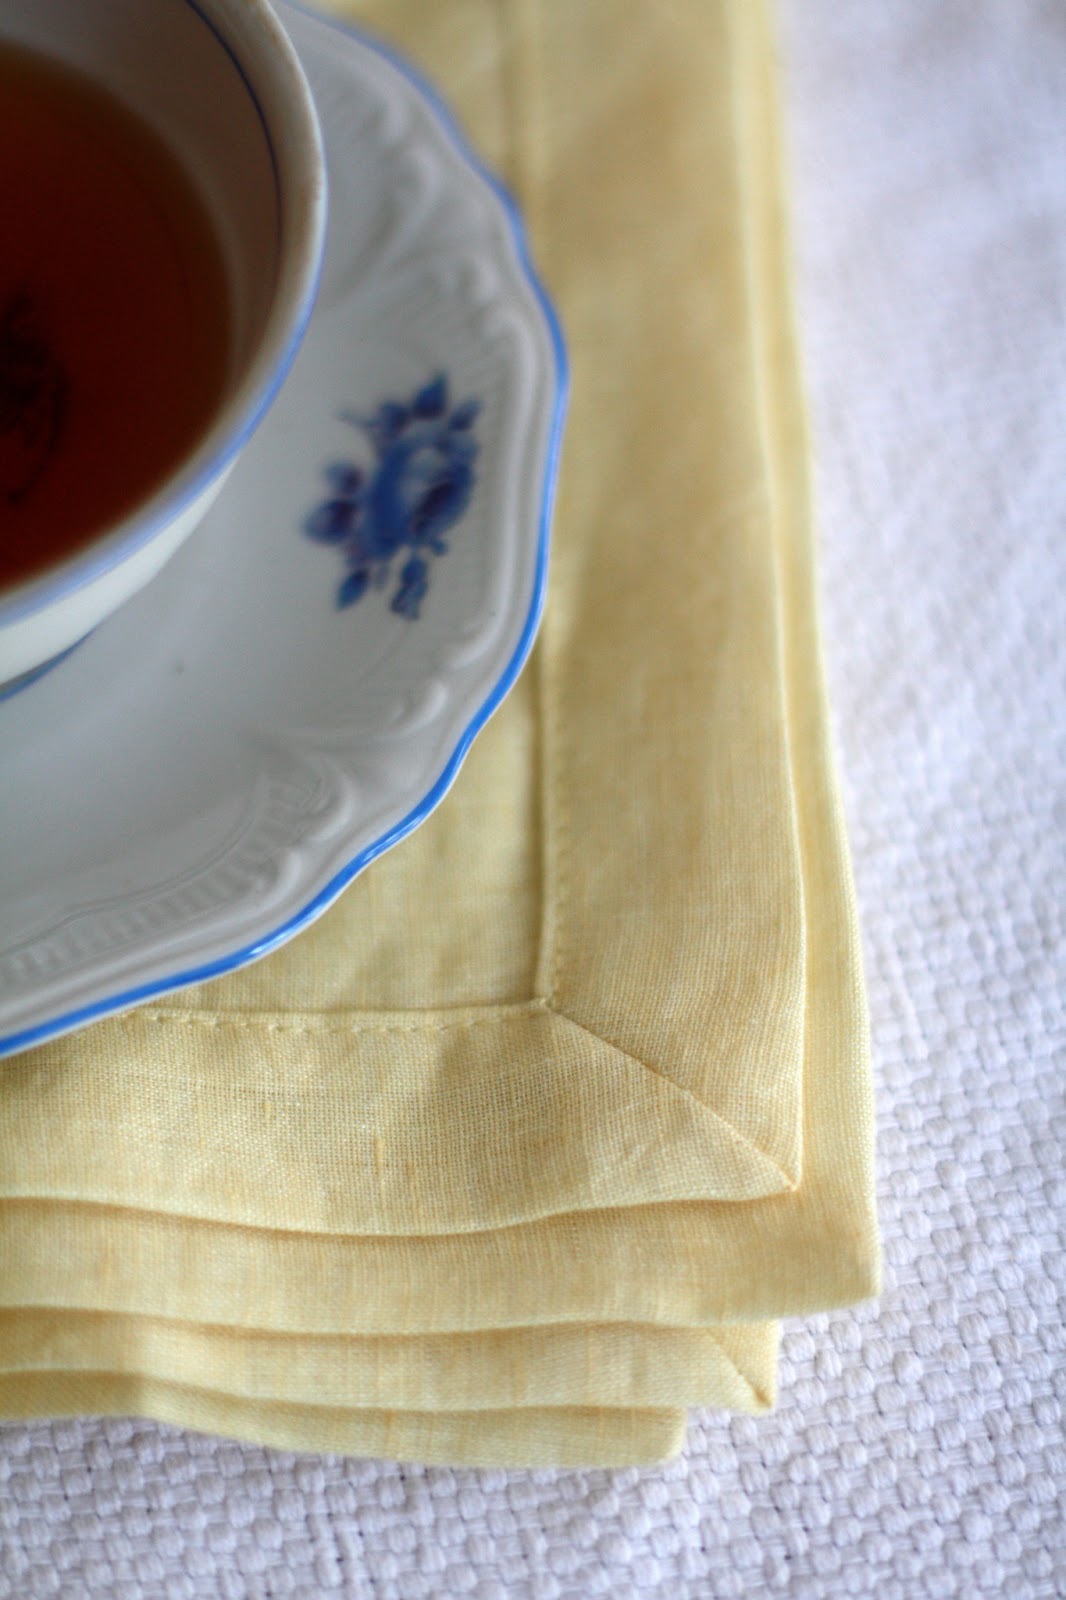
Formal miter-corner napkins
Next up, the formal miter-cornered napkin. Linen is usually the fabric of choice for formal table linens, so I went with this lovely pale wheat-colored fabric. For the size of square to cut, there are a couple of decisions to make: the size of your final napkin and the desired width of the edge hem. For my napkin, the final size is 15″ (luncheon size) and the edge width is 1″. So, add 15″ + 2″ + 1/2″ (for 1/4″ double hem on both sides) and the final length of each side should be 17 1/2″. Measure and cut carefully.
As with the casual napkin, start off by pressing 1/4″ around all four sides of the square. With linen, which has a more open weave, I found that spray starch is a necessity for keeping the fabric from distorting. Use liberally, following the directions, of course!
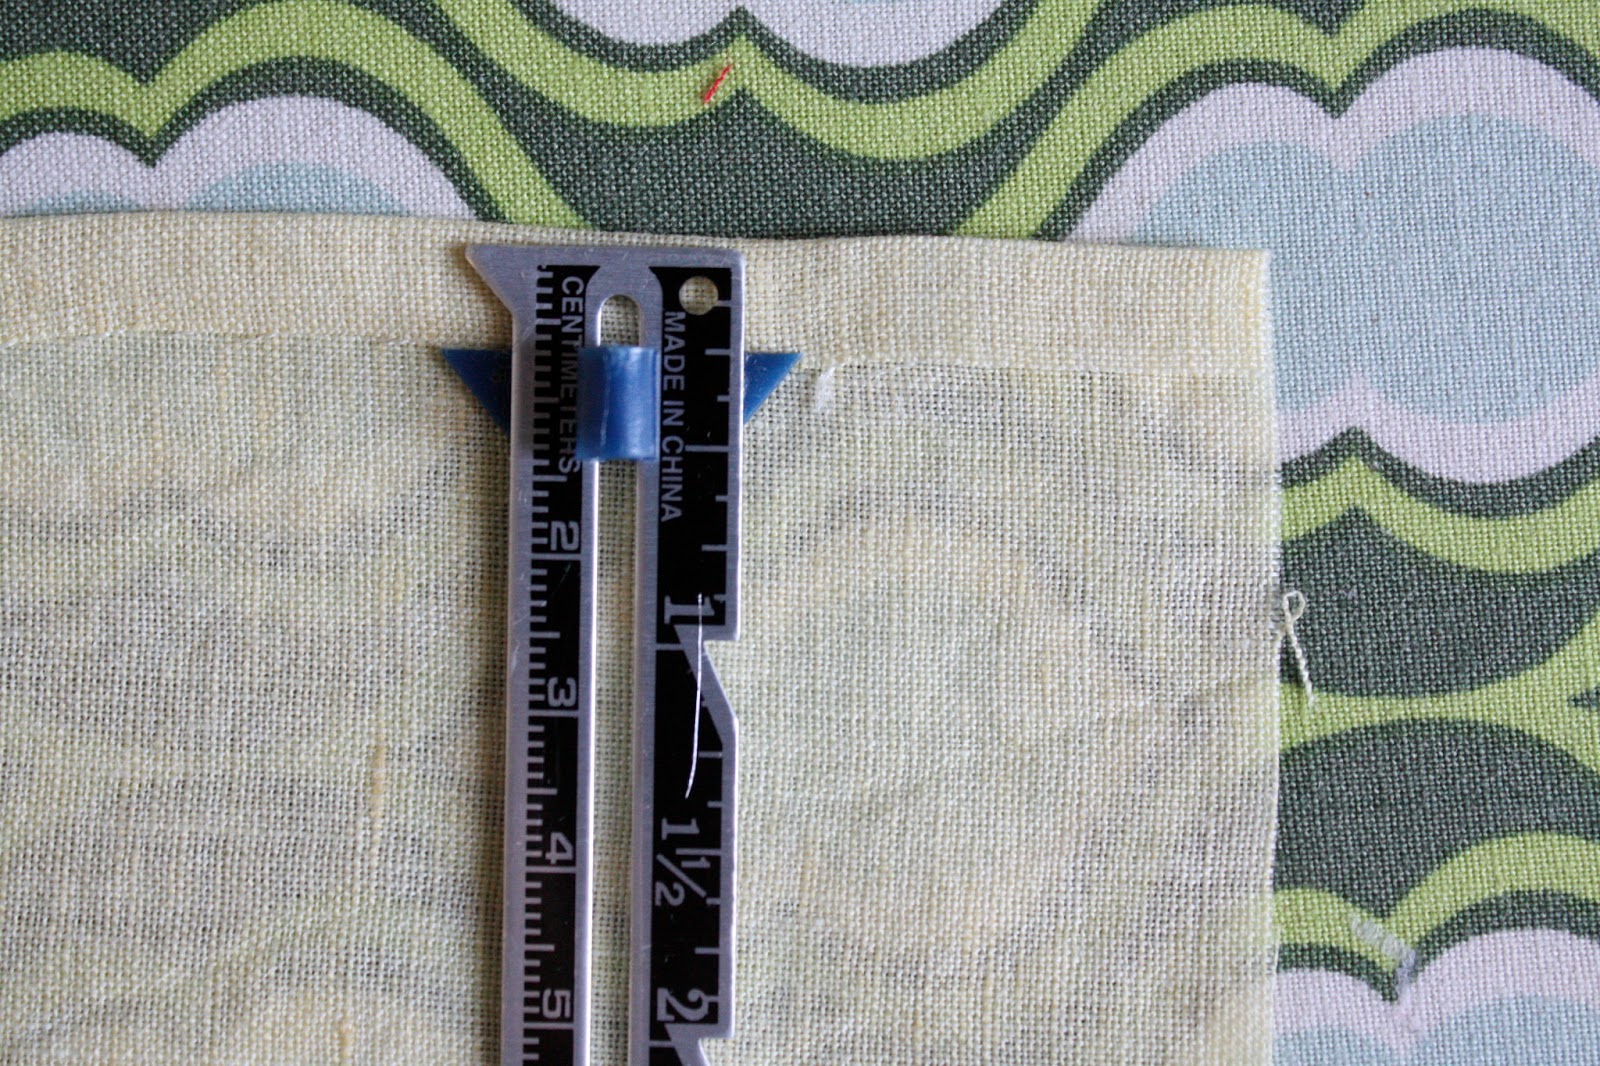
Then, fold and press the width of your edge hem around all sides (1″ here).

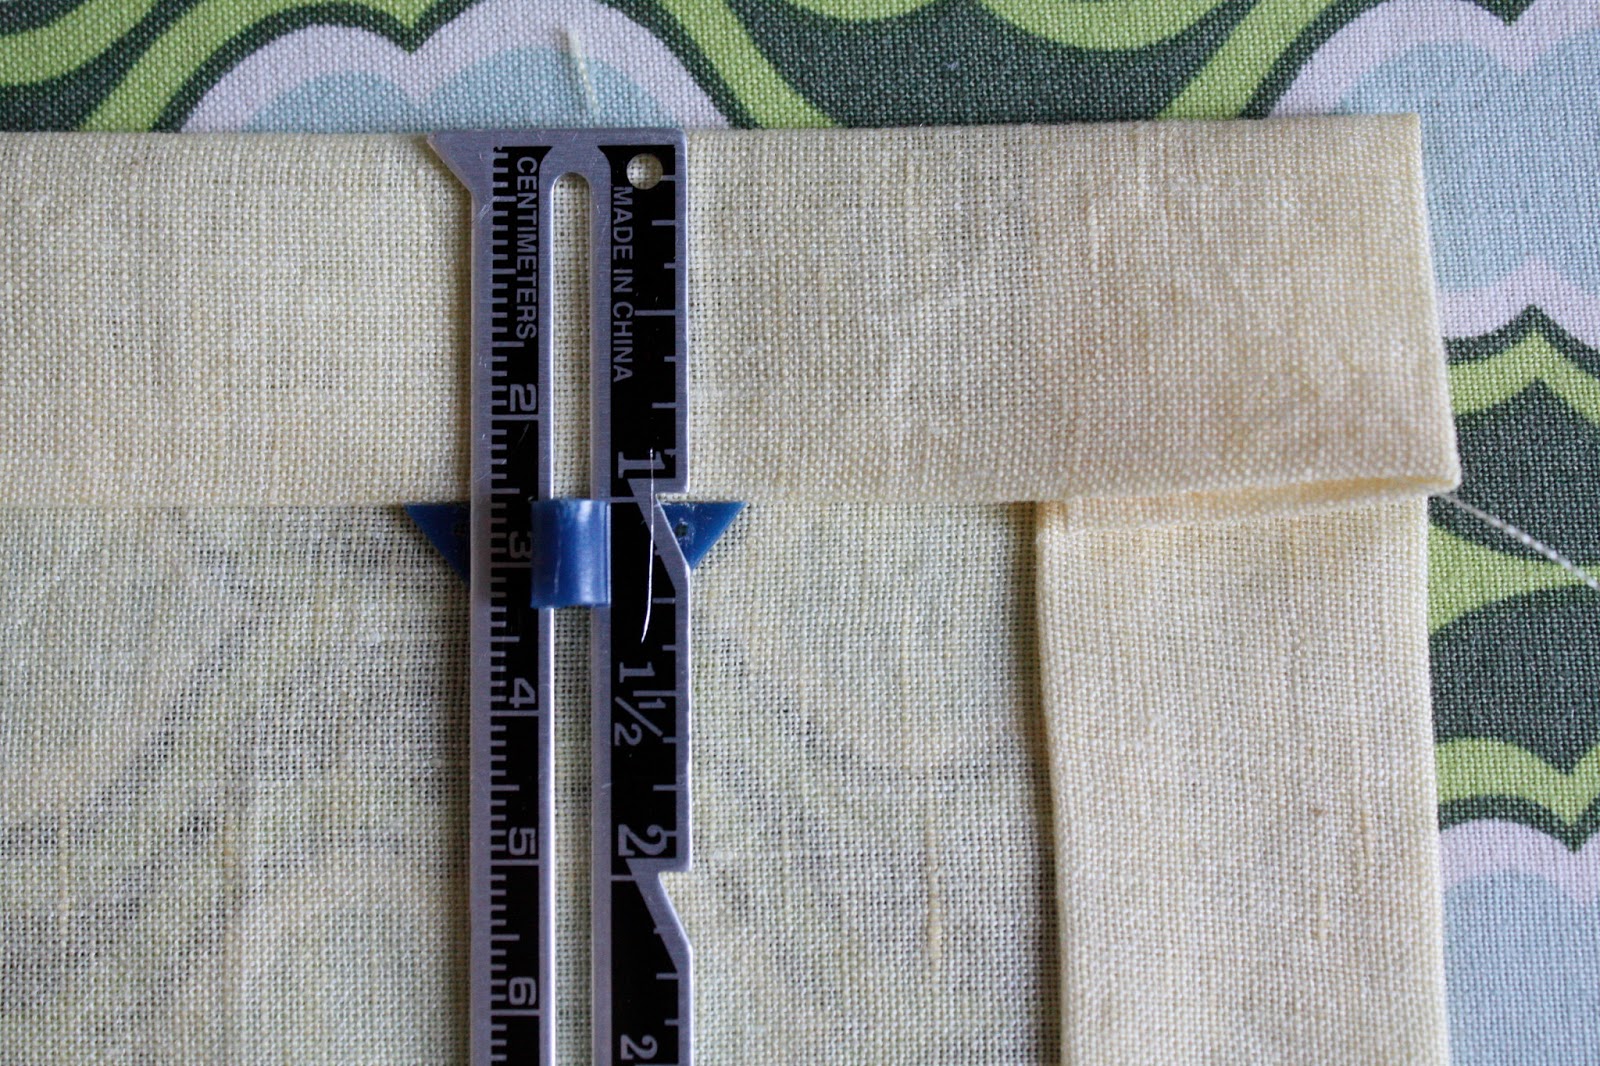
Open up the corner to reveal the fold lines. Do not unfold the 1/4″ crease line.
Next, fold the square in half, diagonally.
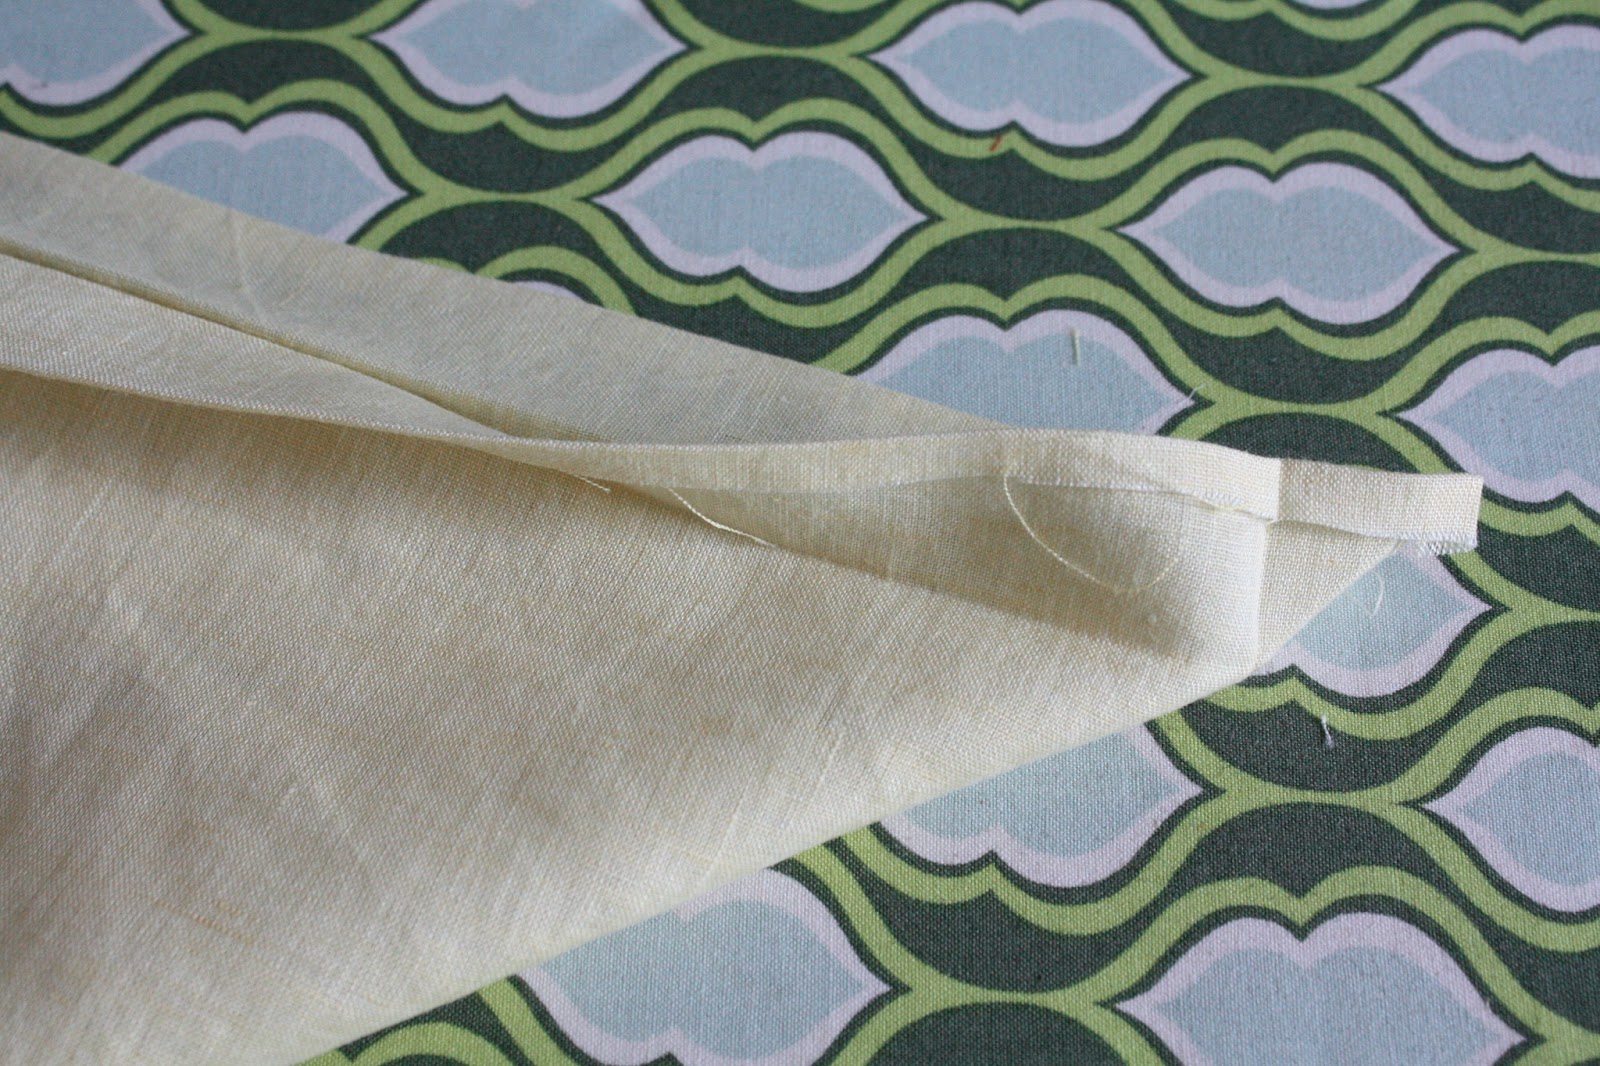
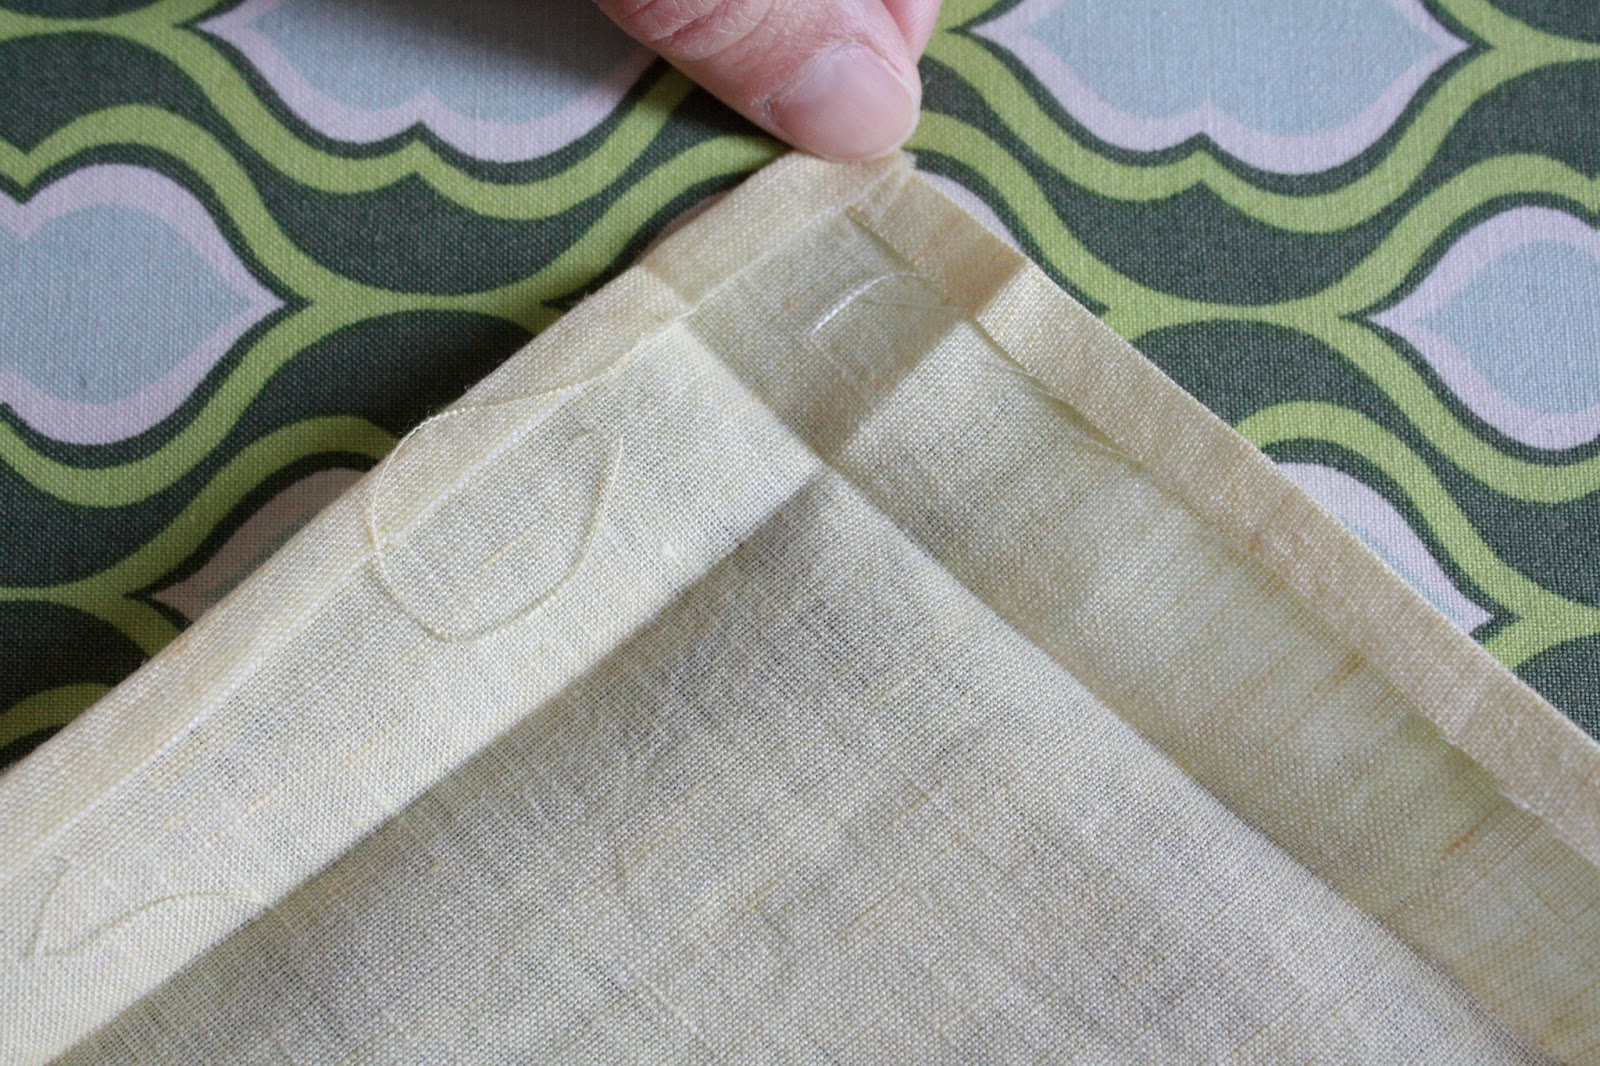
Match up the crease lines created from the second pressing and the edges of the napkin. Pin in place, if needed, but do not press.
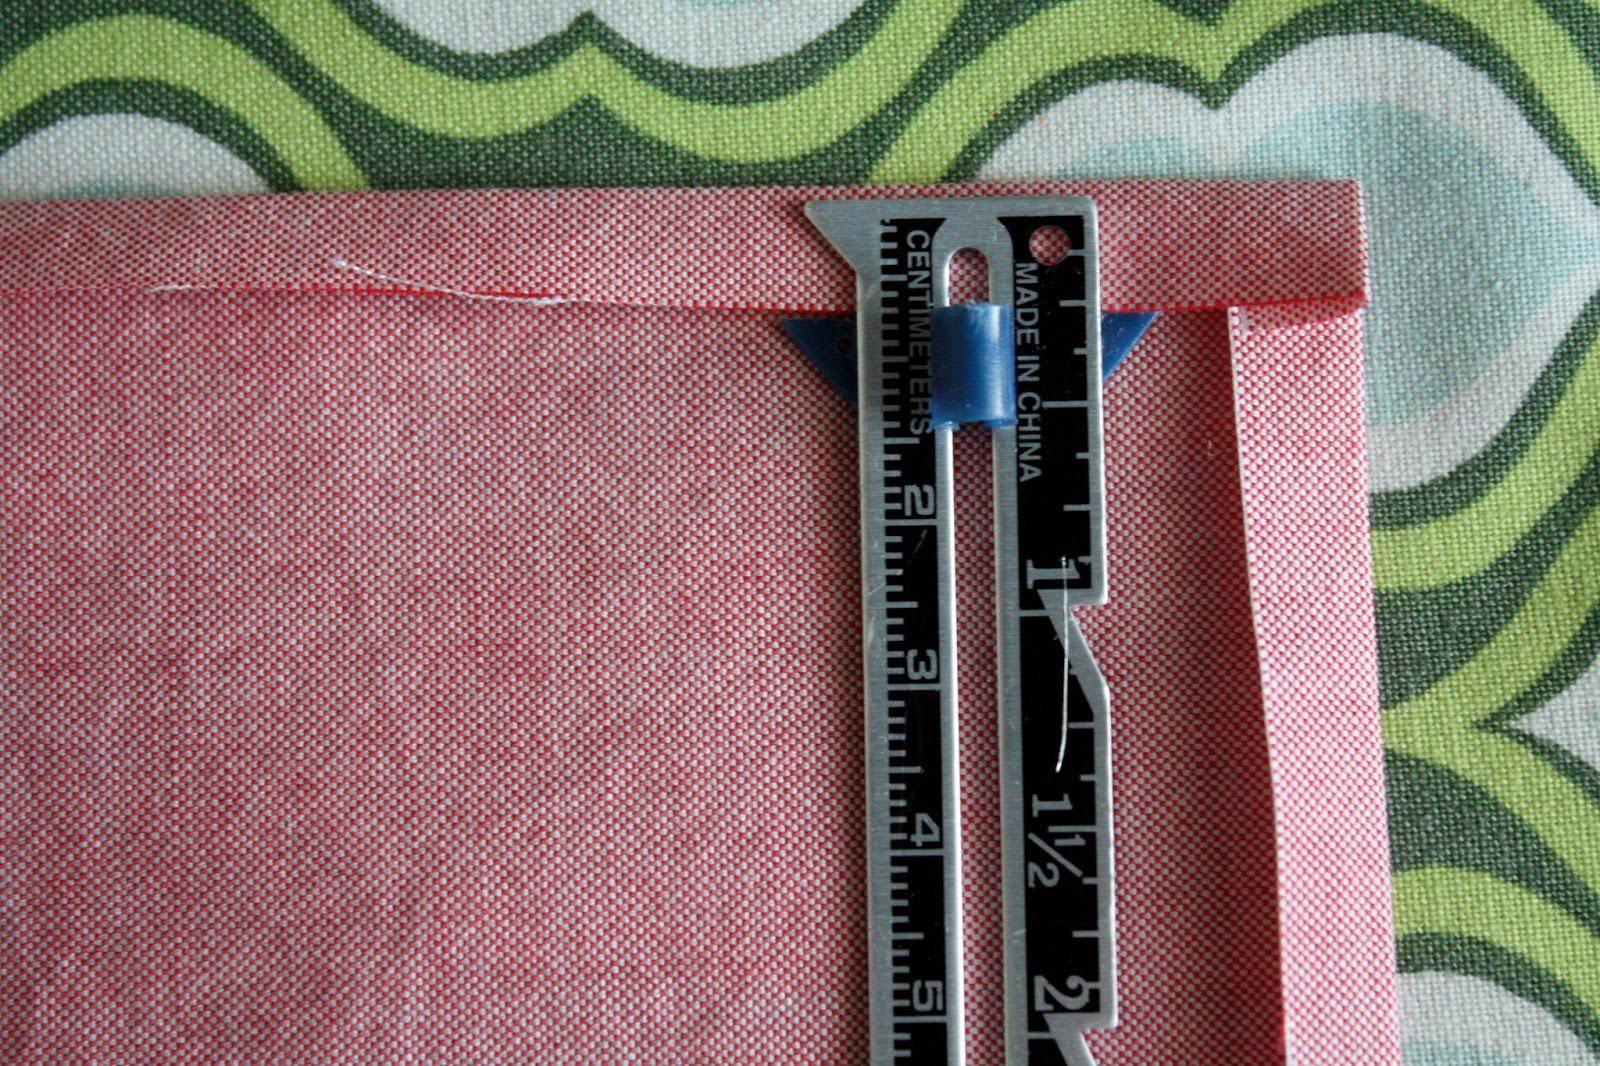
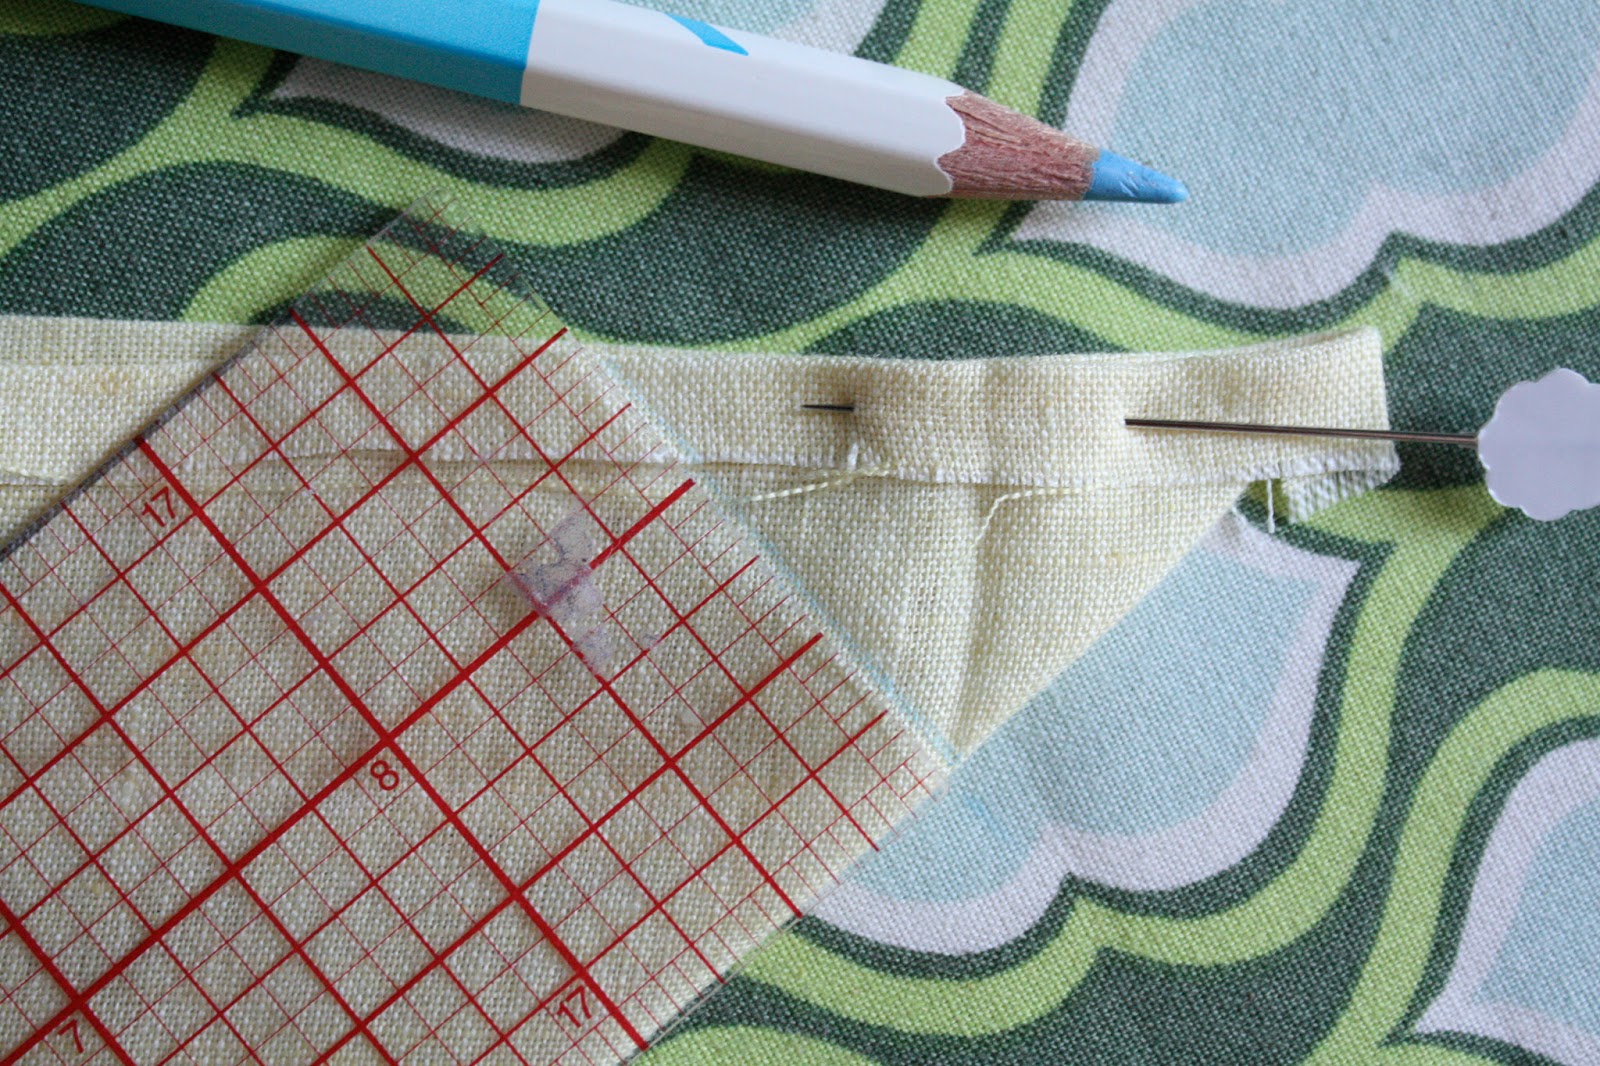
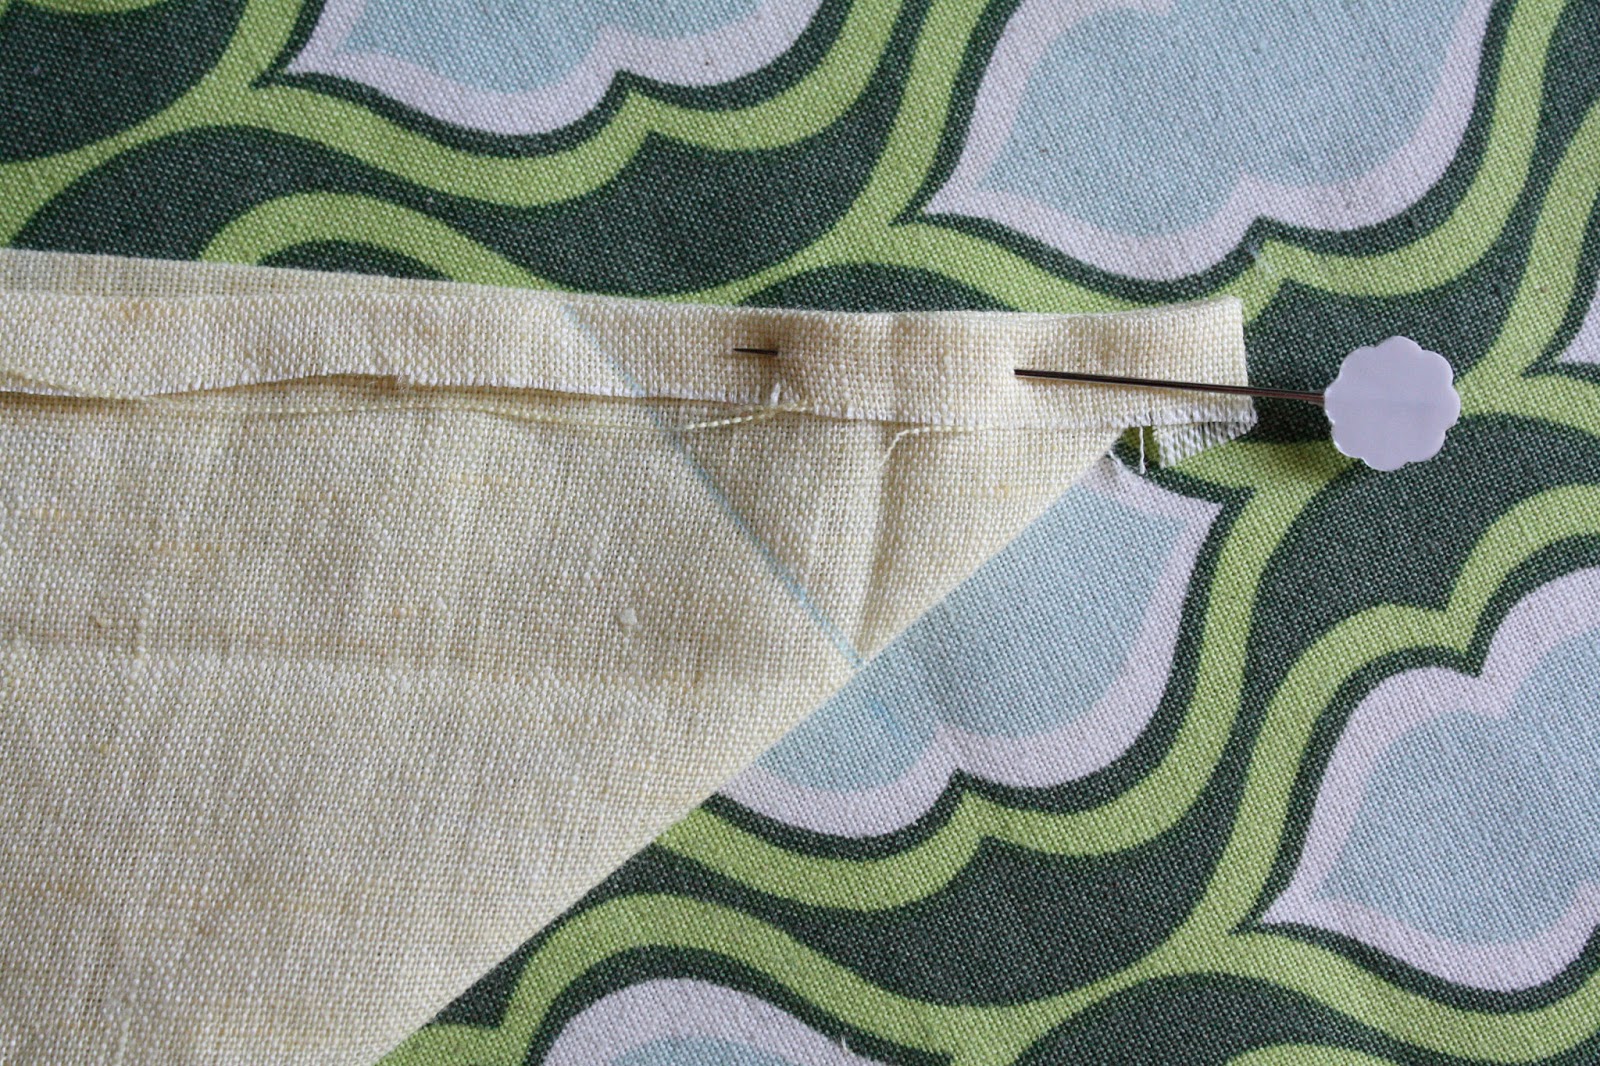
Line up the edge of your ruler and the edge of the diagonal fold, positioning the corner of the ruler at the intersection of the crease lines (see below).

Draw in the 45 degree diagonal line. This is your sewing line.
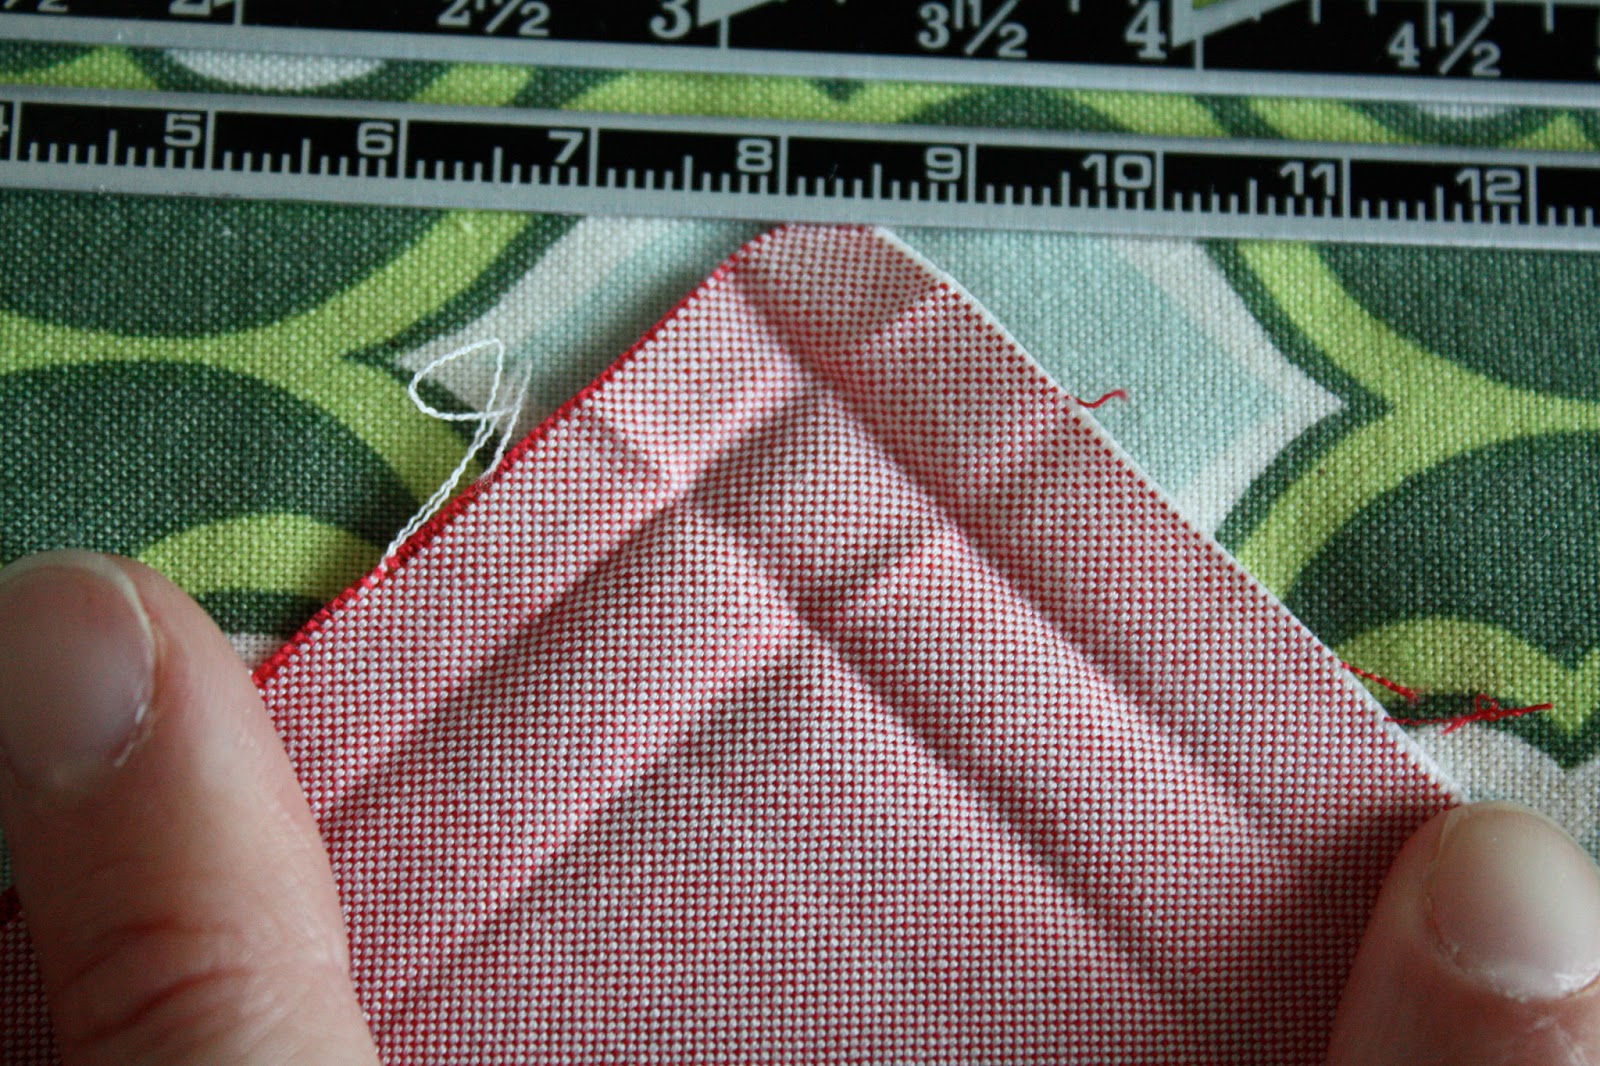
Sew along your marked line.

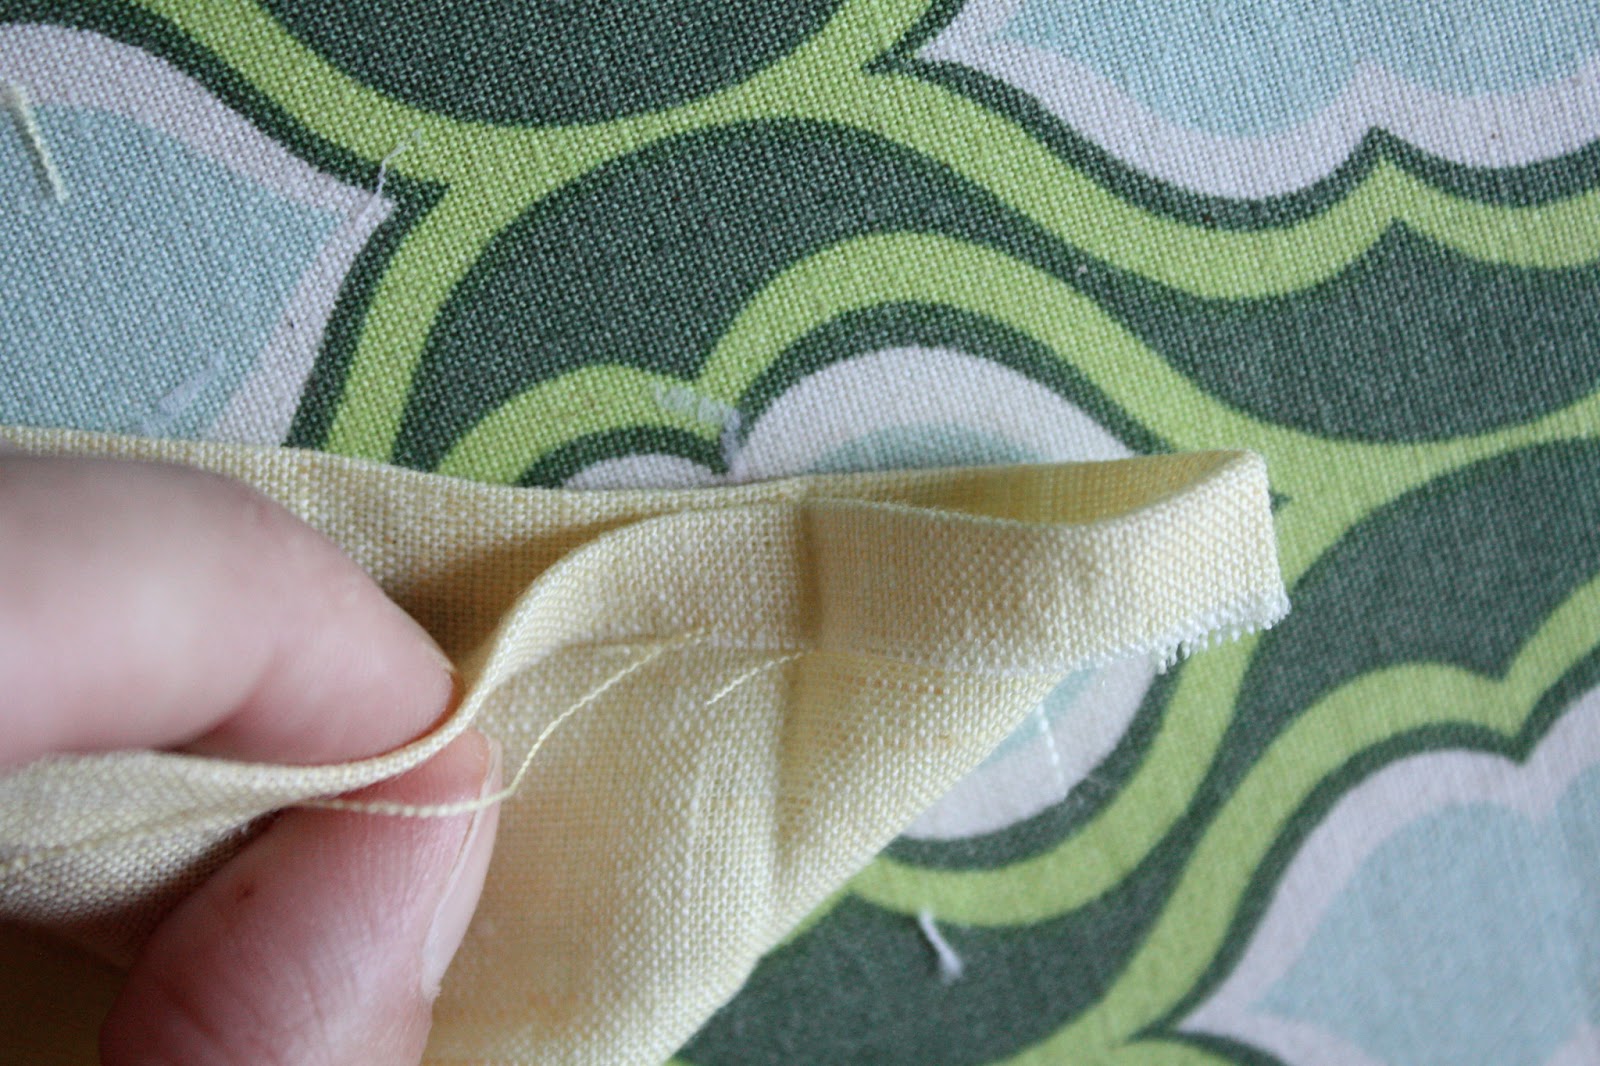
Trim the corner as shown below, which reduces the bulk right in the tip of the corner.

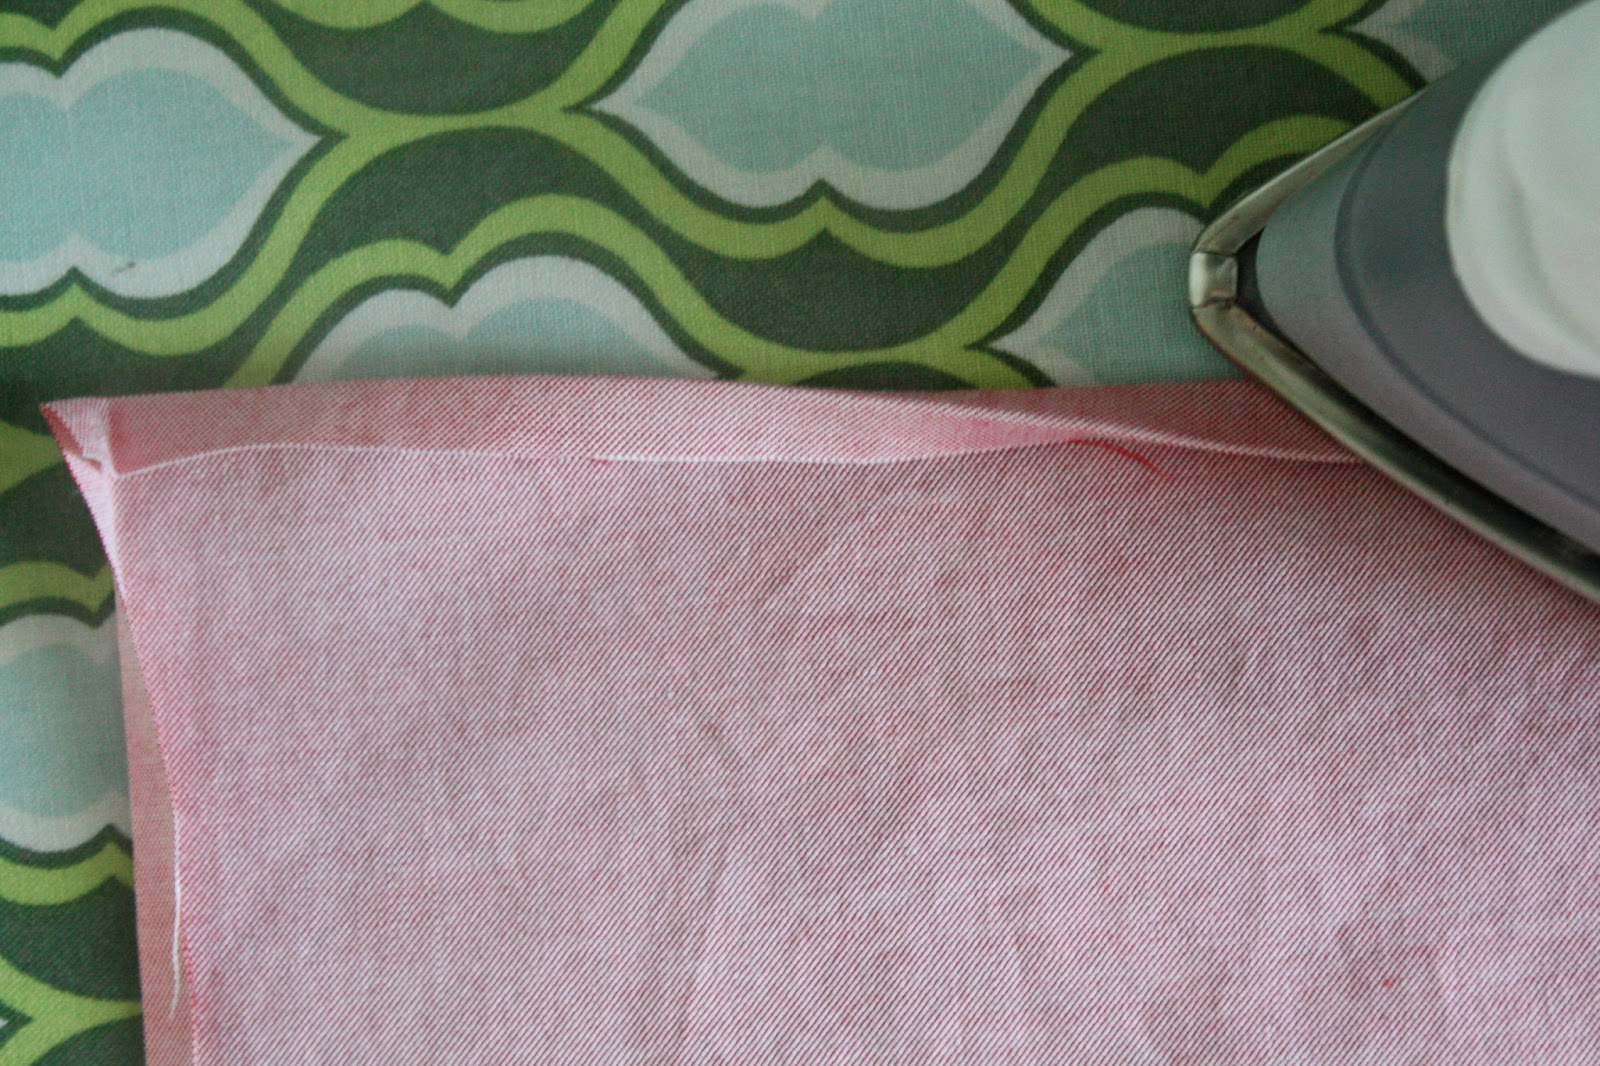
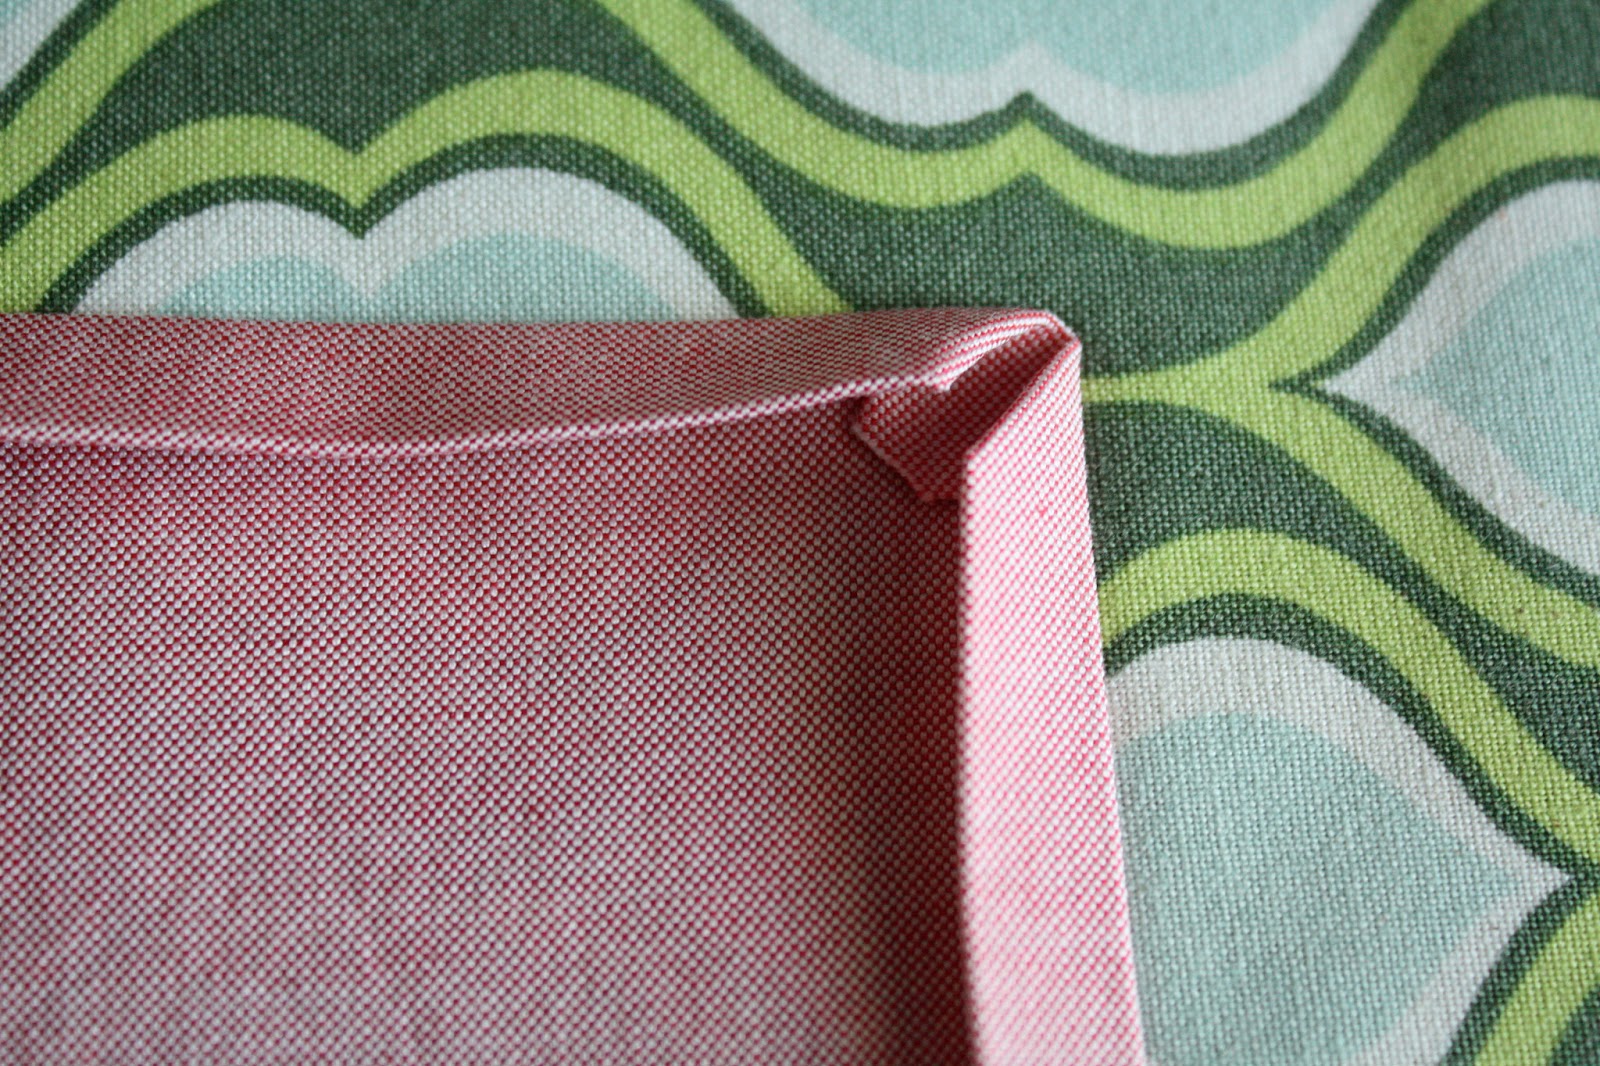
Turn right side out and use your point turner to make a nice sharp corner.
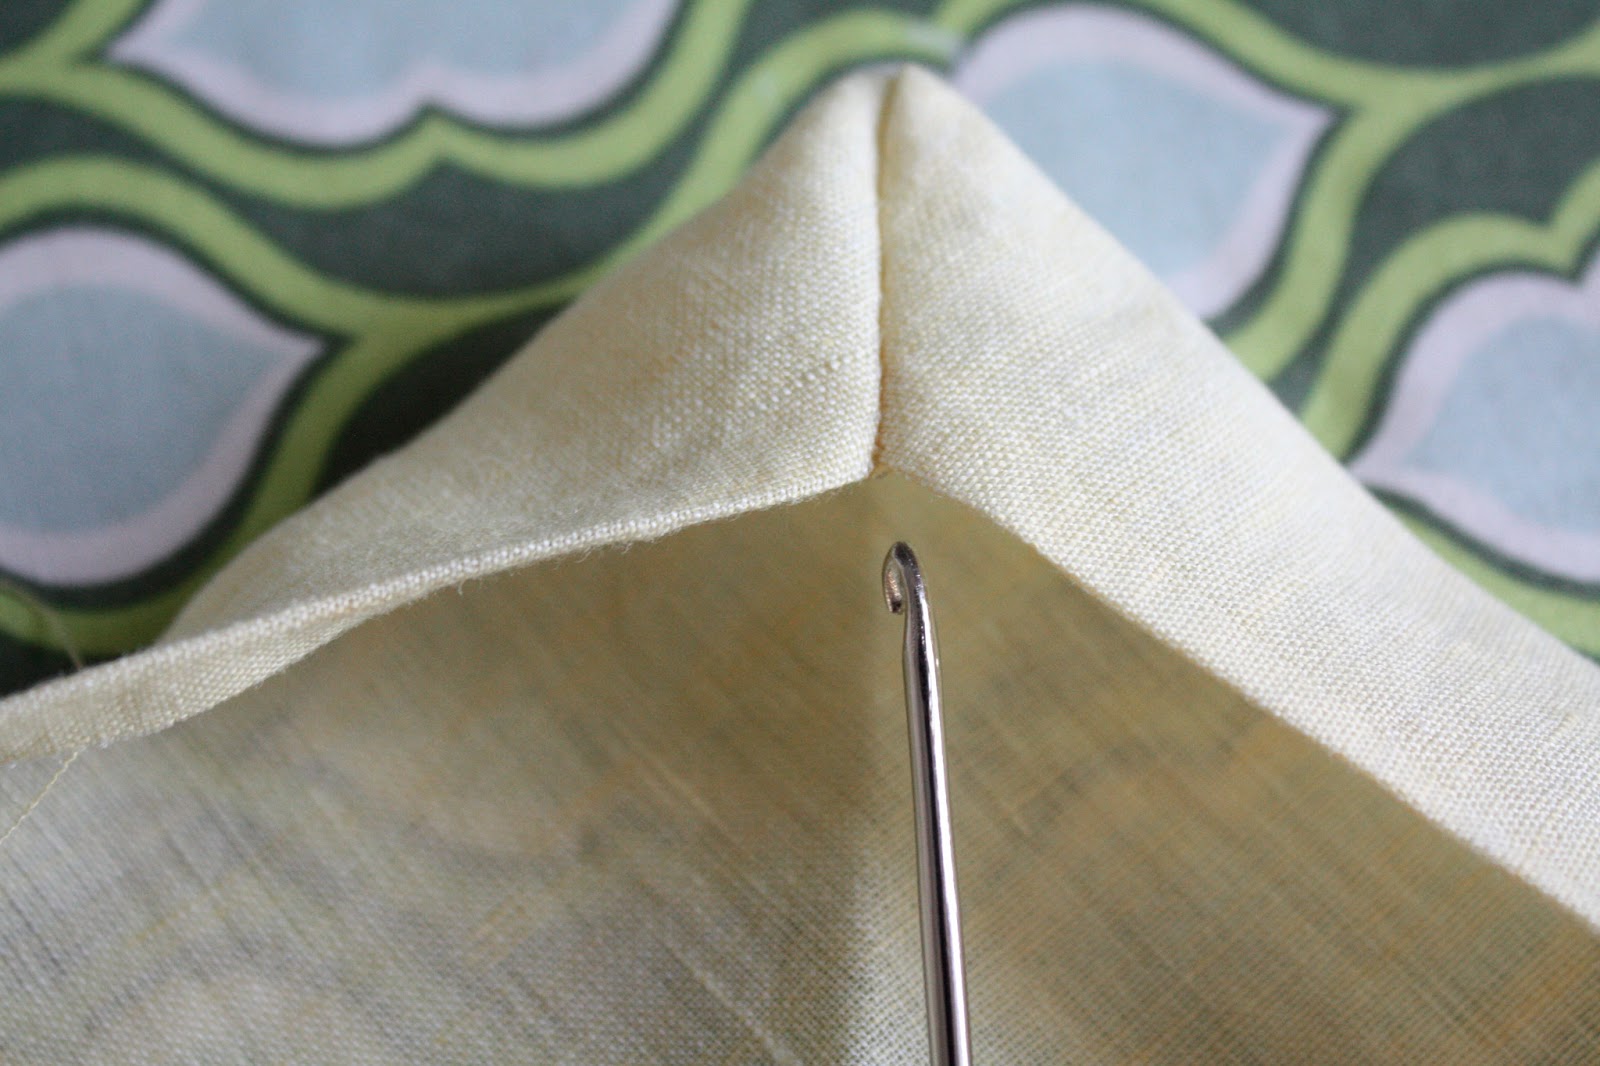
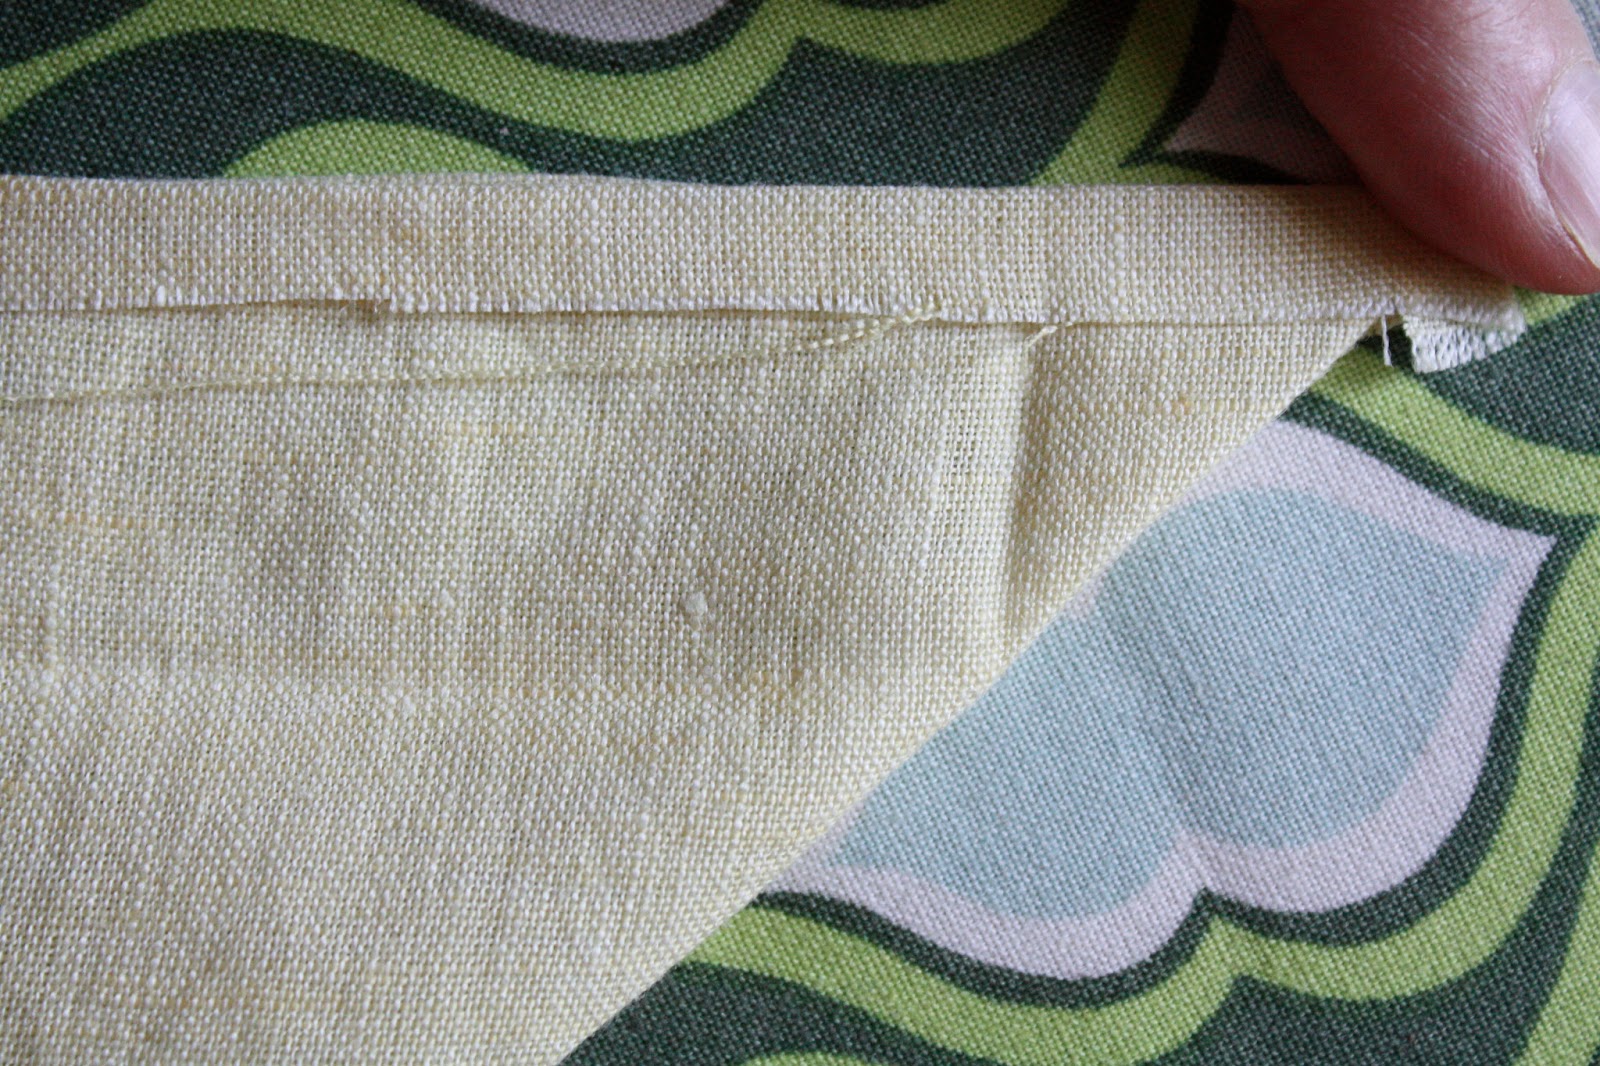
Open up the seam allowance inside the corner to press. This will help the corner lie very flat.
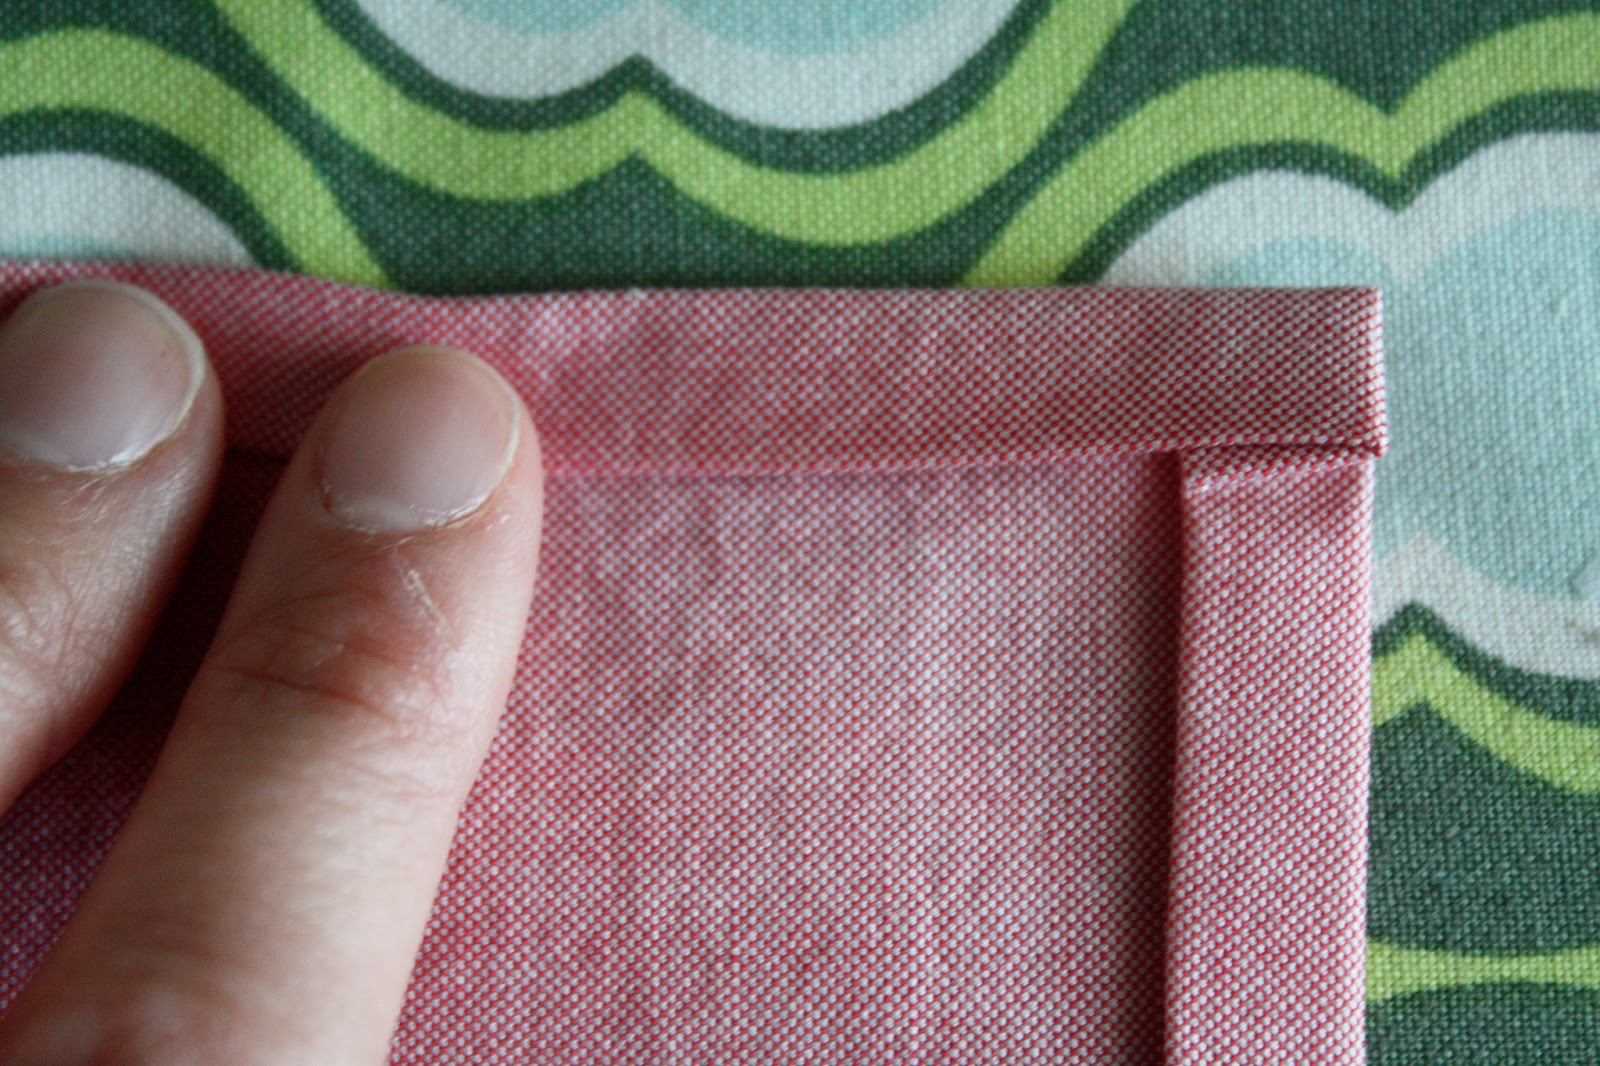
Repeat for the other three corners! Then, topstitch close to the edge, pivoting in the ditch at the corners.

So pretty! I hope my grandkids appreciate these 🙂
Much thanks to Britex Fabrics for supplying the lovely cotton and linen fabrics!

What a beautiful tutorial! Can't wait to try it!
LikeLike
Thank you! Best of luck and let me know if you have any questions!
LikeLike
This is fantastic! I've been meaning to make some new table linens…I love our cloth napkins but we are wearing out the current set. I have made some with the first method of mitered corners but not the second. I love it!
LikeLike
Thanks — I'm making formal ones and you've told me exactly what I need to know!
LikeLike
I am making 50 napkins in 3 different colours for my daughter`s wedding in 2 weeks time. Could not remember how to do mitre corners – so your tutorial is most opportune! Professional textiles manufacturing friend cut them for me using a heavy card template which was a big help too. Now I have to work out how to handsew a tiny lace fern leaf on each side to complete the look for my New Zealand born bride!
LikeLike
Thank you soo much for sharing!
LikeLike
I did a “trial” napkin with 3/4″ hem. All went well until I turned it – the hem didn't lie flat because 3 sides were a bit (not much but just enough) bigger.
LikeLike
Thank you. I knew it could be done, but wasn't sure how!
LikeLike
Thanks for this post and pictures. This was such as easy way to sew. I made the formal mitered napkins out of soft linen, and those that I measured correctly turned out perfectly.
LikeLike
Thank you for this instruction. I just made one of these and found your process very effective and easy to follow. The results were so satisfying; I'll be making more tomorrow.
LikeLike
I can't thank you enough for the clear directions and photos. The detail on the linen napkins is beautiful. While I appreciate that many people are taking the time to post directions for various techniques, it's unusual and refreshing to find this skill level. Again, thanks! Cannot wait to try the “linen” mitered corned on a table runner.
LikeLike
Thank hou so much for this beautiful tutorial. Best regards.
LikeLike
I made a linen towel today. Came out perfect. Thank you.
LikeLike
What is the advantage of dadoes and wedges vs. just screwing the fences to the board? I guess you can then take a narrow piece, put it *in* the dado and wedge it firm, while wider pieces are easy enough to hold by hand best sliding compound miter saw
LikeLike
it is a nice post.
google.com
LikeLike
I am going to go check out their blog for sure!Fabulous tutorial!! And the project piece is so beautiful. Perfect for the task at hand. Thanks Nicole!!
ebel
LikeLike
This is a great tutorial. So glad your mom told me about your blog!!
Betsey
LikeLike
huh, interesting to see the angle differences ( I now see what you're talking about) Funny thing is that the board in the video from your last post he has it the opposite way. Searching my knowledge banks for a rationale. best compound miter saw
LikeLike
Thank you. I knew it could be done, but wasn't sure how!
Visit my website : click here
LikeLike
Thanks for sharing your tips. Your napkins look simple and cute. You are so dextrous to do that. It will be my next project.
LikeLike
What a wonderful tutorial! I have been wanting to learn this technique and have been afraid to try. Thanks for the inspiration!
happy thanksgiving, Nicole.
LikeLike
Love this tutorial – made several “luncheon size” napkins out of colorful linens…great for messy kids! Thank you!!
LikeLike
WOW Nicol , I think you are Clever , thank For this Topic . i love this.
PS: You can Go my home Here : plate joiner
LikeLike
Thank you so much for this tutorial. Best regards. Shared to my friend.
LikeLike
Very specific and detailed. That great help for amateurs like me
LikeLike
This is a great guide. I am learning sewing, so this post really help.
Thank for share
LikeLike
I have used this tutorial twice now. Love it so much. Thank you!
LikeLike
Thank you for that very detailed tutorial! My wife makes some of these and we use it for special occasions and if we have guests around!
LikeLike
Thank you, very clear and easy to follow! My napkins turned out beautiful!
LikeLike
My wife was looking for some napkin ideas, I think this might just be what she is looking for.
Thanks!
LikeLike
To be honest, it has never occured to me, that you could use cloth napkins, d'oh! Neat stitchwork too! I wonder if you could up things a notch with some custom embroidery or if that would be too much for napkins. In any case, good job 🙂 Love, Adriana
LikeLike